Enhance your digital footprint by integrating your current domain with your Surplus Systems website. The Surplus Systems Domain Connect feature streamlines the process of connecting your distinctive domain to your site, ensuring your brand showcases a notable and polished web presence.
The Surplus Systems Domain Connect feature simplifies the process of migrating your custom domain, whether new or existing, to your Surplus Systems site. It provides easy integration with top domain registrars such as Google Domains, GoDaddy, and Cloud flare, doing away with complicated manual DNS adjustments and guaranteeing a smoother and more accurate configuration.
Easy Integration: Experience hassle-free linking with top domain providers for a swift and effective setup.
Automatic DNS Setup: Avoid the complexity of manual DNS configurations. Domain Connect automates your settings for a seamless and error-free linkage.
Superior Security: Take advantage of advanced security protocols from the foremost domain infrastructures, providing a safe connection to your Surplus systems site.
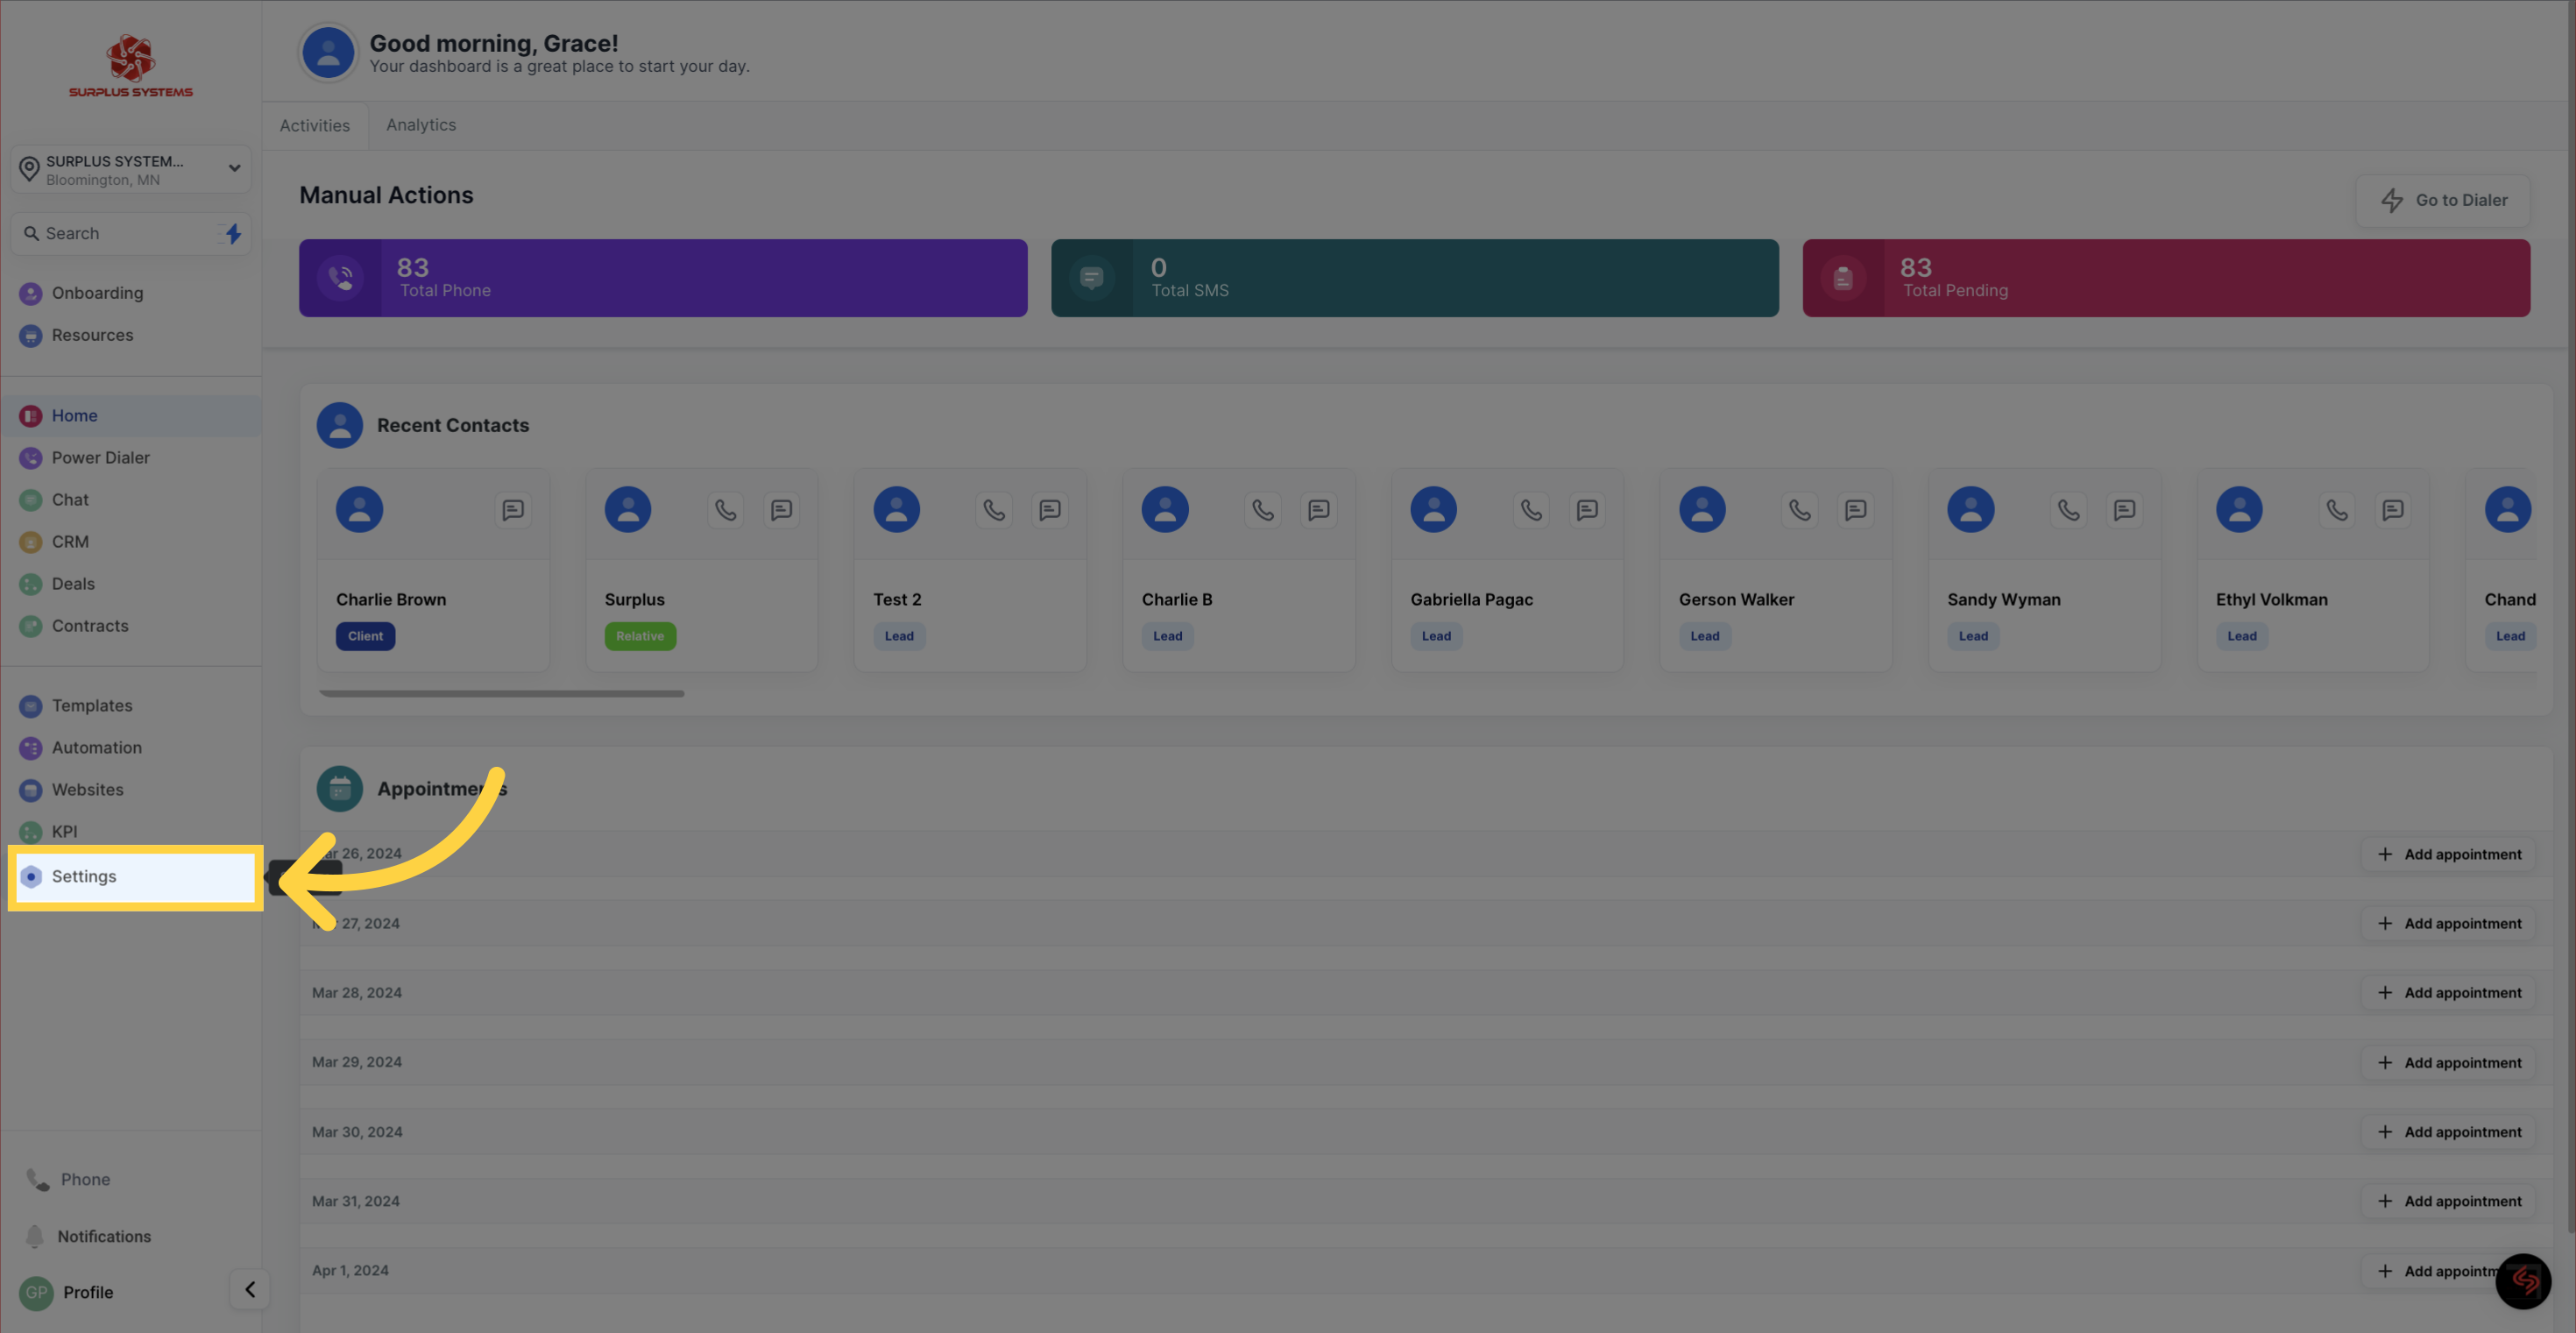
Begin by navigating to the Settings on your Surplus systems dashboard, locate the Domains section, and select 'Add a Domain
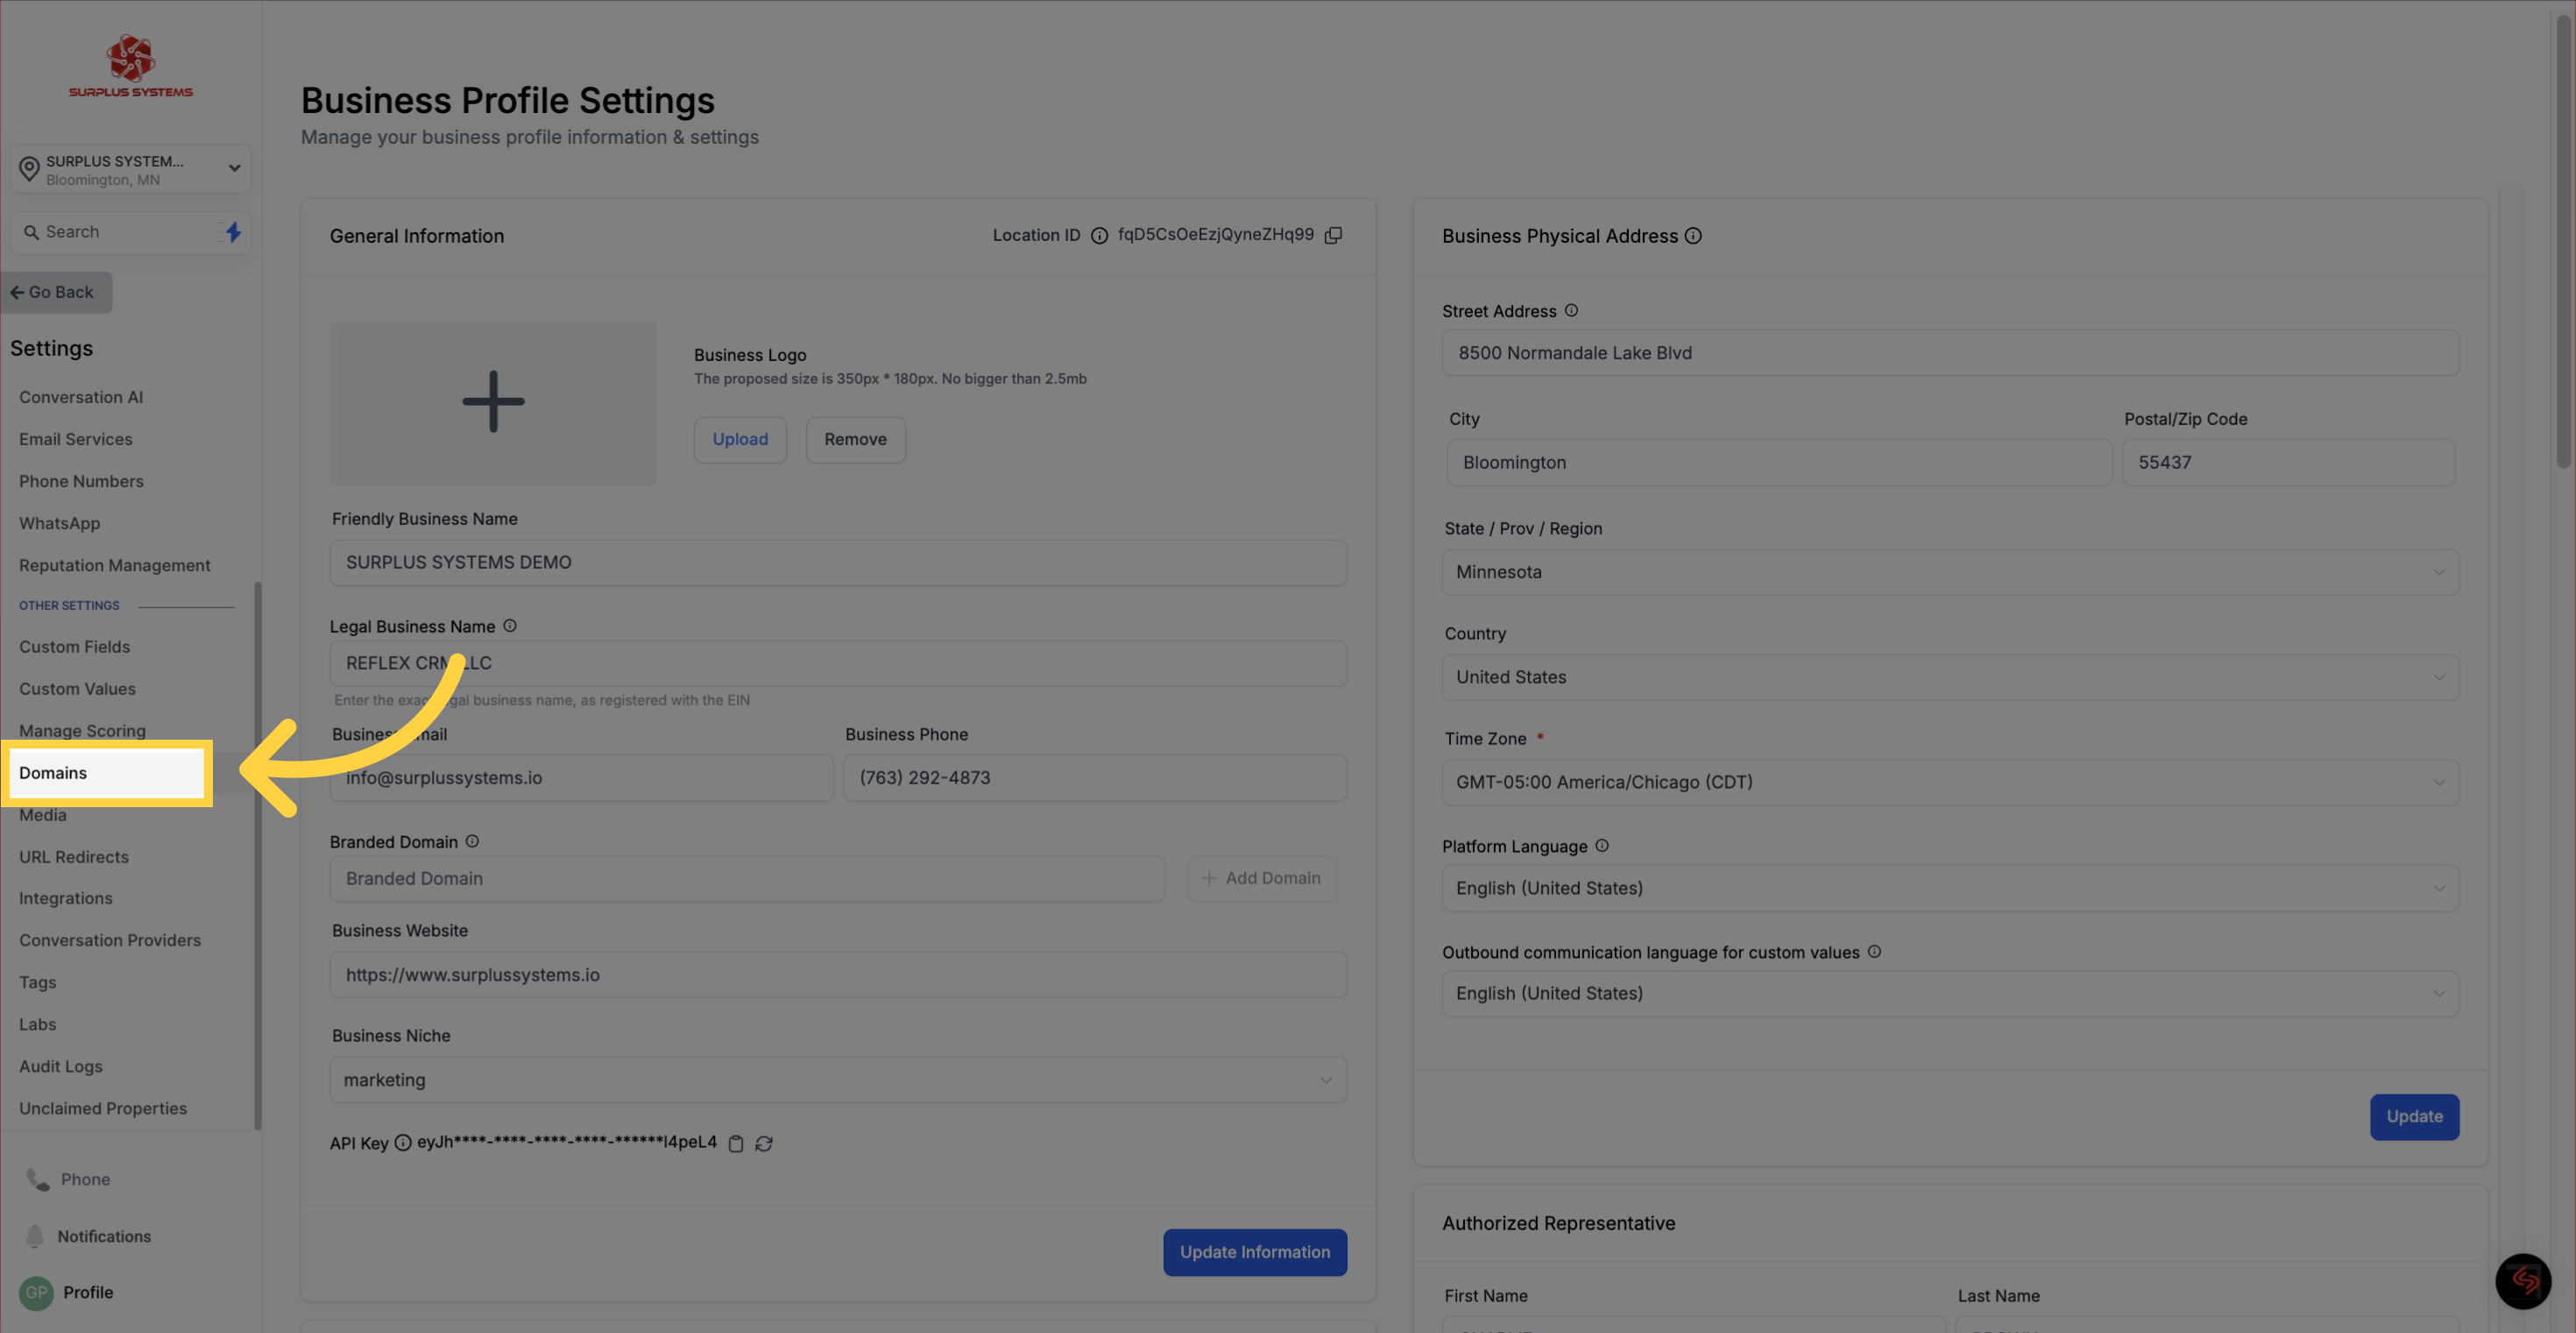
Navigate to the Domains section.
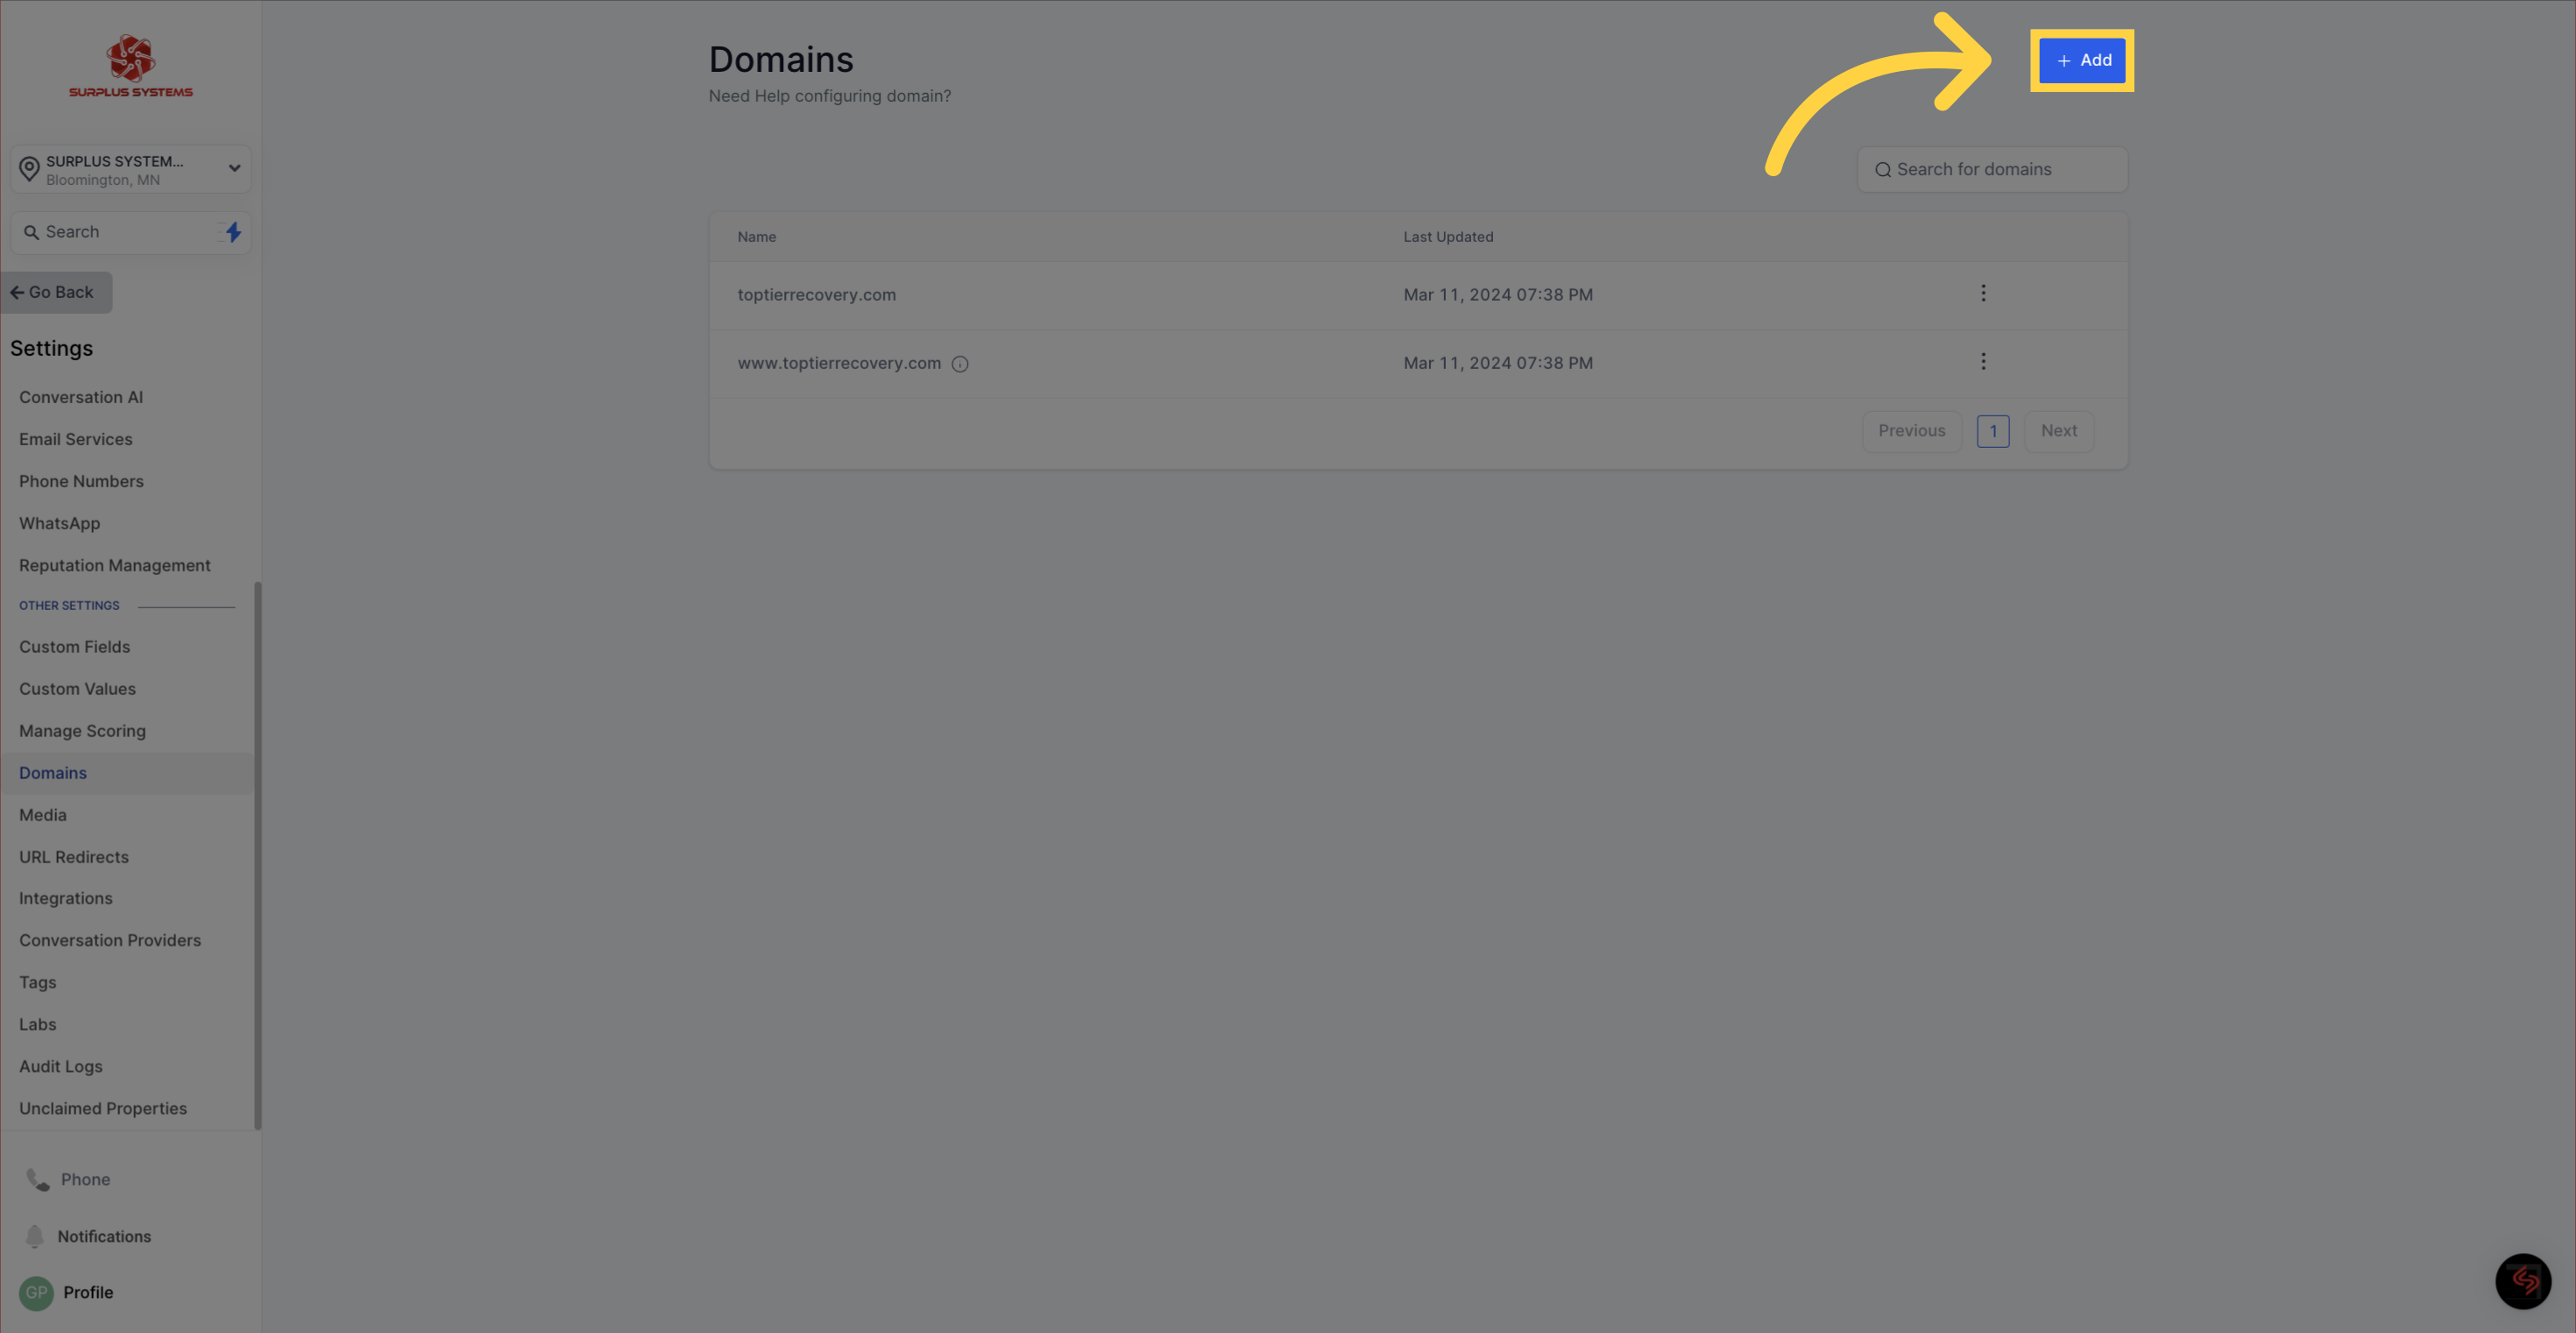
Initiate the domain addition process.
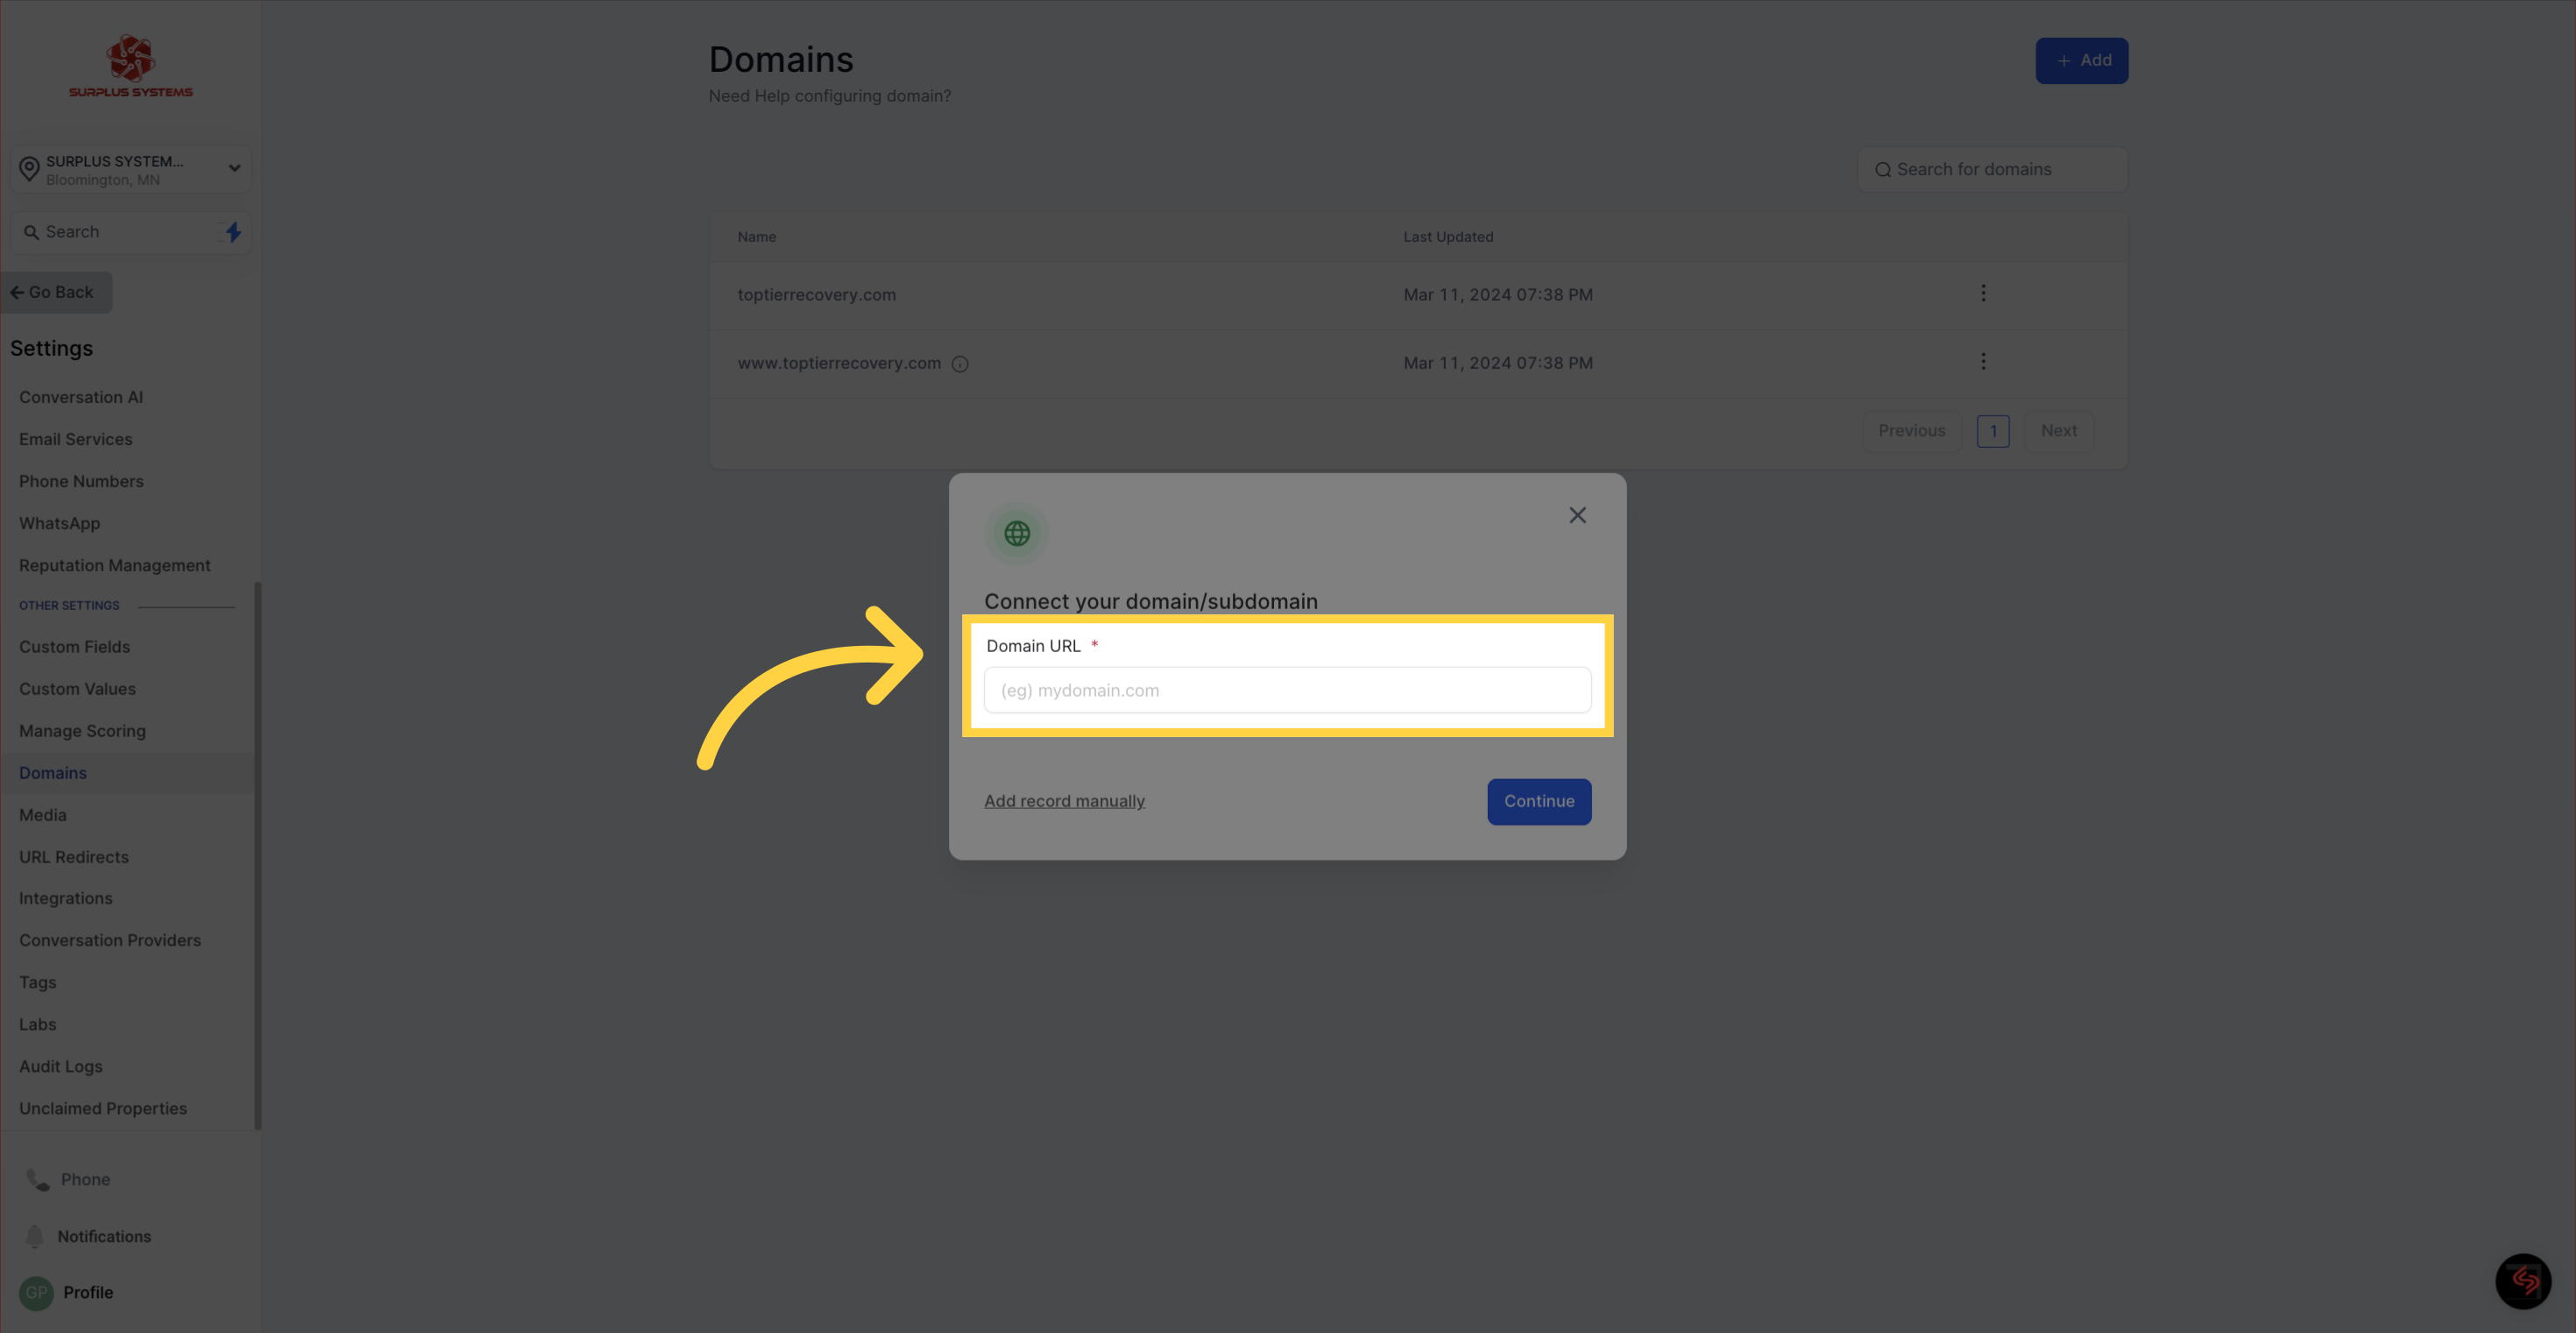
Enter the domain name you wish to connect. Be sure to incorporate the root domain when connecting a “www” subdomain to ensure comprehensive coverage.
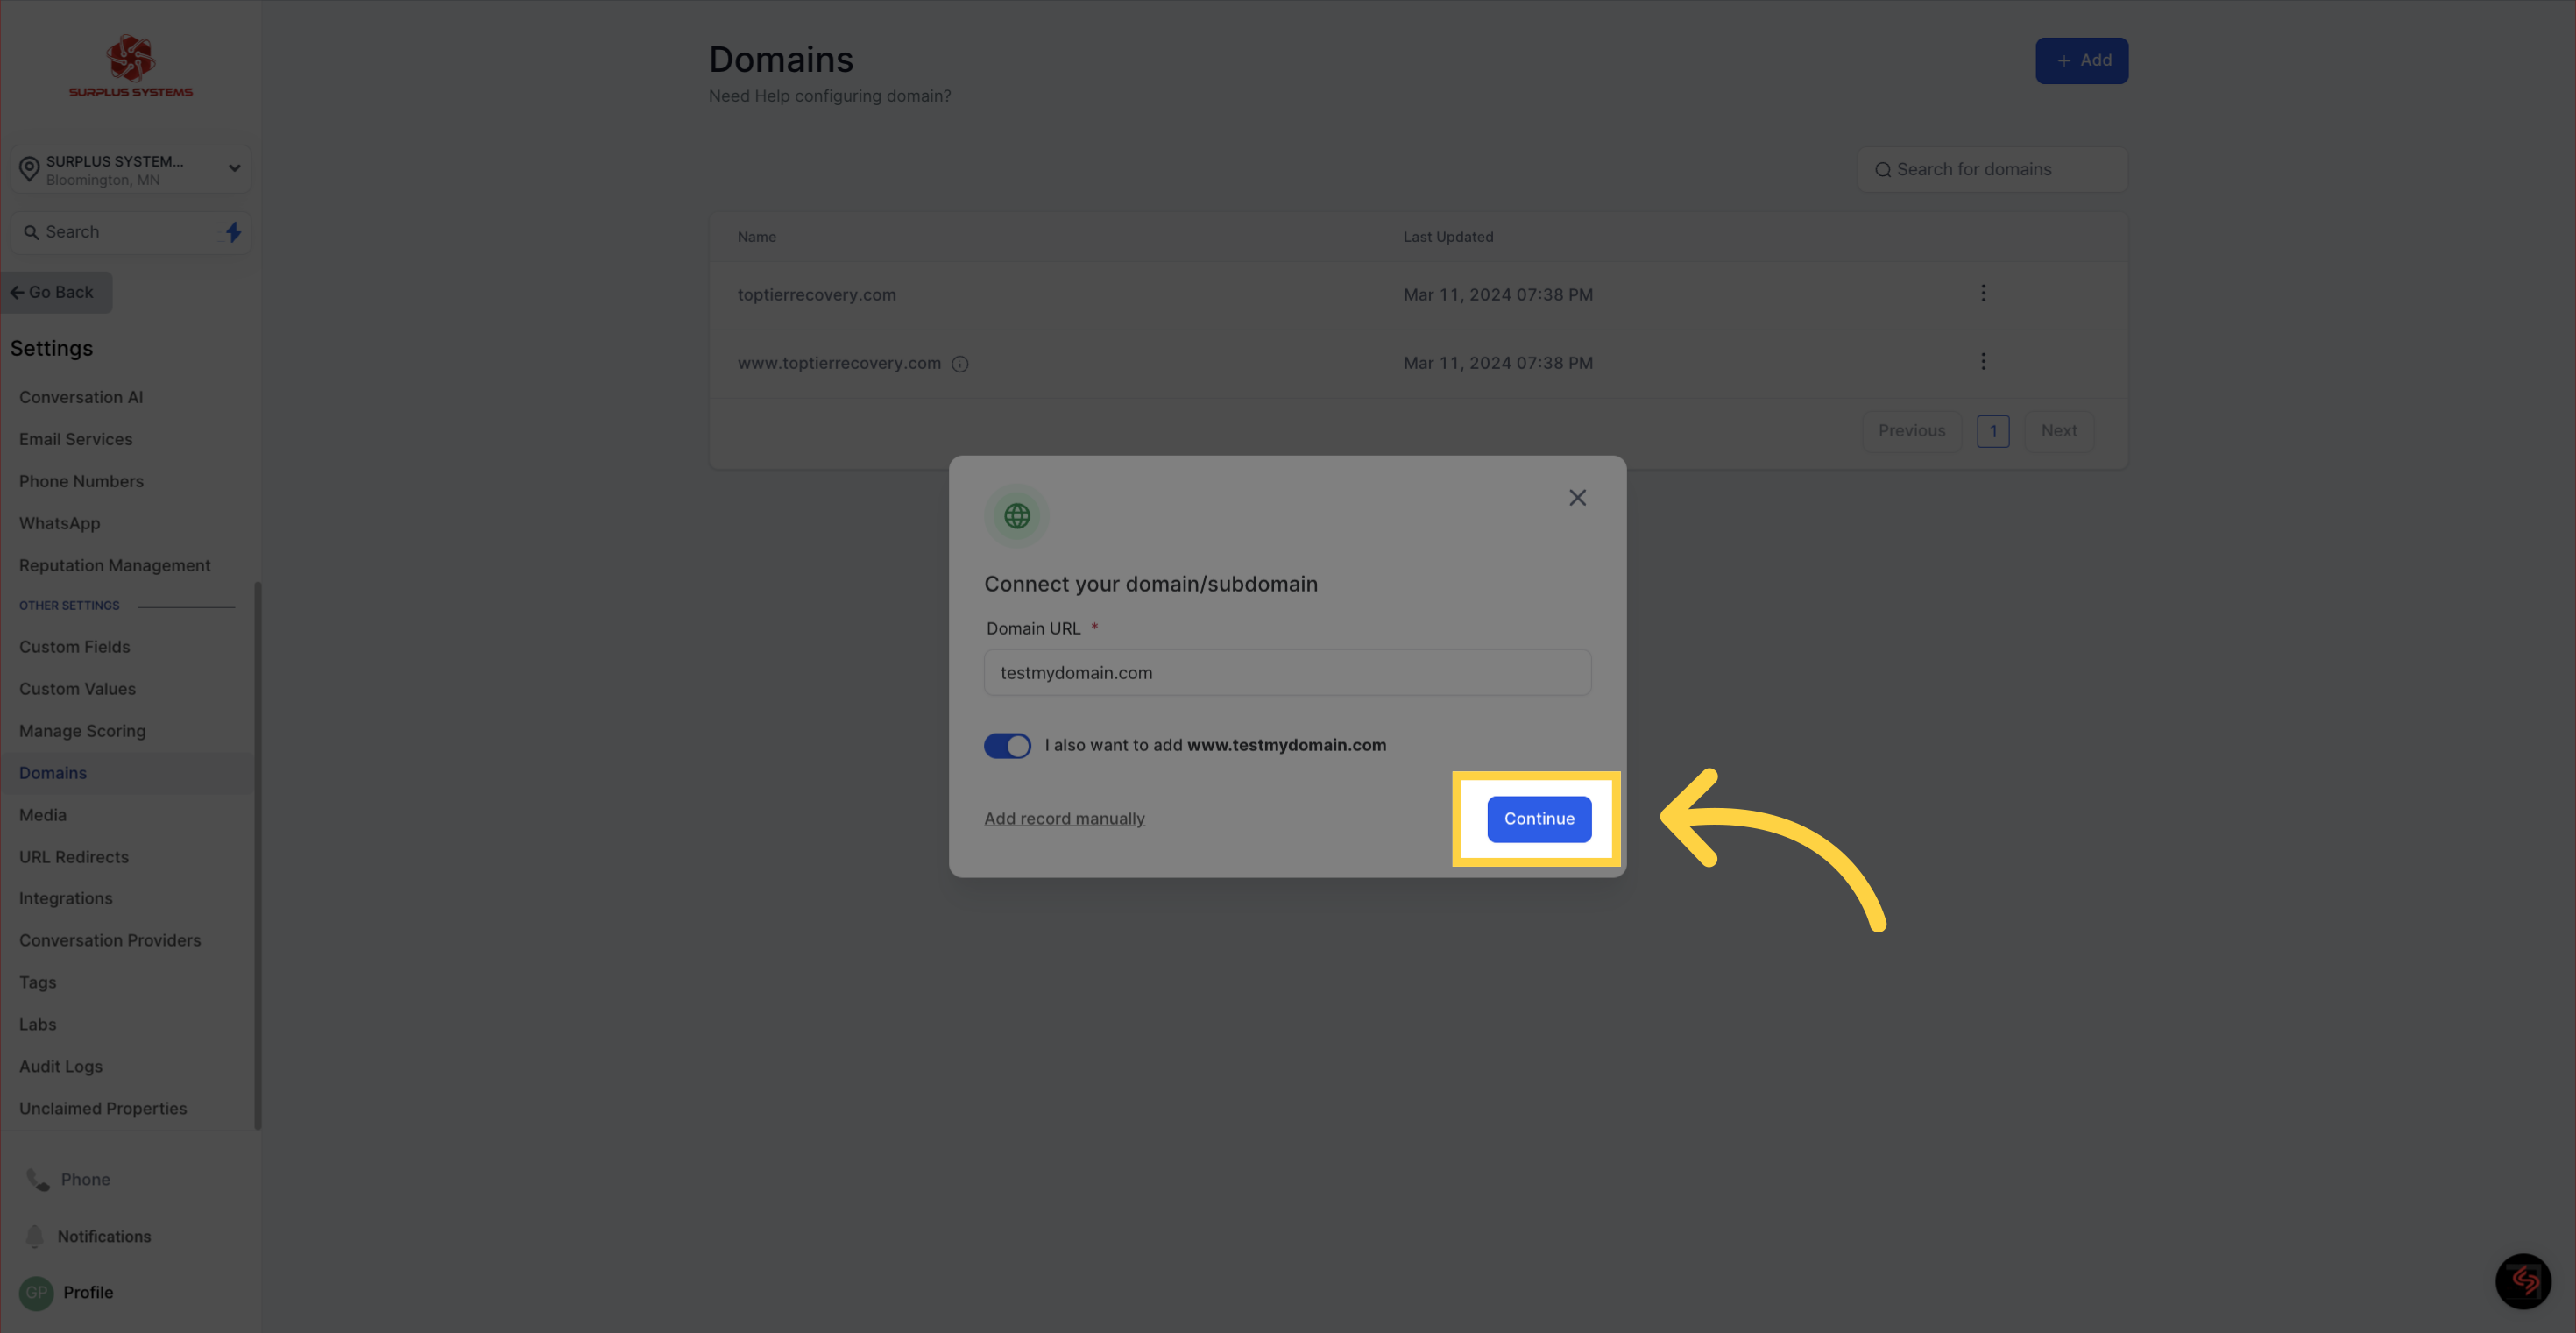
For registrars that support Domain Connect, permit it to automatically adjust your DNS settings, making for a seamless connection.
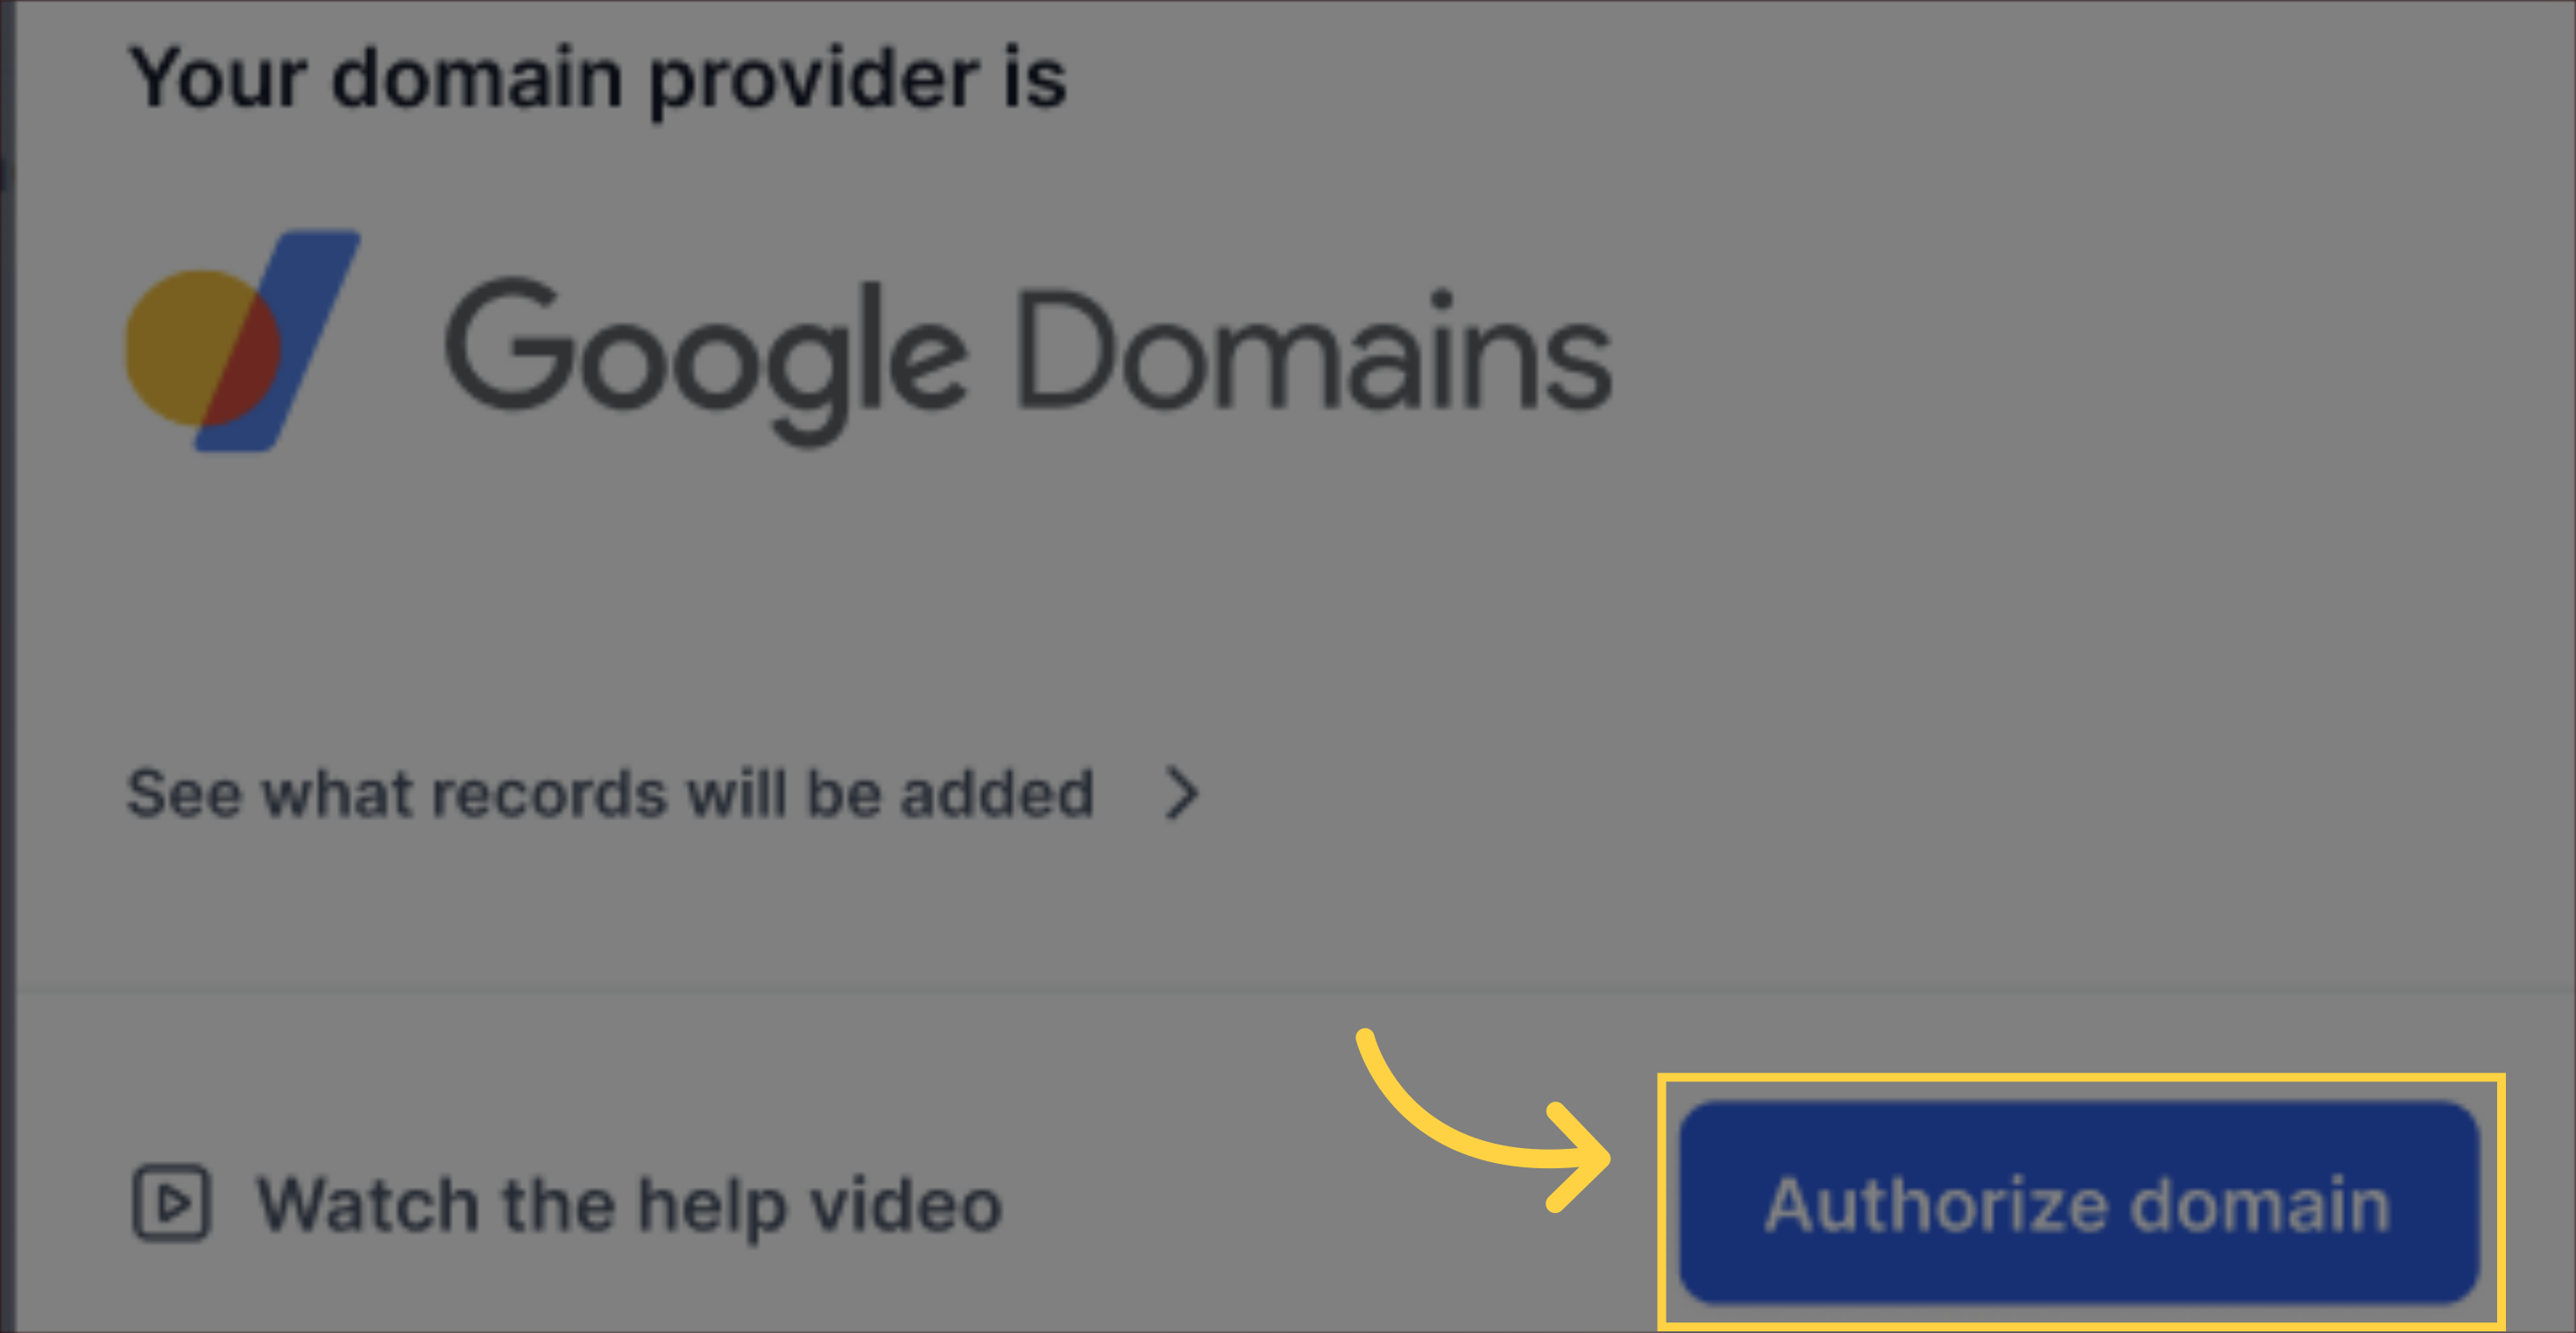
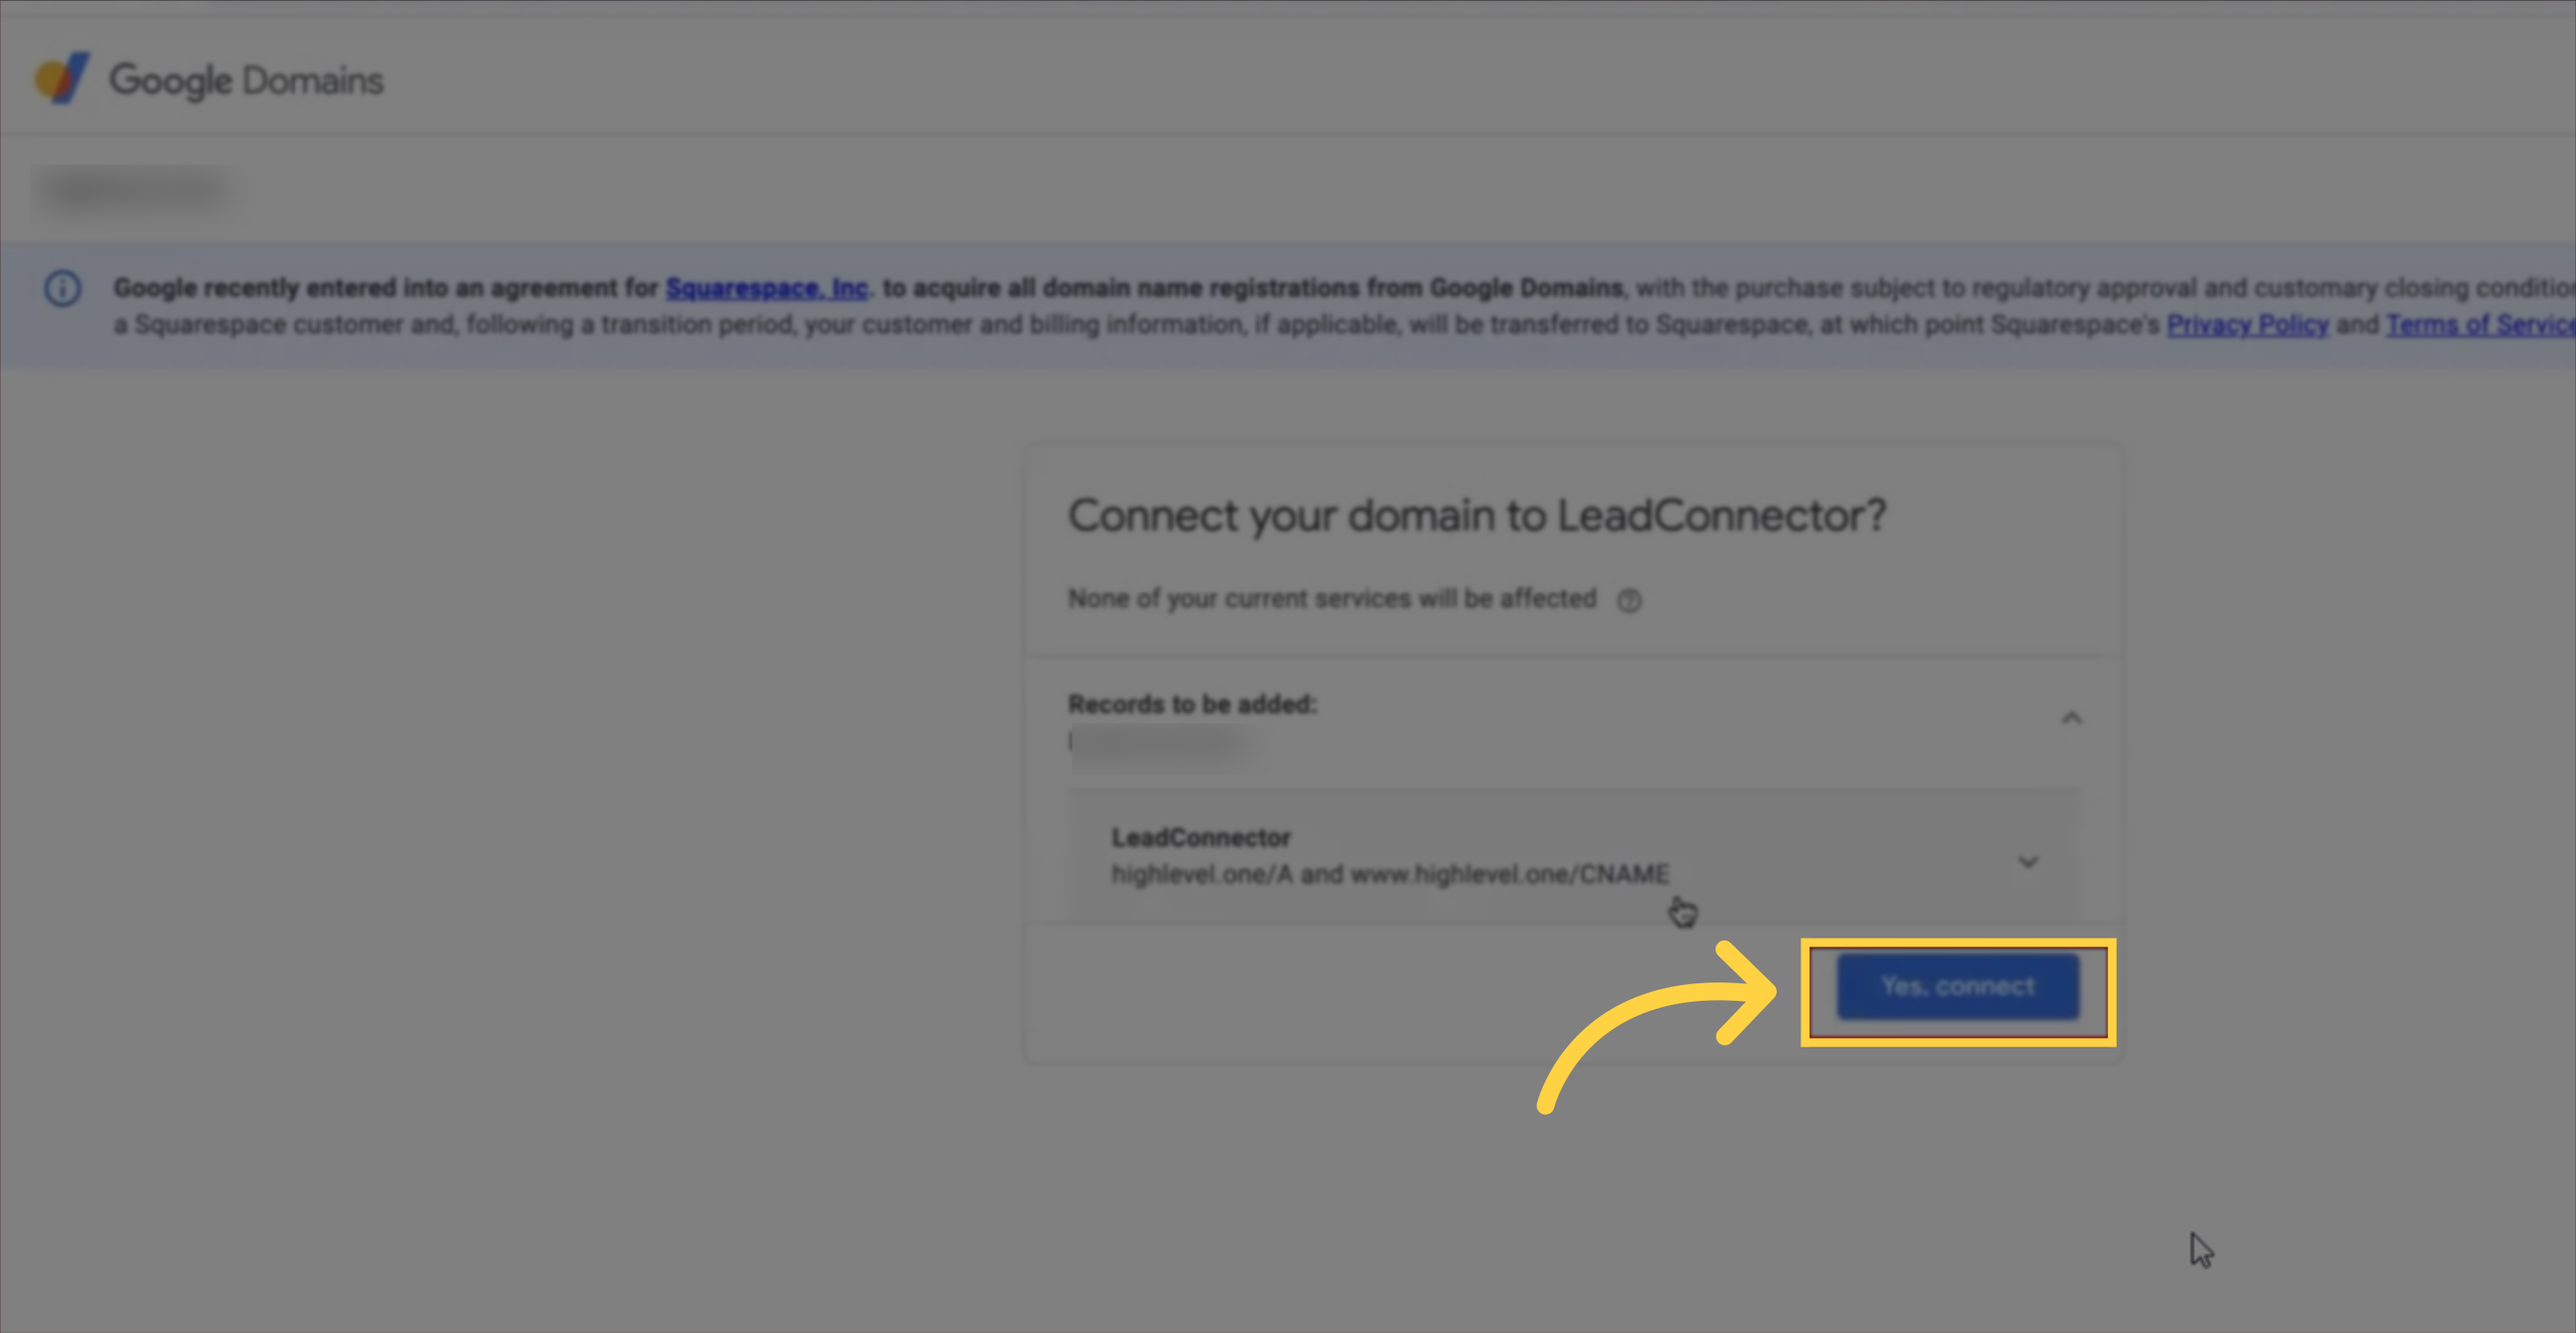
Complete the confirmation process with your domain registrar to approve the DNS modifications. After confirmation, your domain will automatically link with your Surplus systems site.
Testing: It’s important to test the domain connection to ensure it’s properly set up.
Manual Adjustments: If your registrar does not support automatic updates, you’ll need to manually adjust DNS records.
Propagation Time: Keep in mind that DNS changes may require a few minutes to several hours to fully propagate across the internet.
Manual DNS Configurations: Yes, you can opt to manually configure your DNS settings if you prefer detailed control or use an unsupported registrar.
Unsupported Providers: For registrars not integrated with Domain Connect, manually inputting DNS records is necessary for domain connection.
Handling "www" Domains: Confirm there are no conflicting existing CNAME or A records for the "www" version before activation.
The Surplus Systems Domain Connect feature transforms the way you manage your domain, providing a safe and straightforward route to forge a robust online identity. It eases the website setup process and helps you secure a professional domain name, elevating your online presence in a manner that genuinely mirrors your business's ethos. Surplus Systems is dedicated to making sure your digital voyage—whether you're establishing a new presence or enhancing an existing one—is fruitful and truly representative of your brand's quality.
