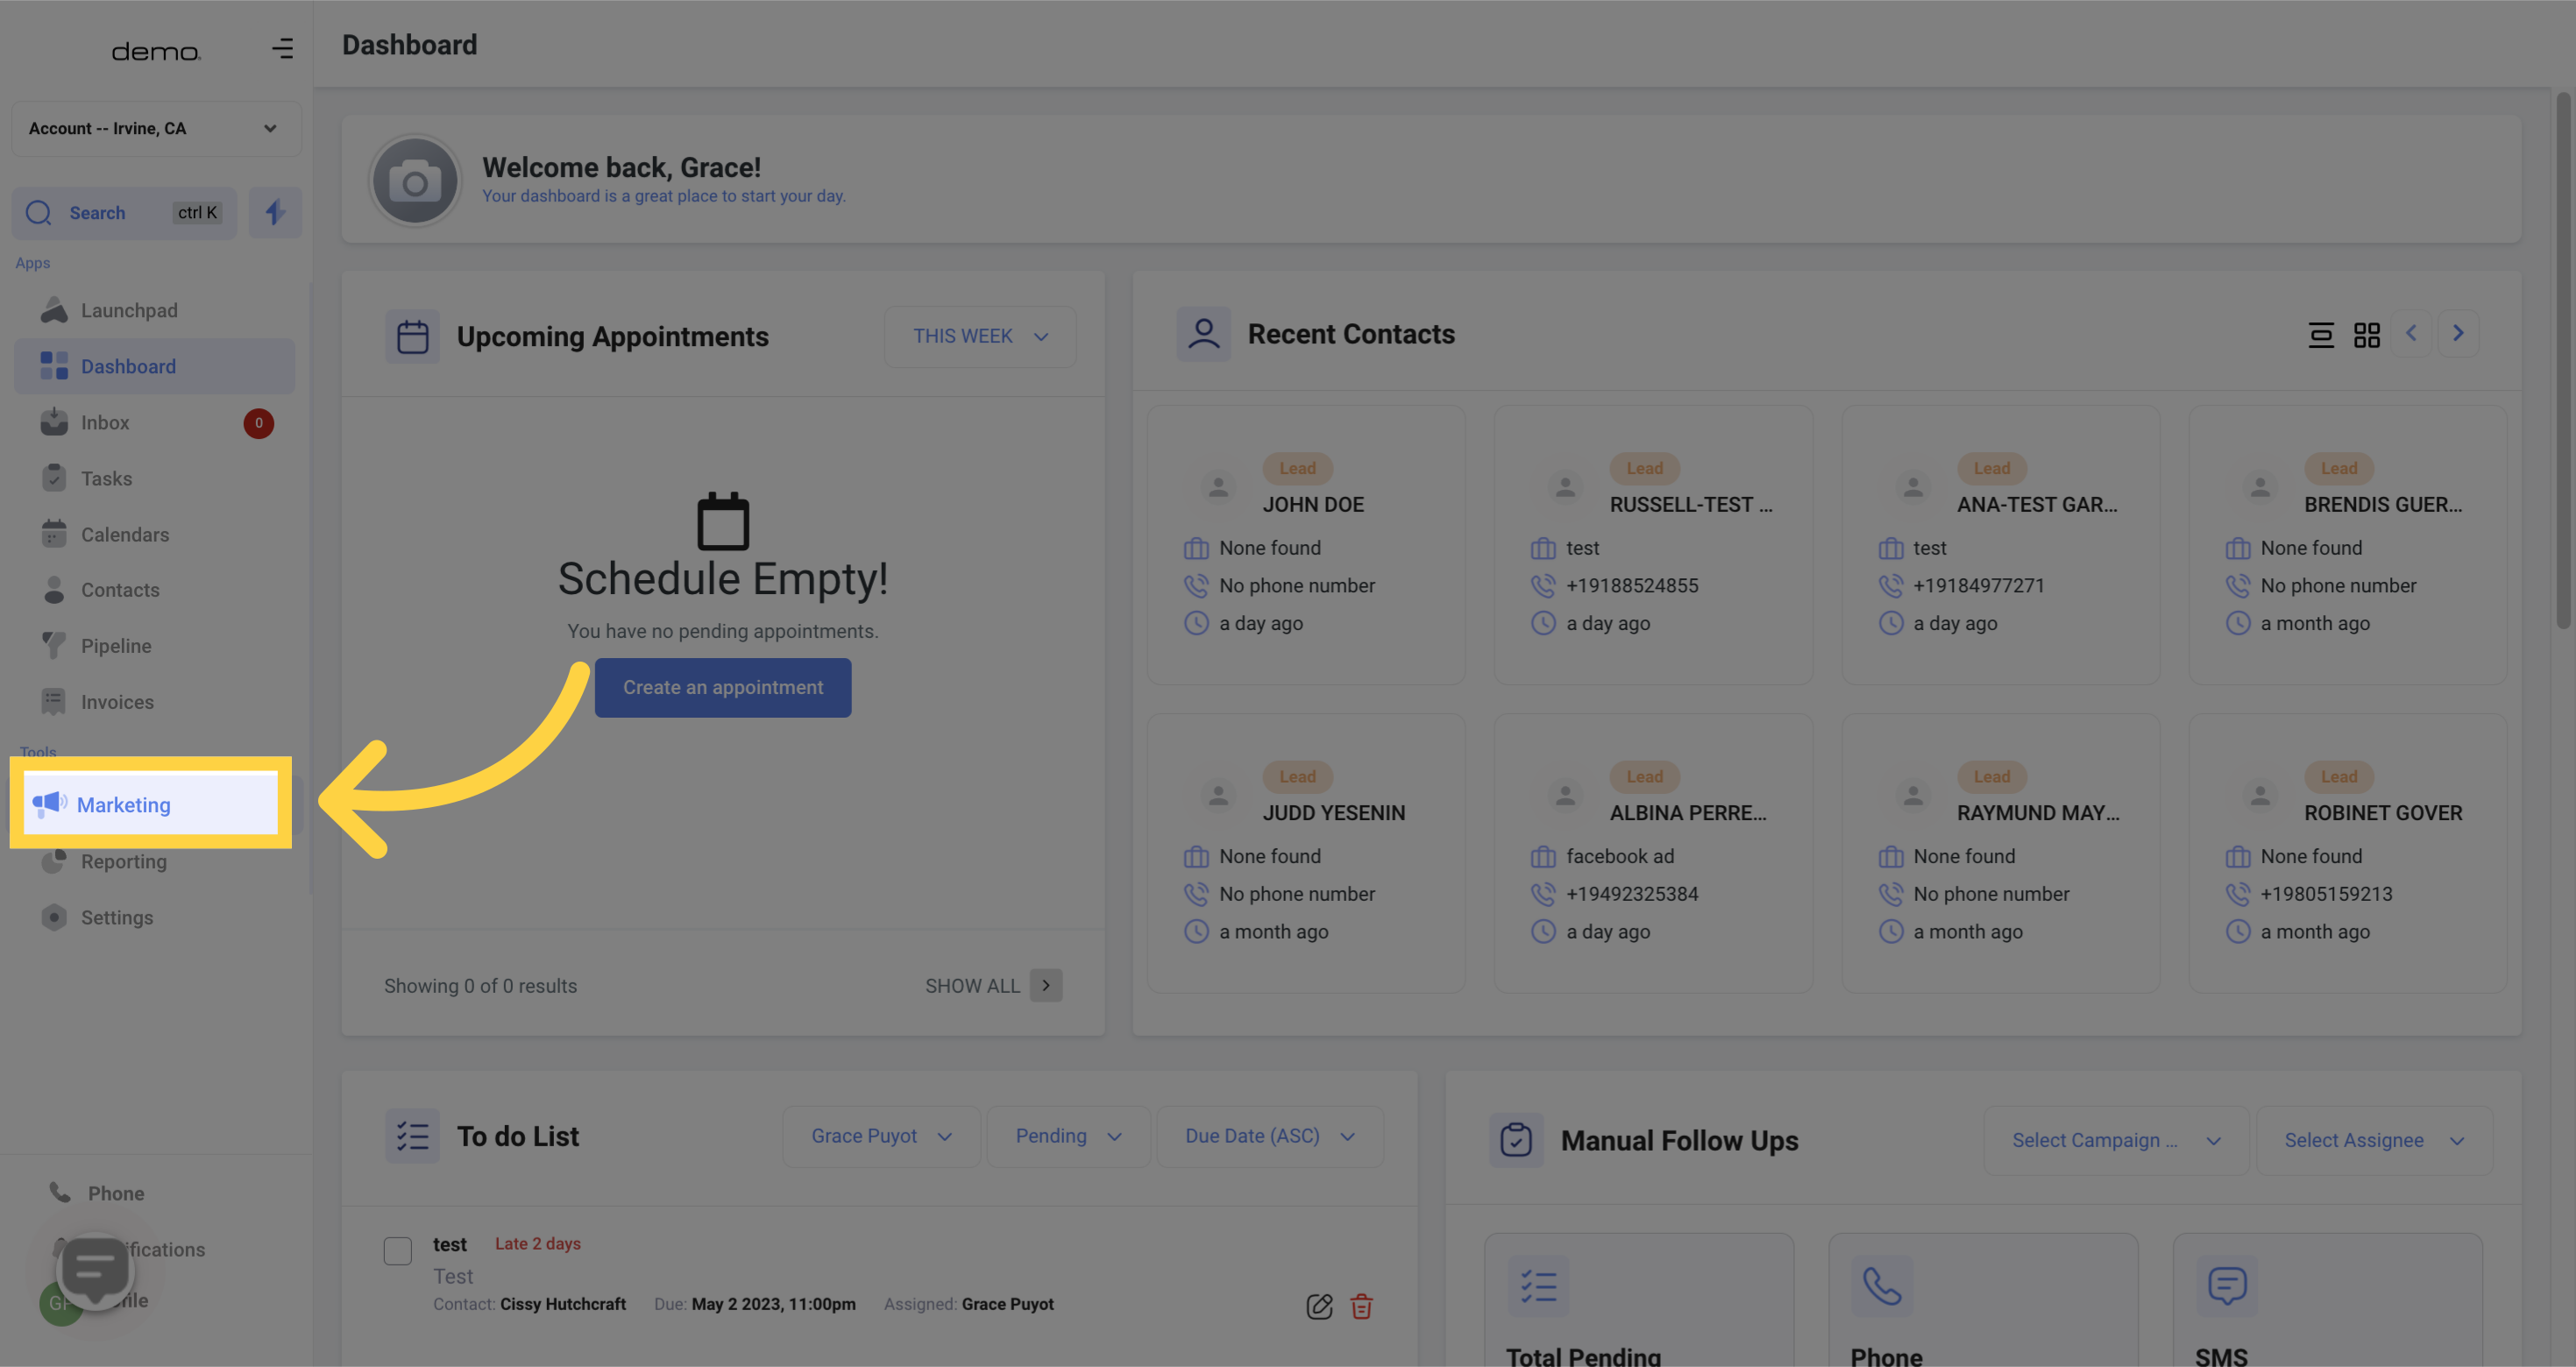
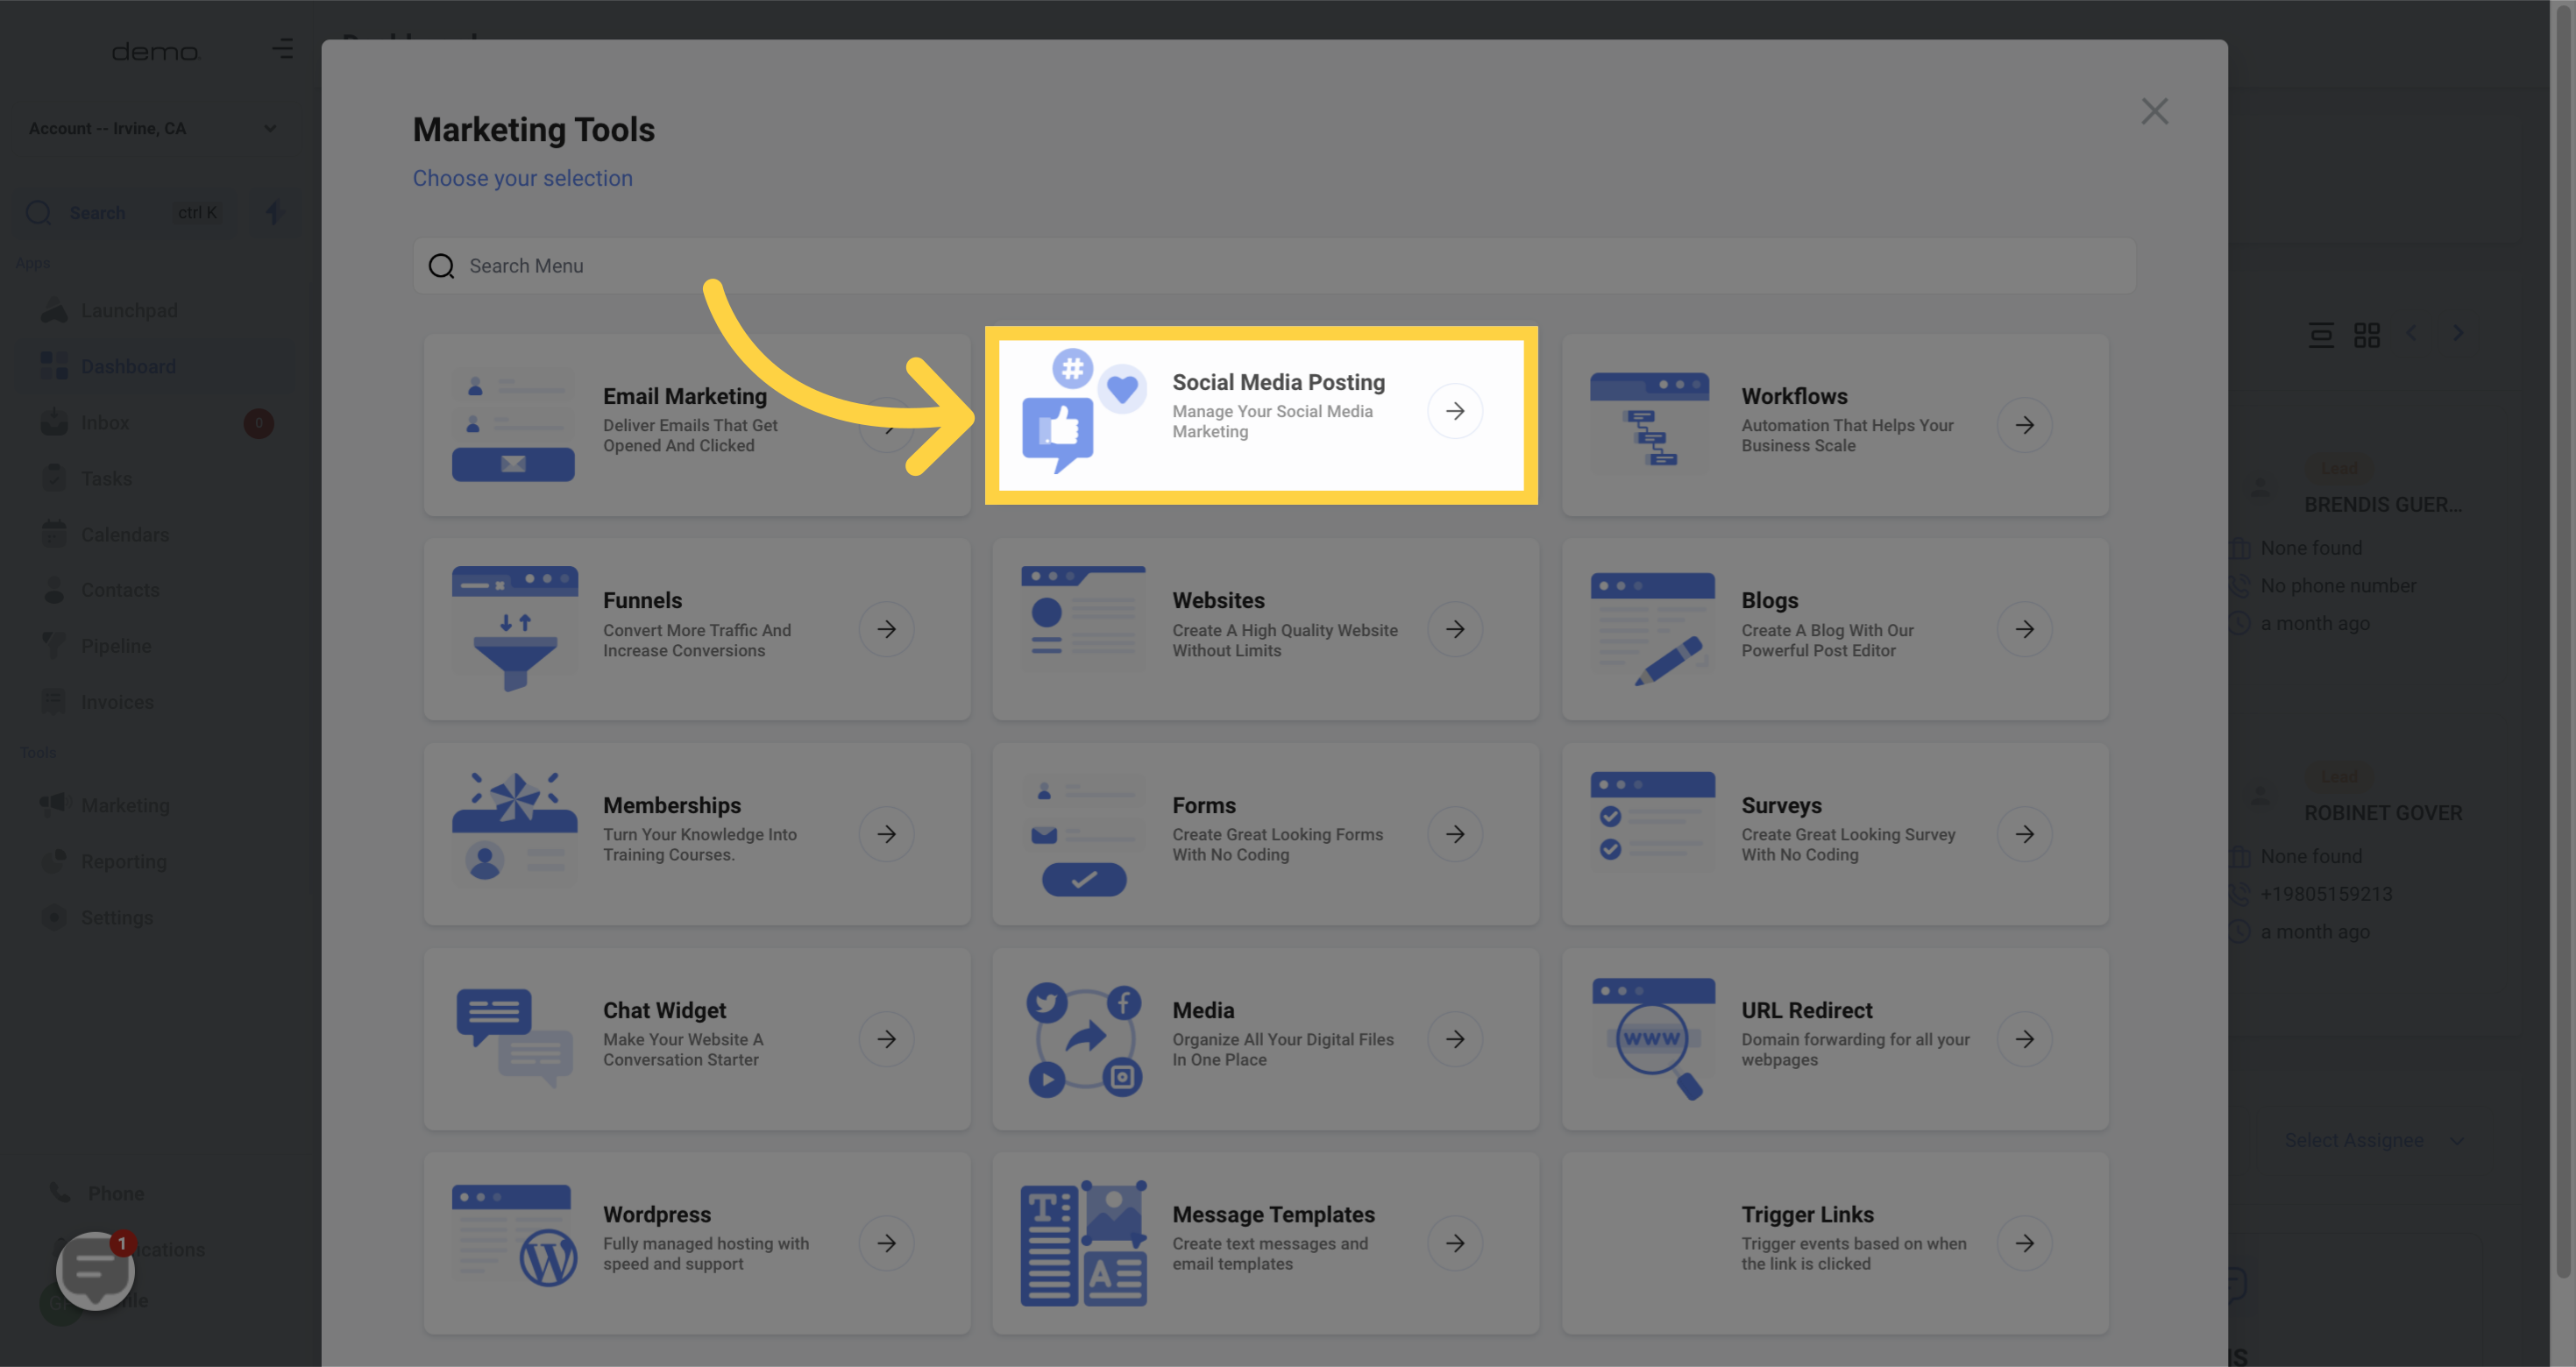
The Social Planner feature now includes an approval flow option that allows users to have their social media posts reviewed and analyzed by another team member prior to scheduling.
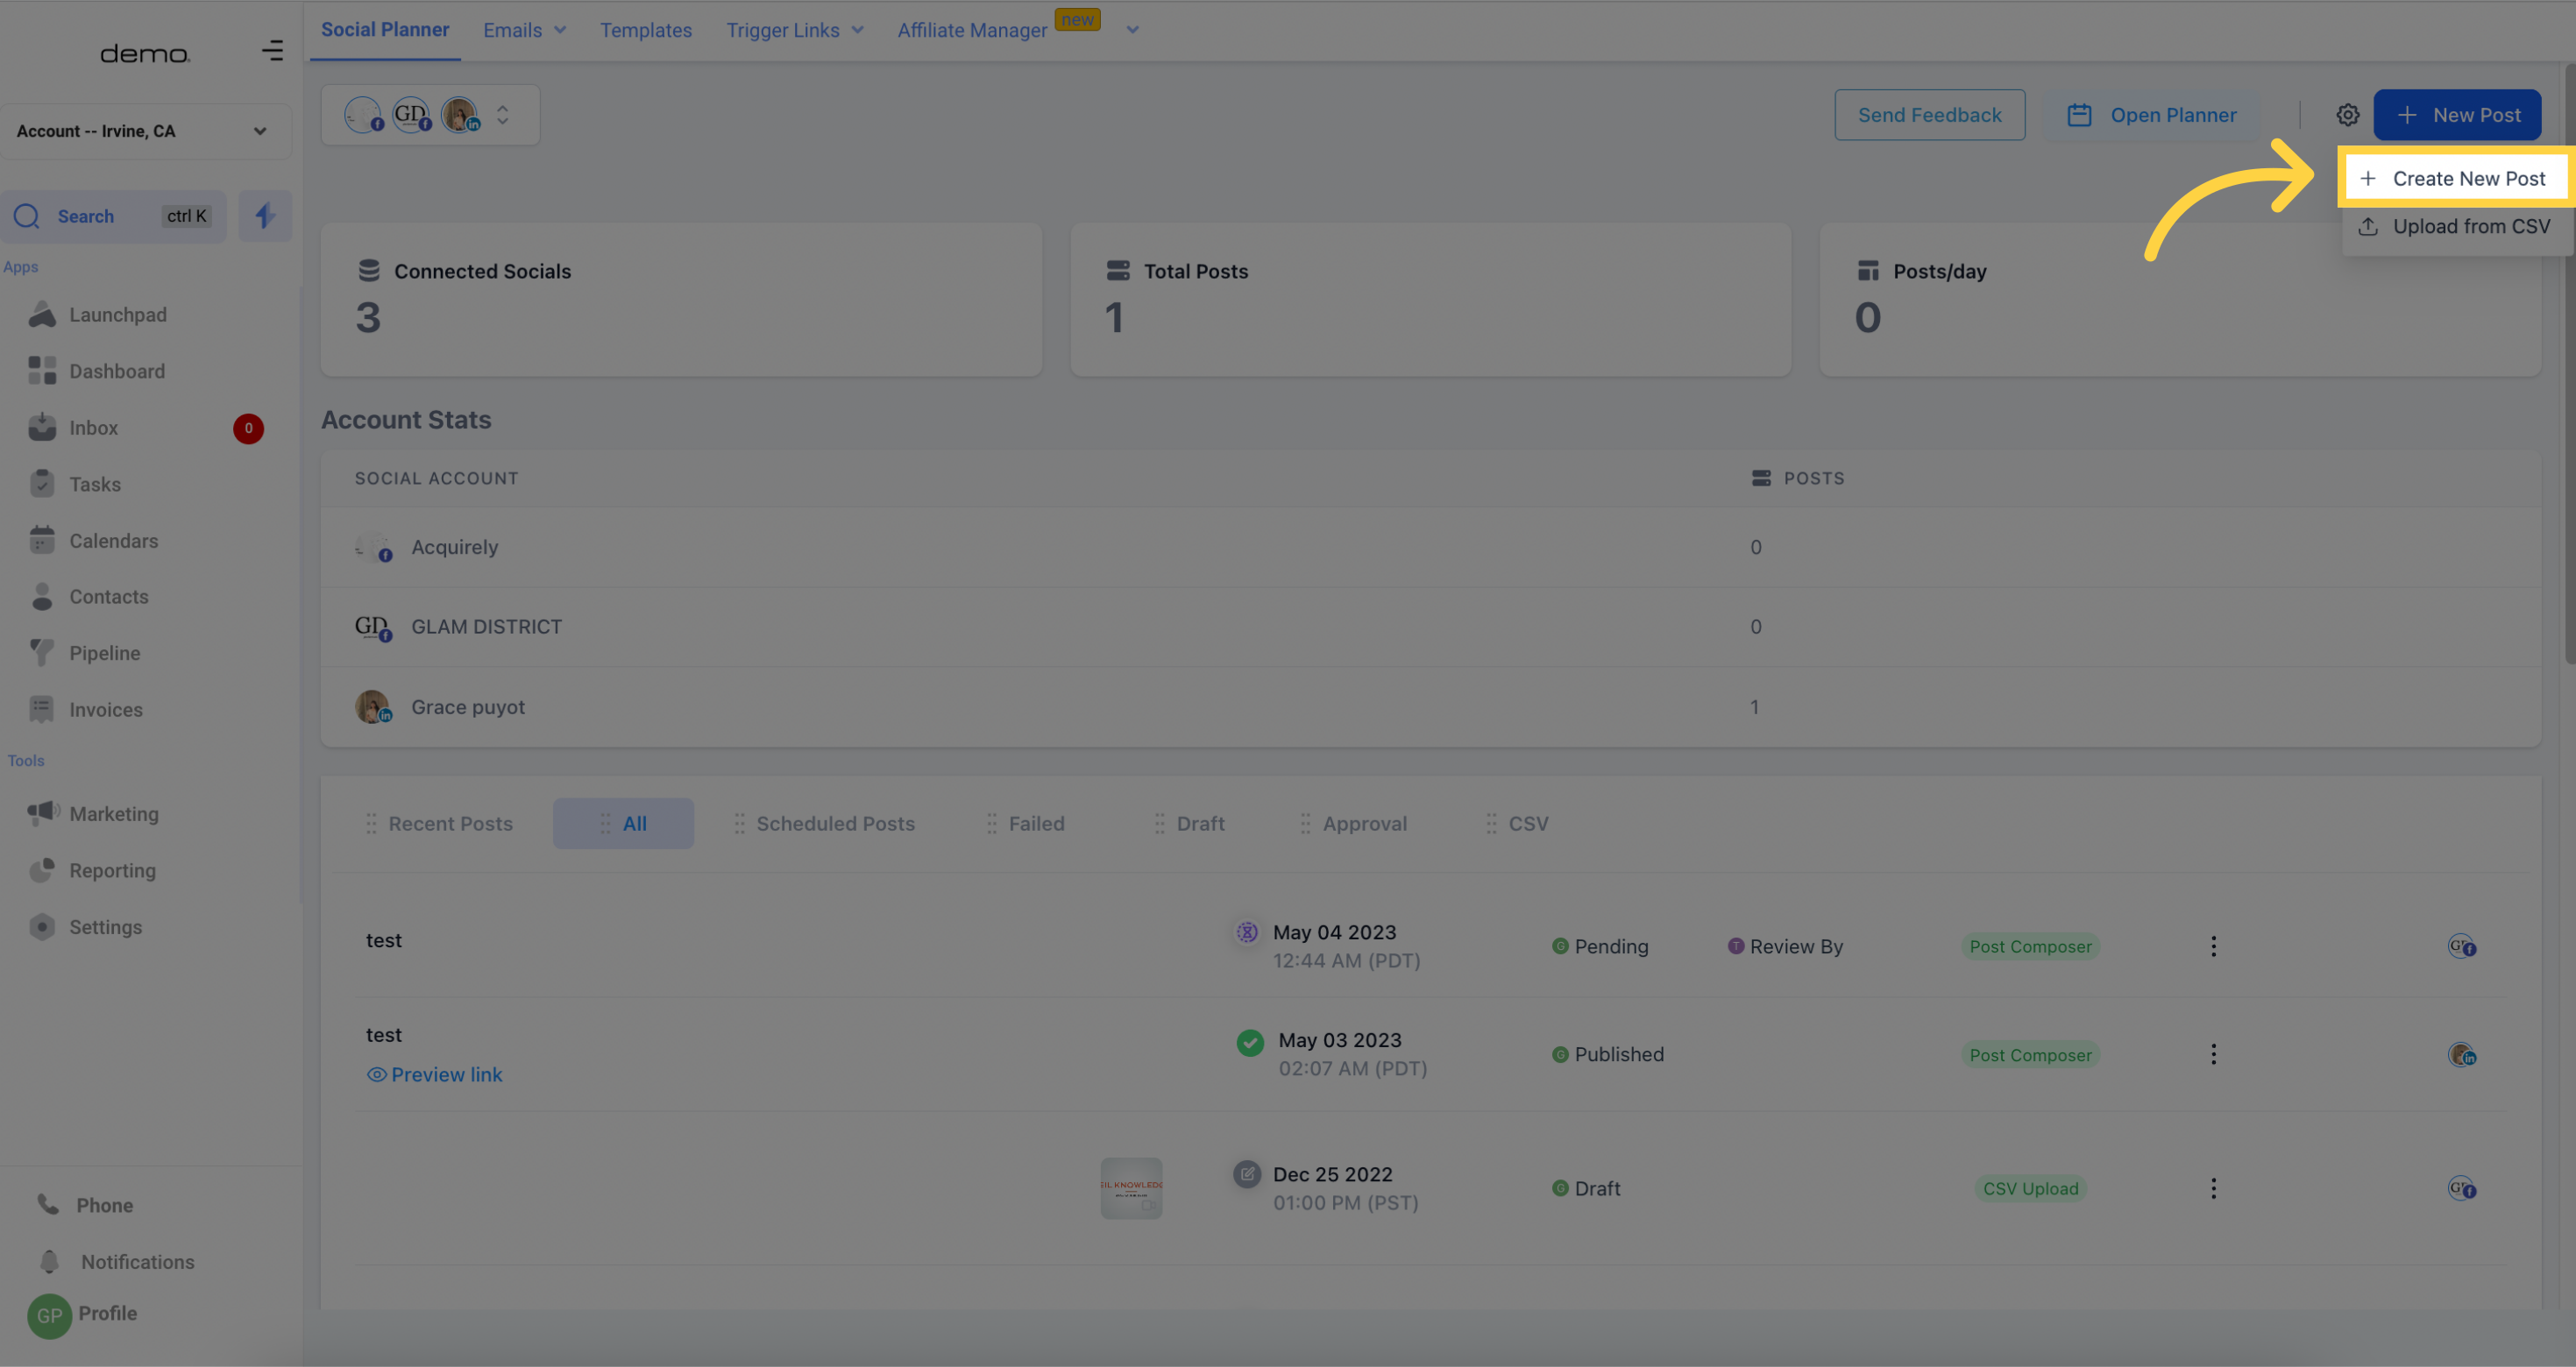
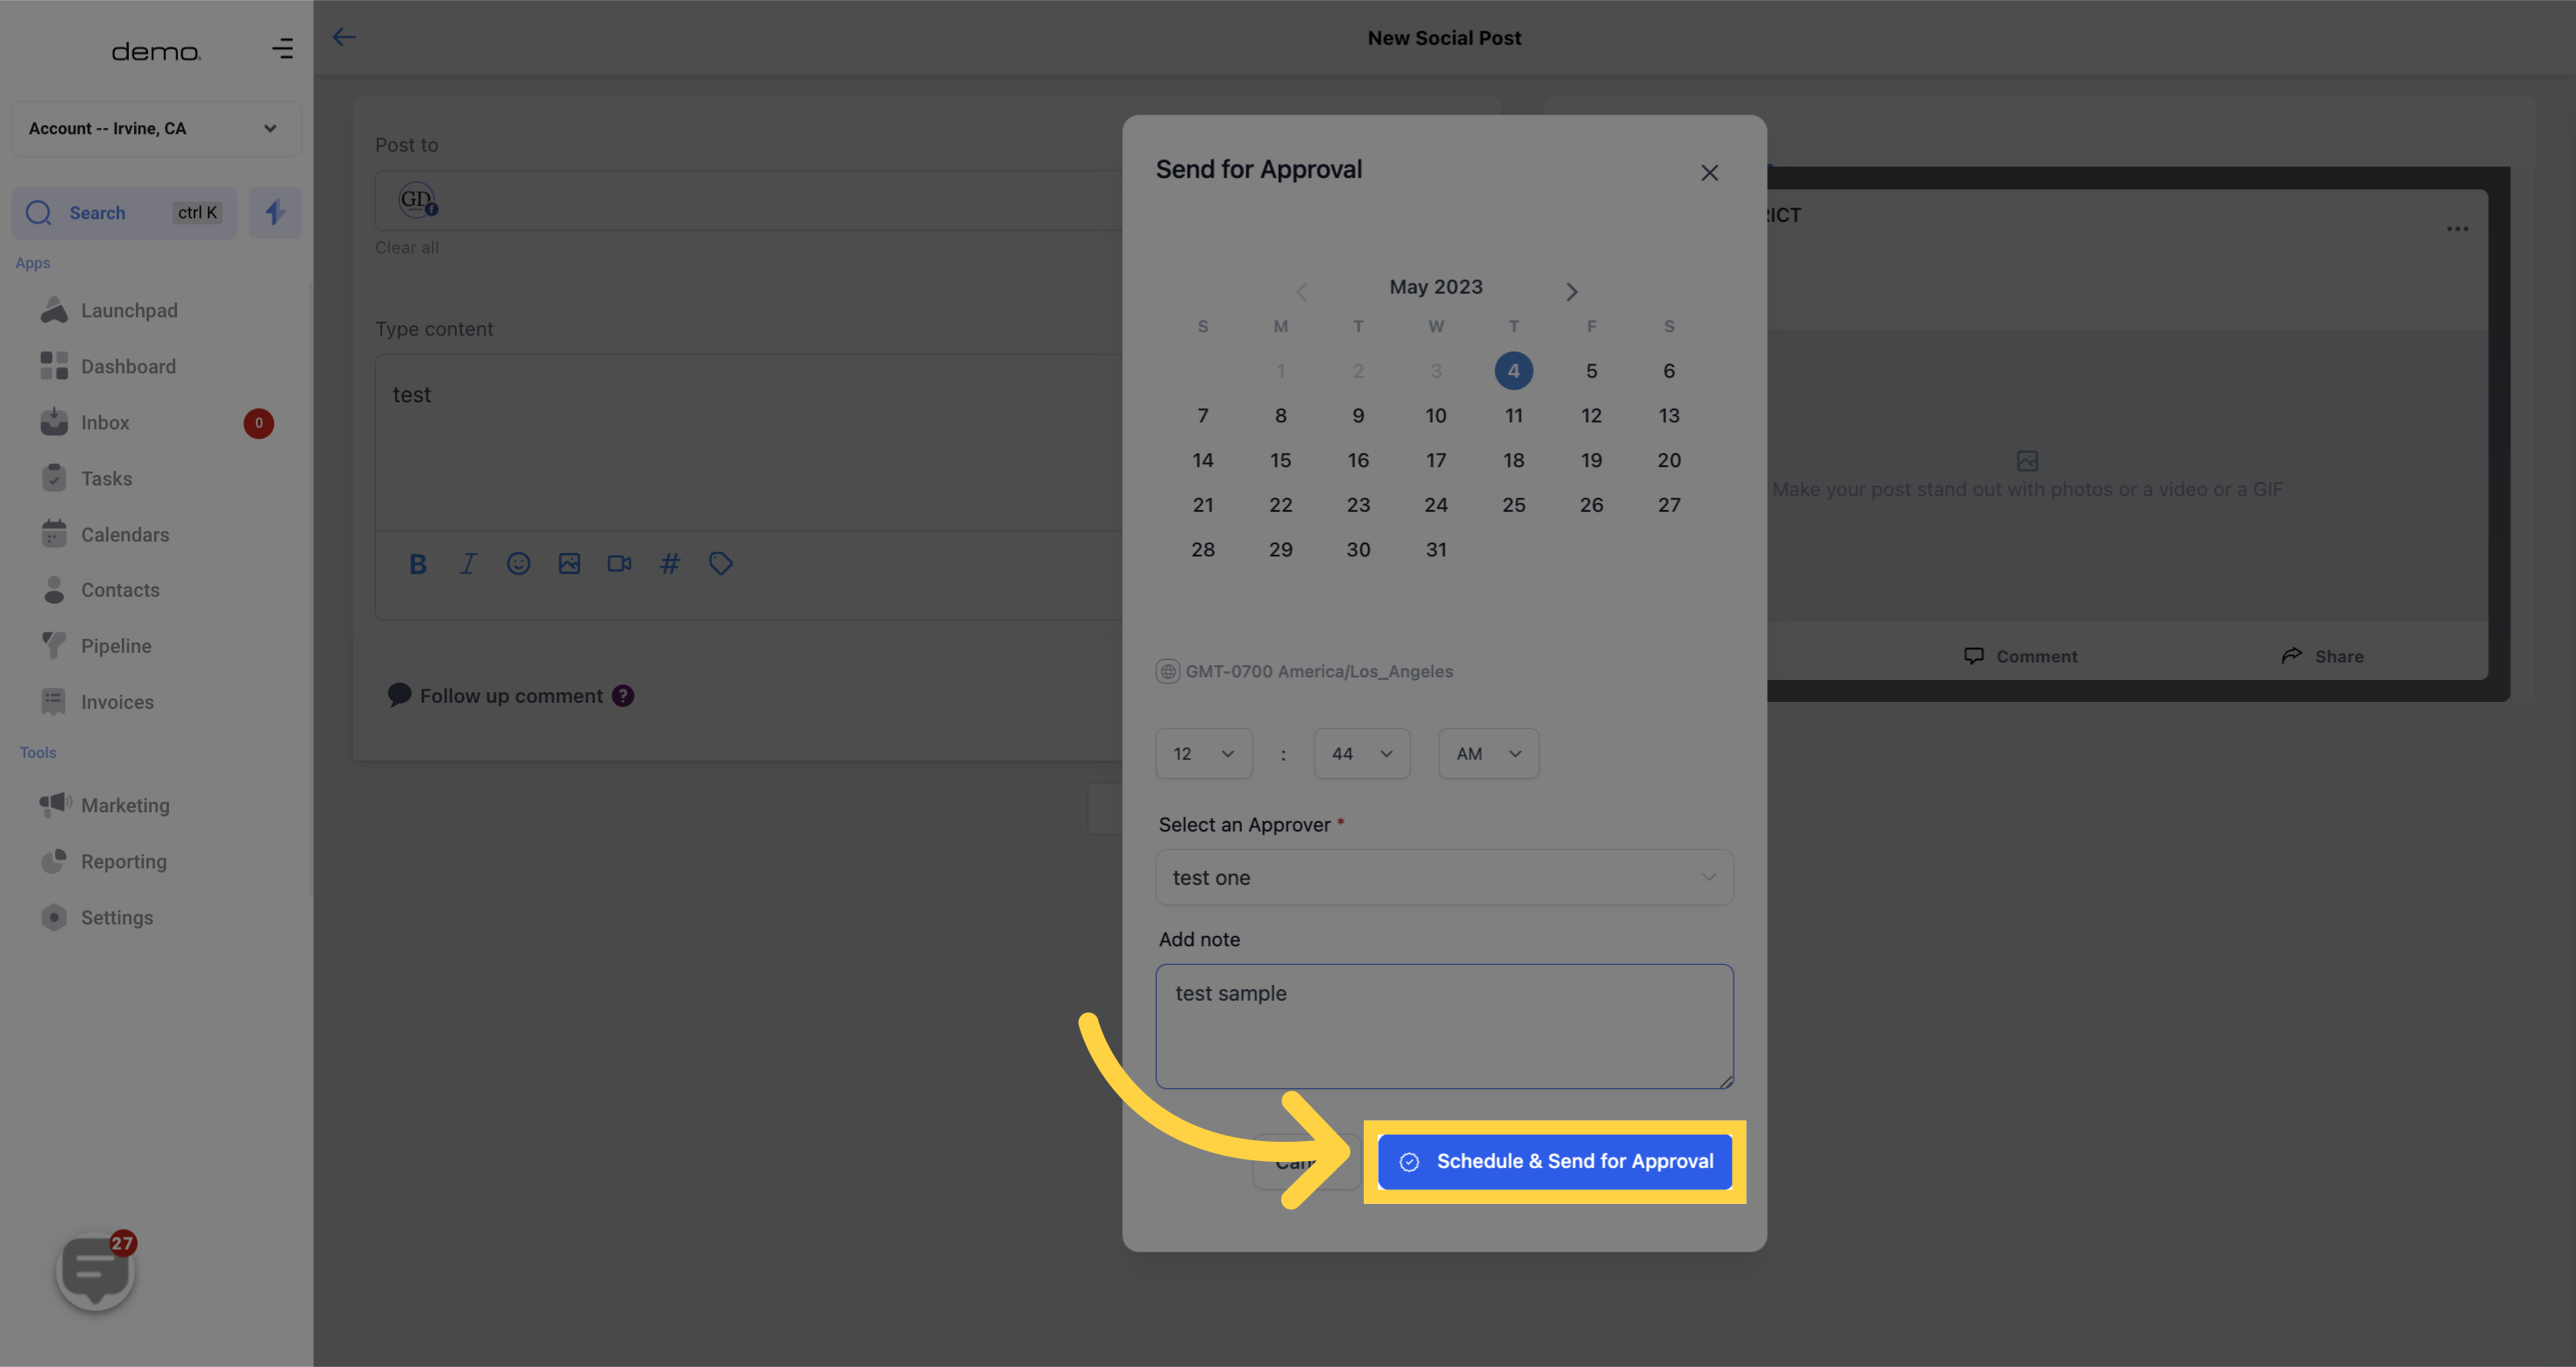
After adding the necessary content, rich media, hashtags and more, you can "Schedule for Approval" the post
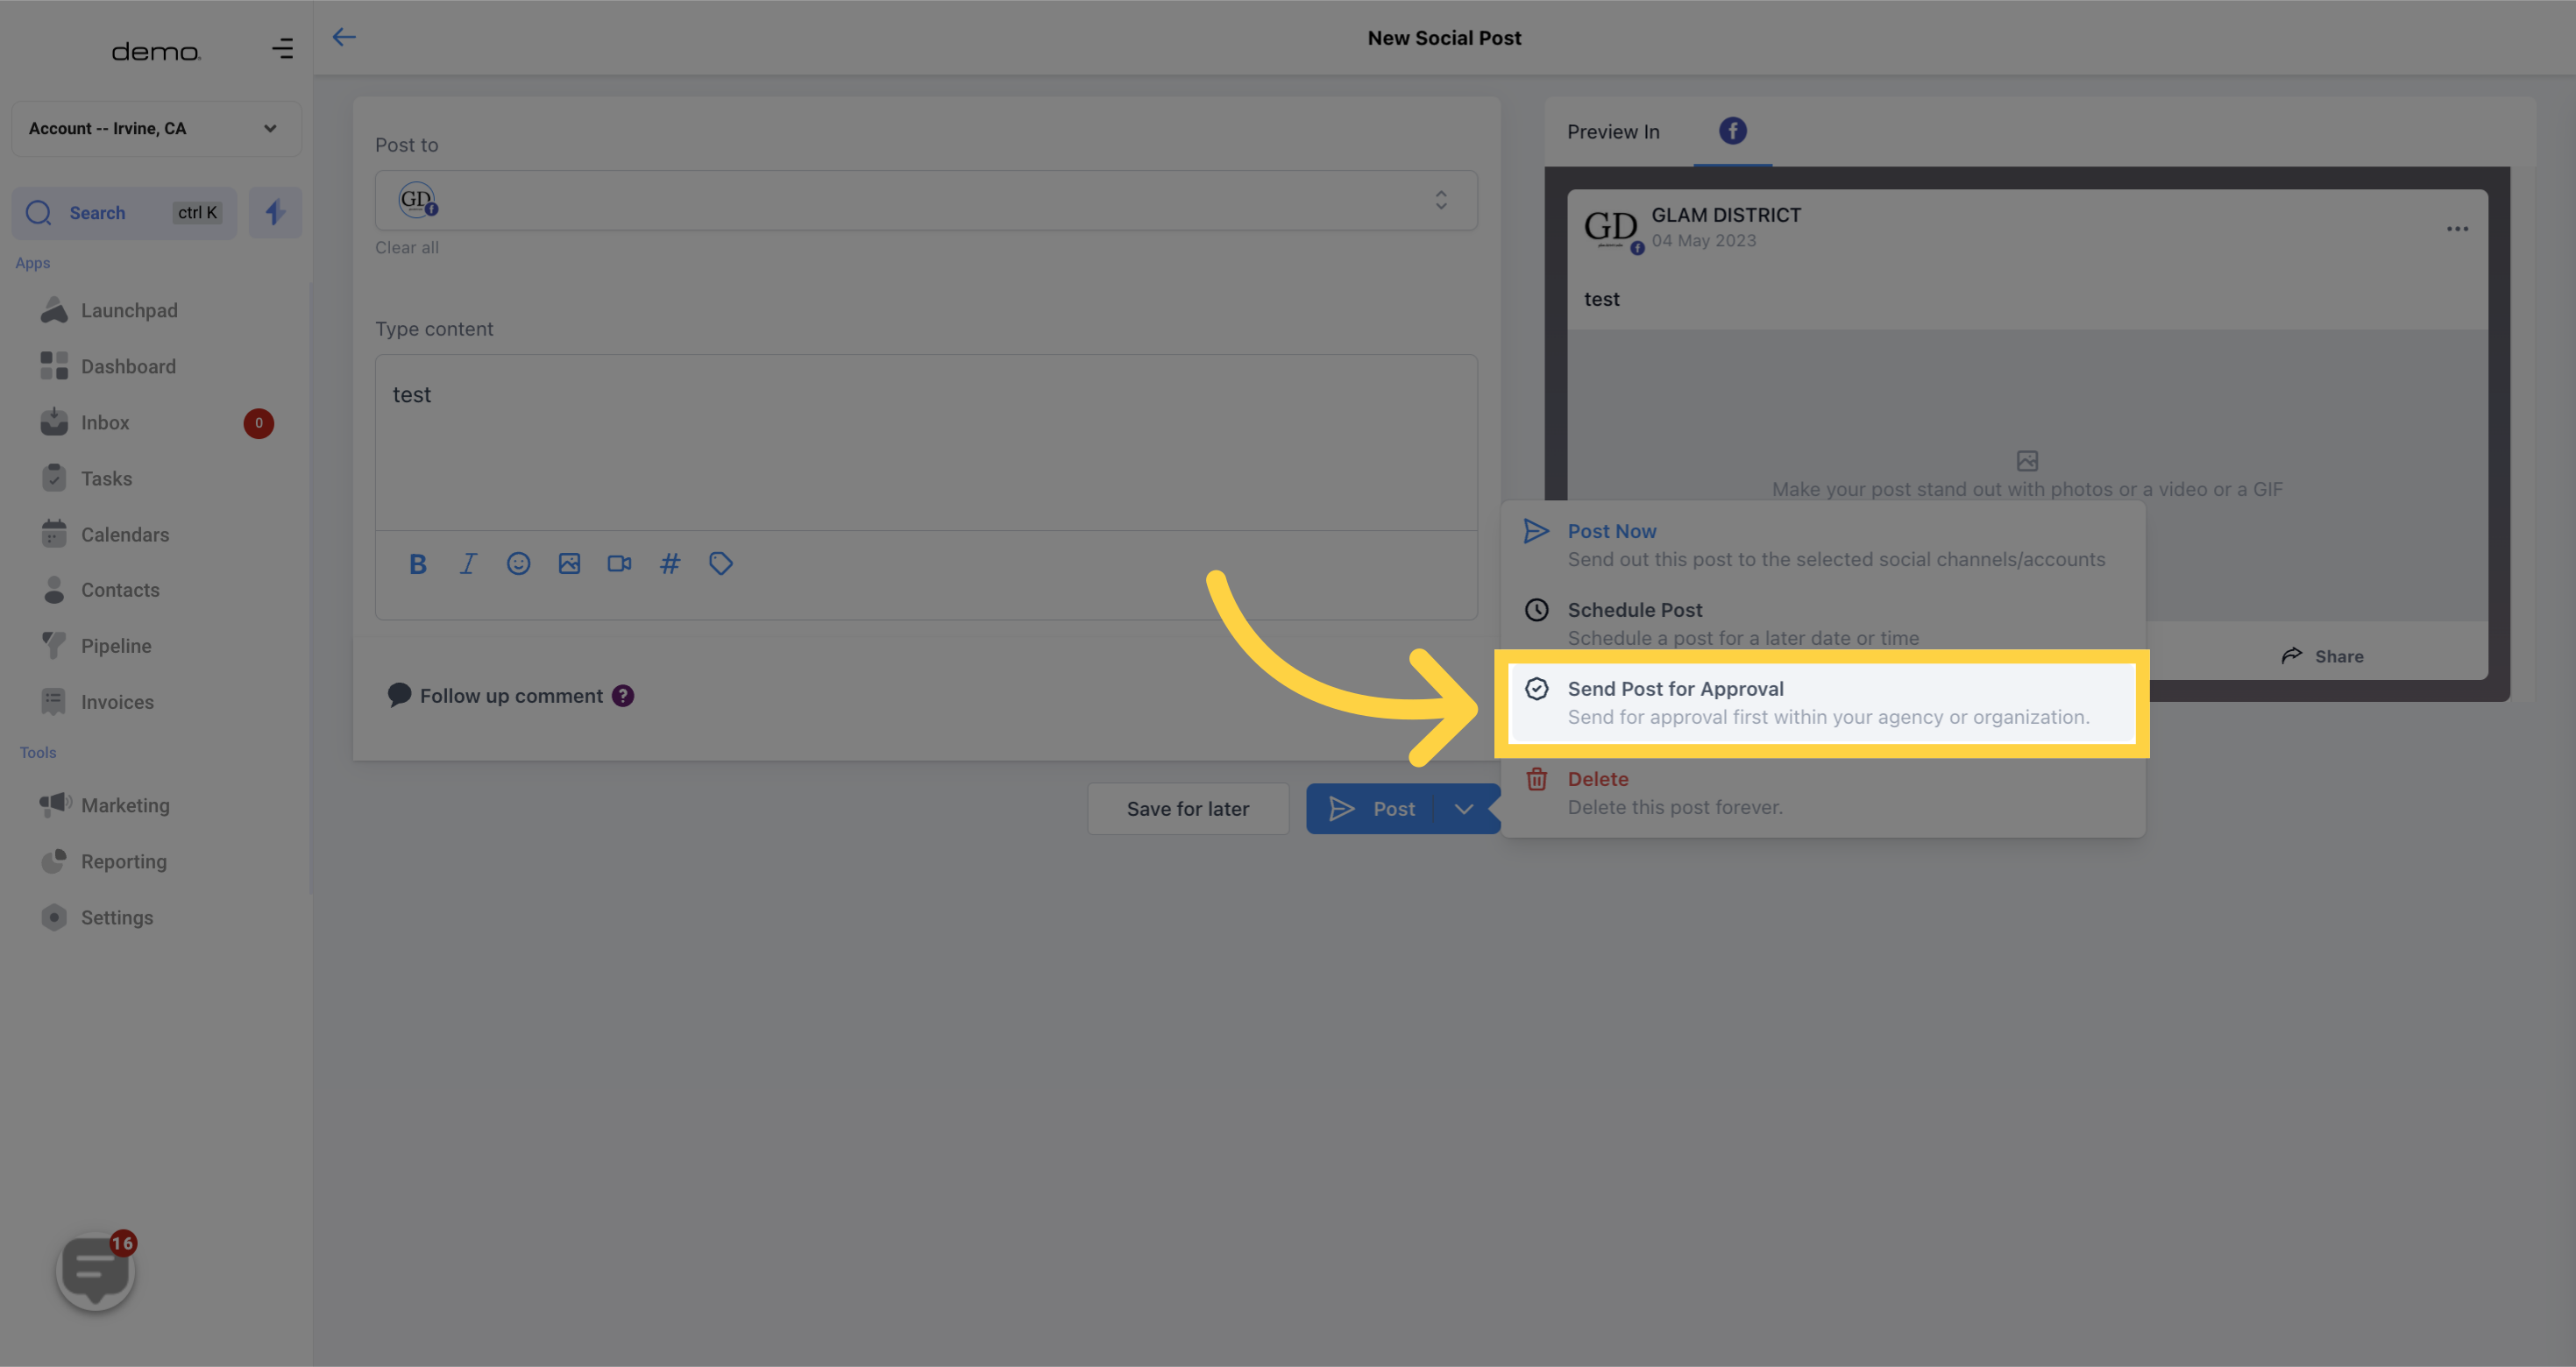
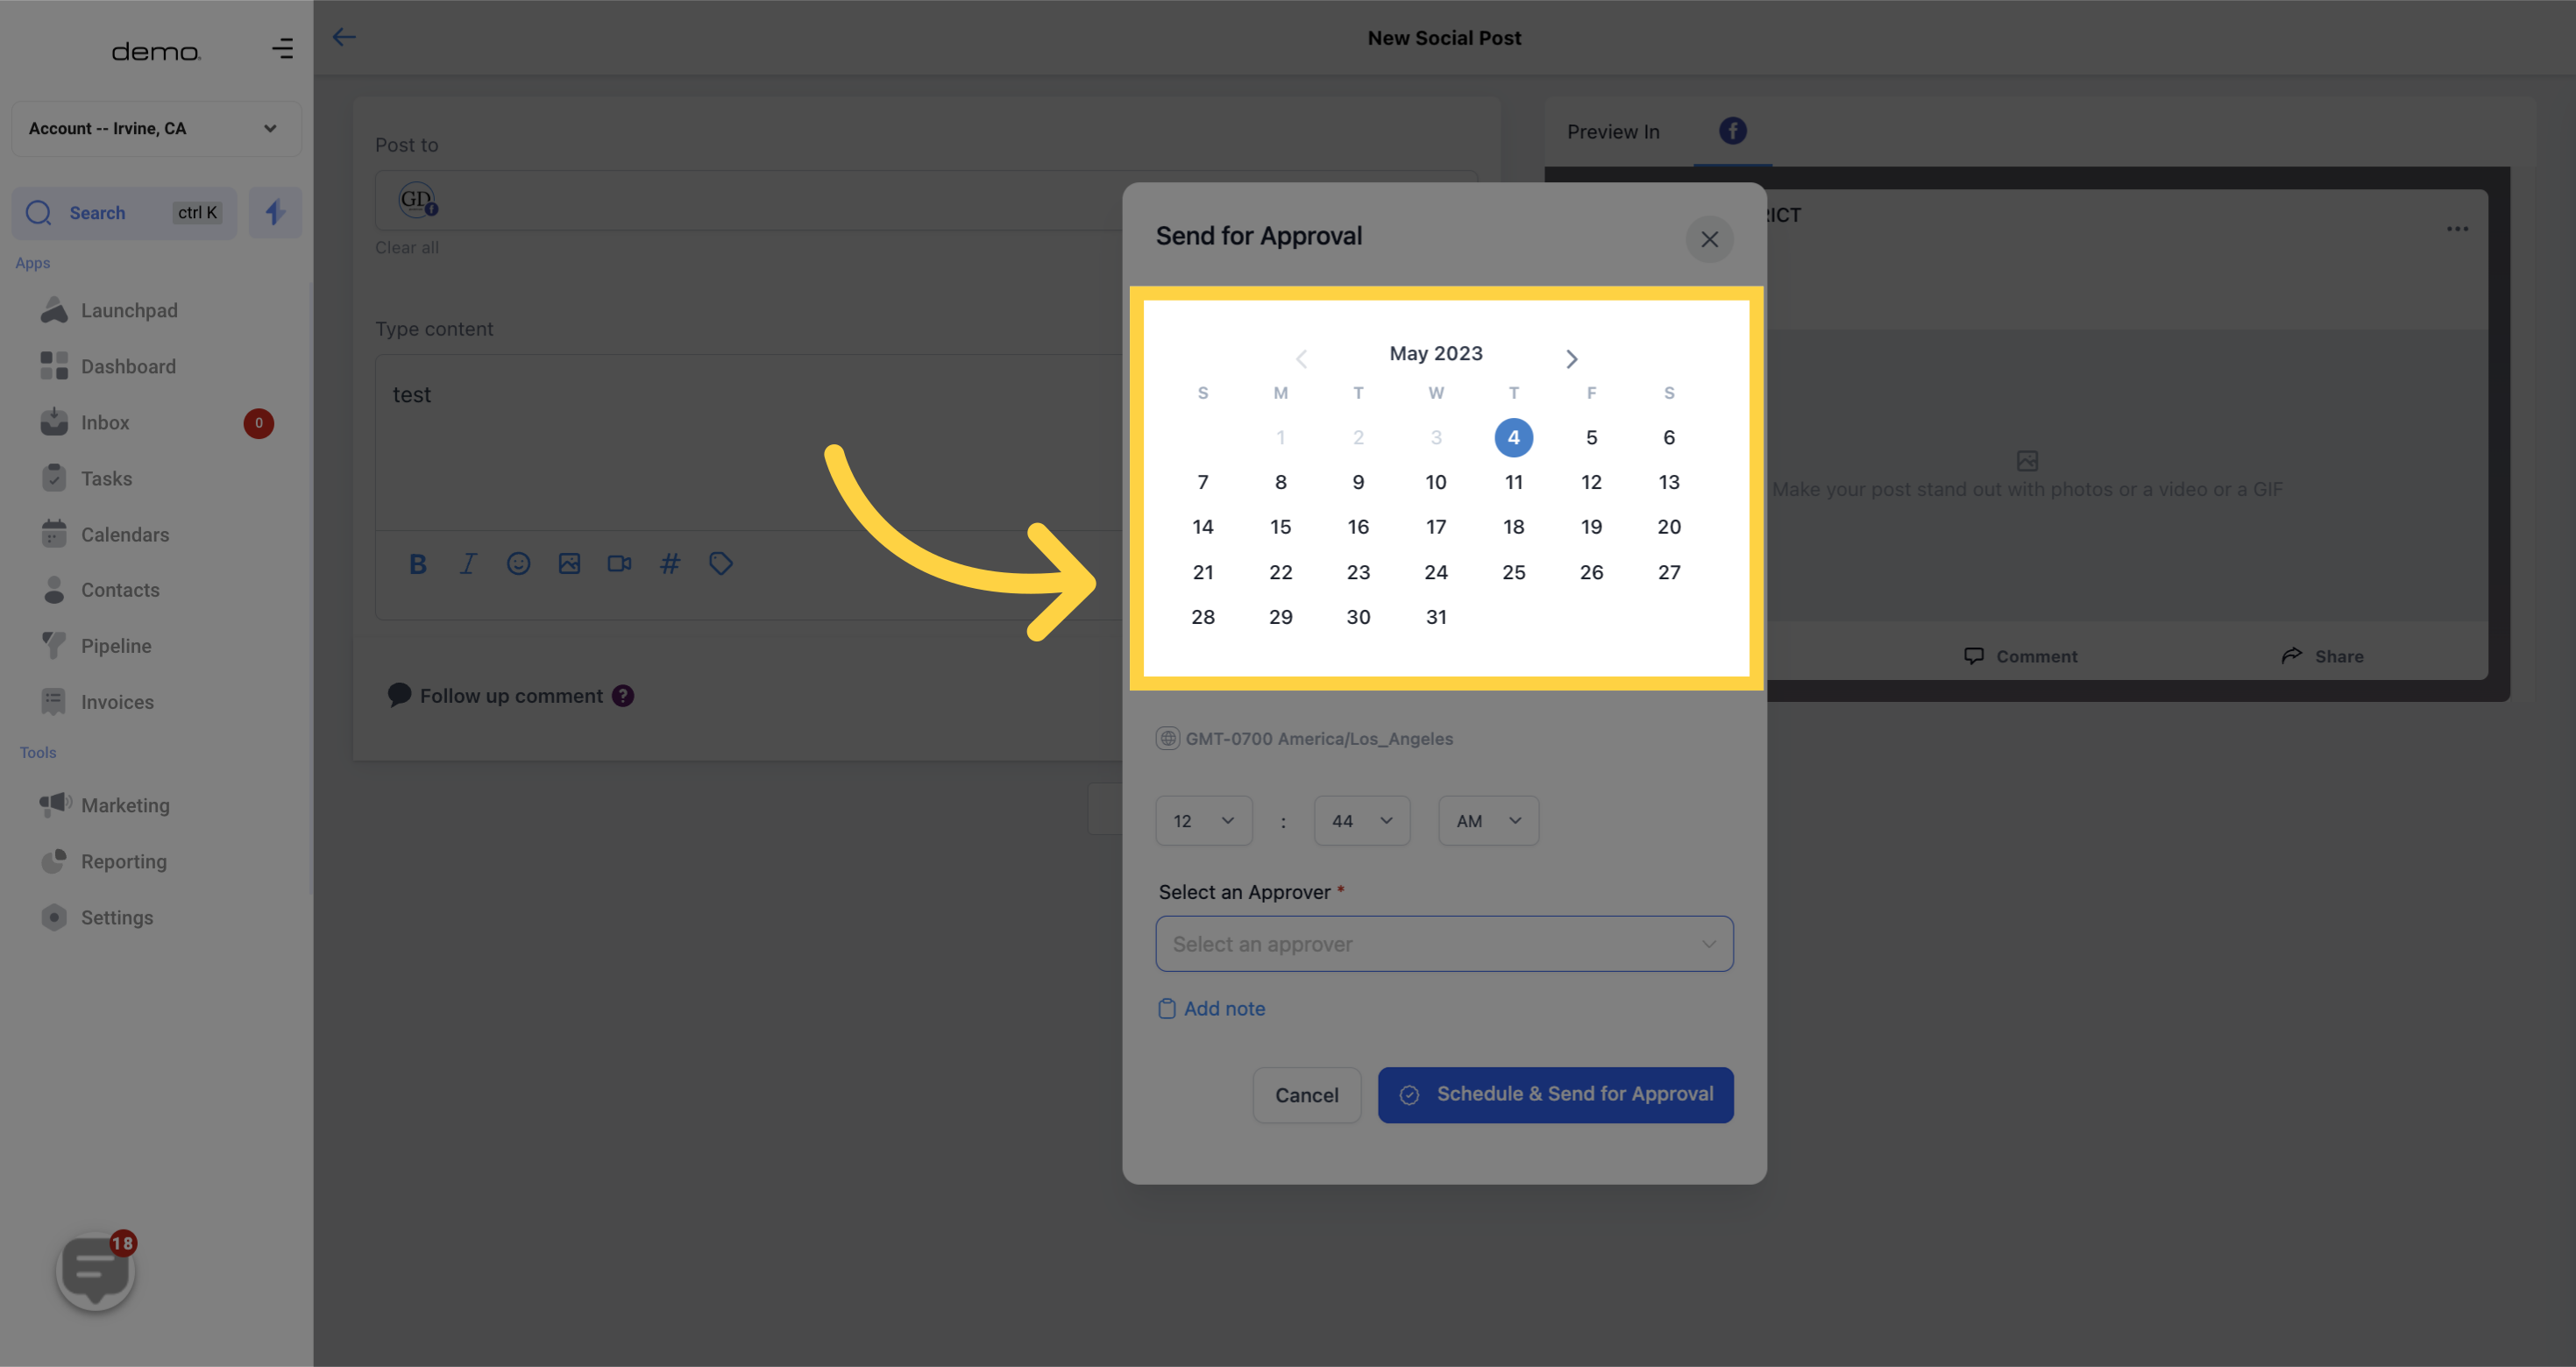
To schedule the post for a specific date, simply add the desired date
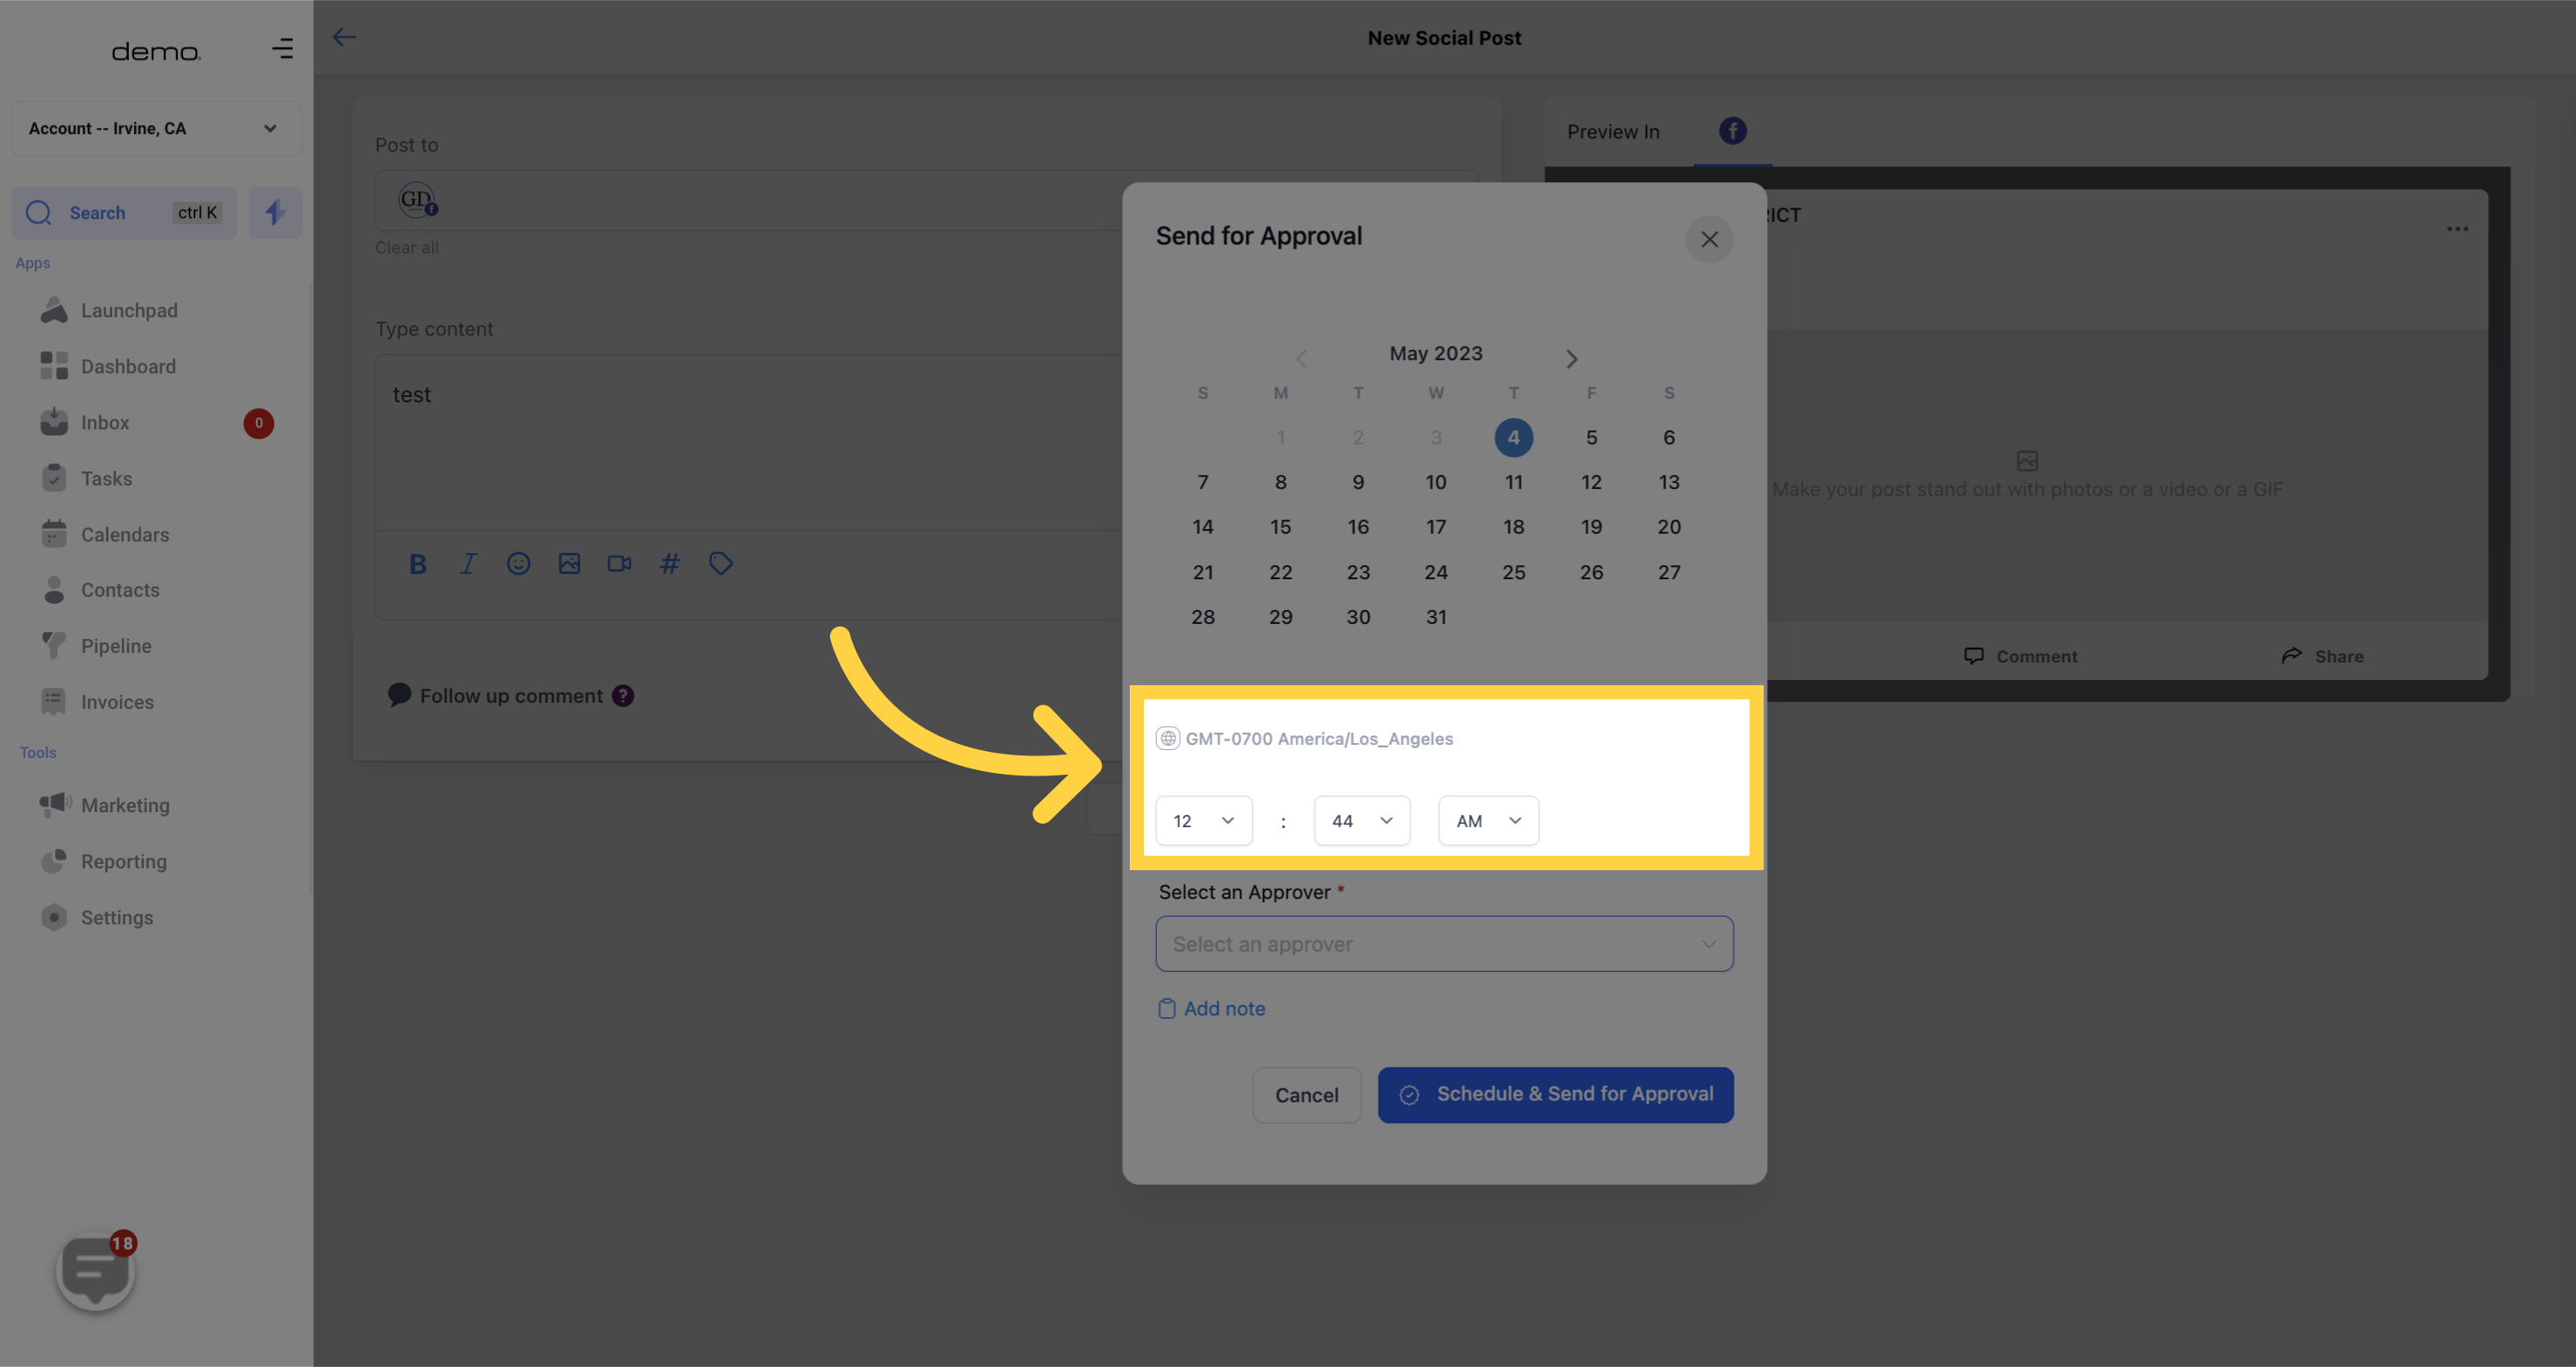
To schedule the post for a specific time, simply add the desired time
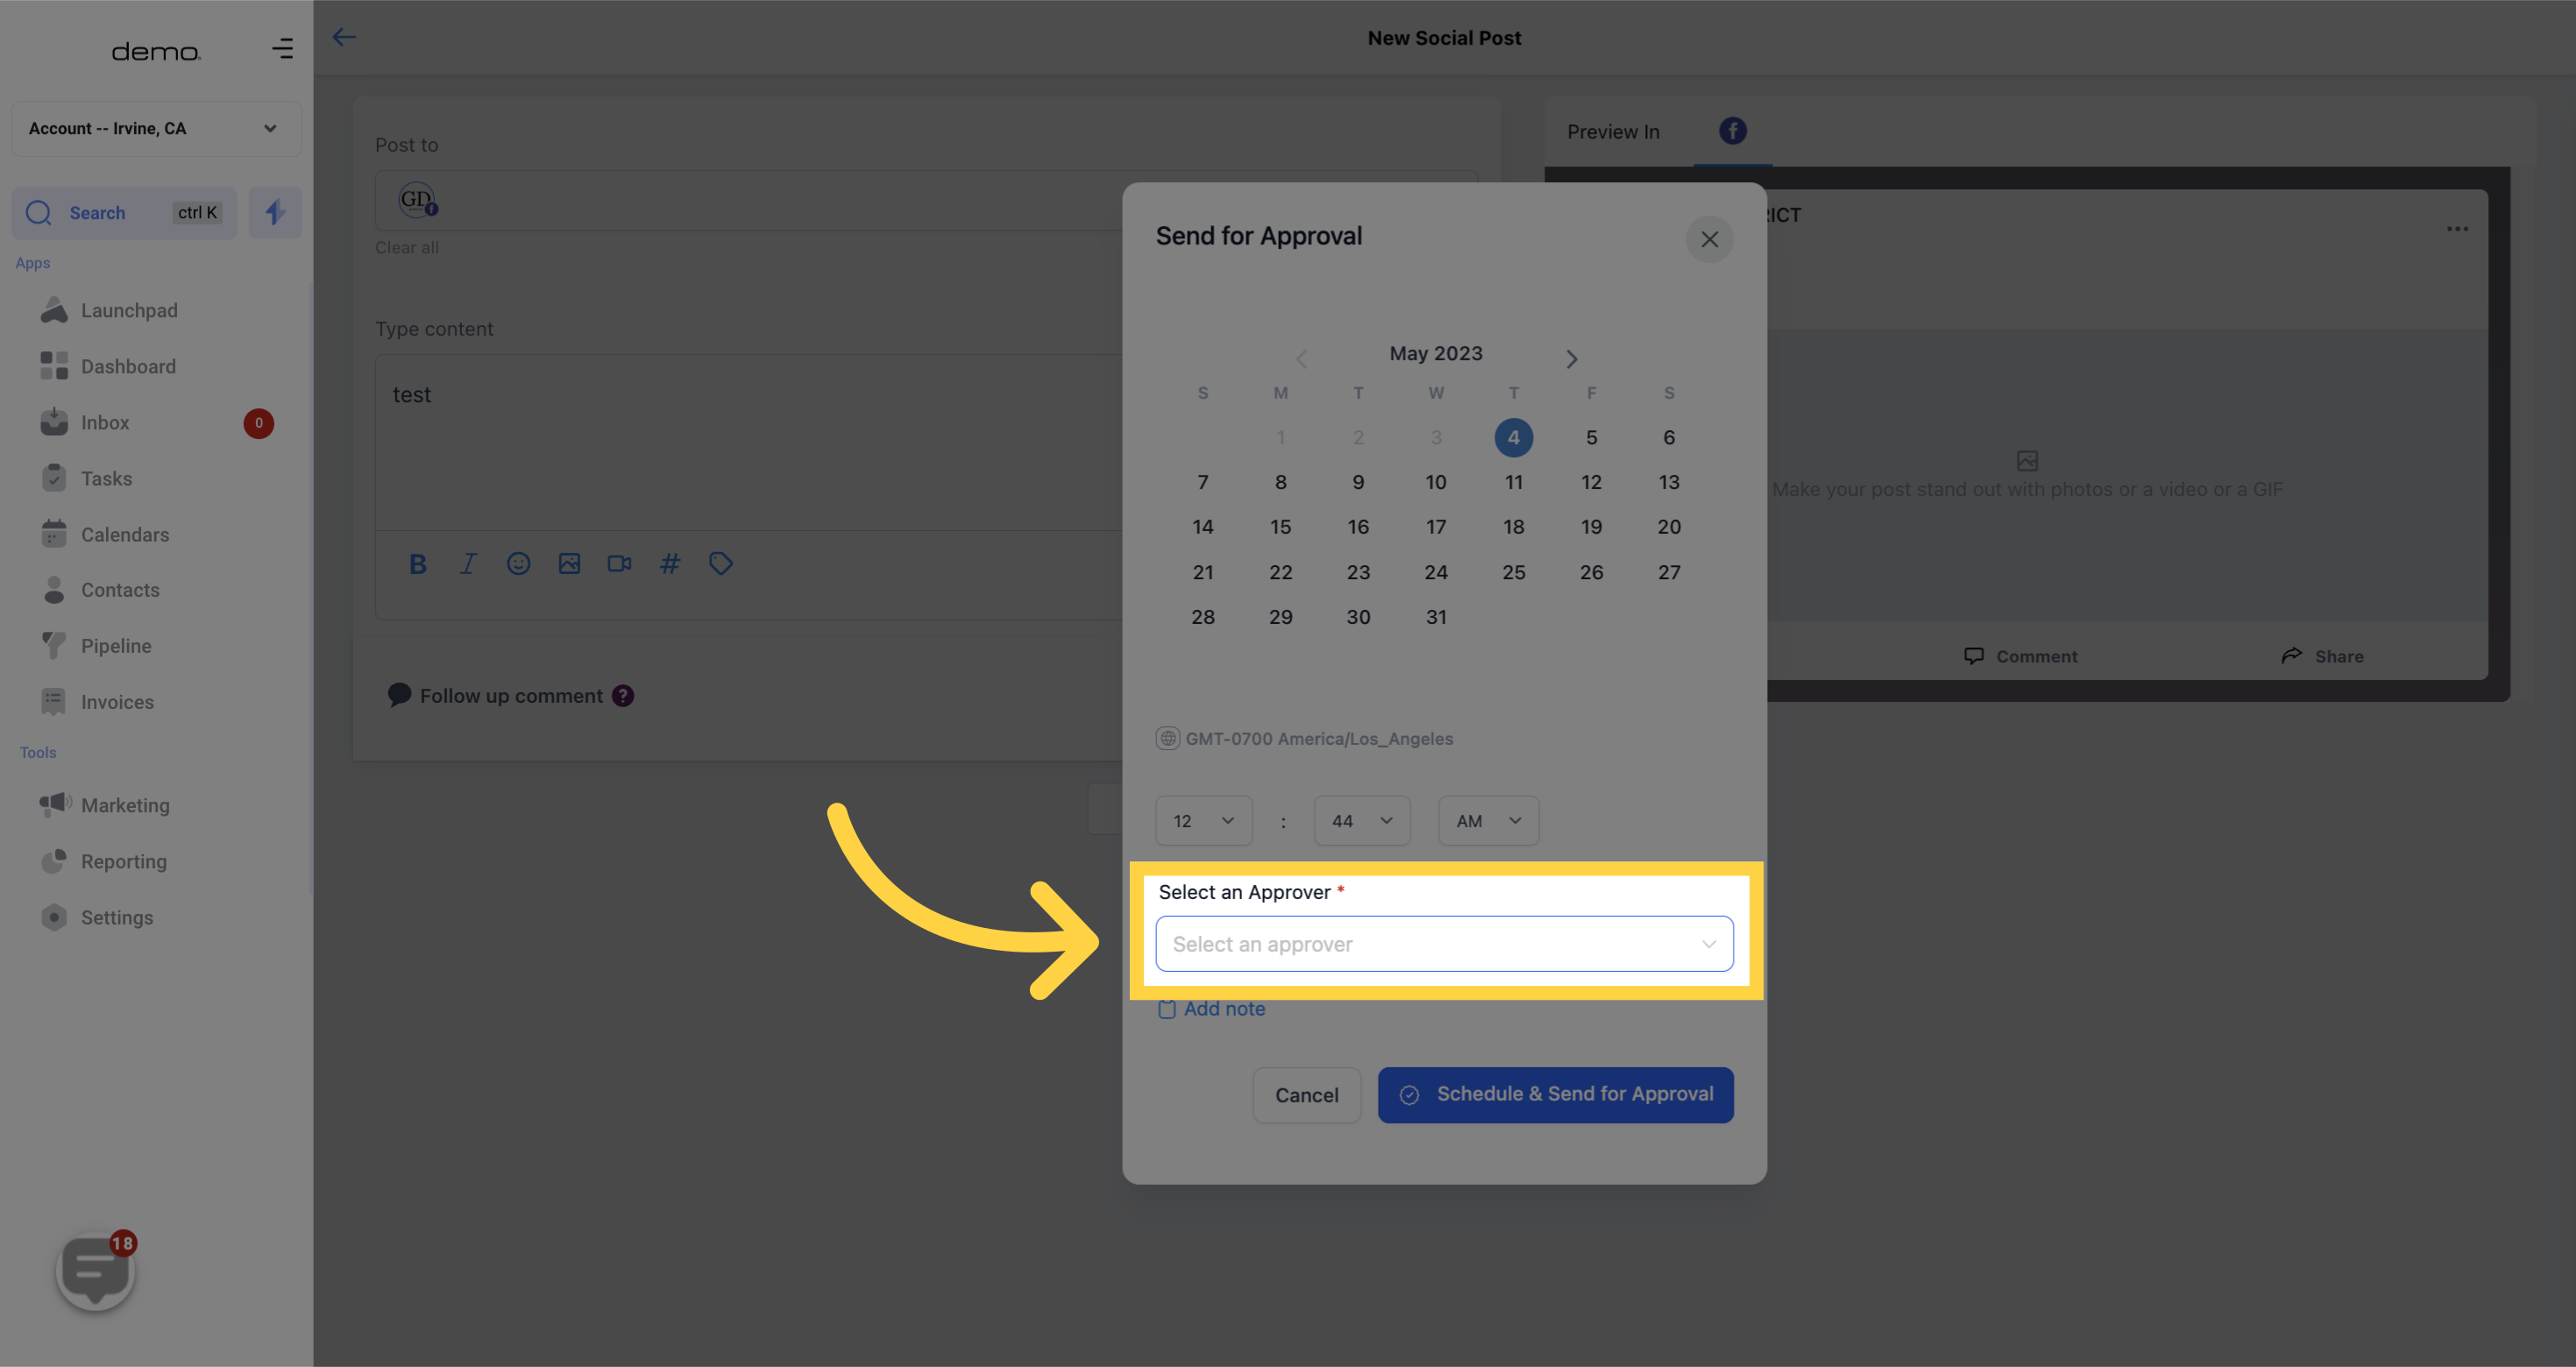
Select a user who would approve the post
To provide additional information for approval, you can add an internal note.

Once the post is submitted for review, you will receive an email notification regarding the scheduled post. Please ensure that your email is set up correctly to receive these important notifications.
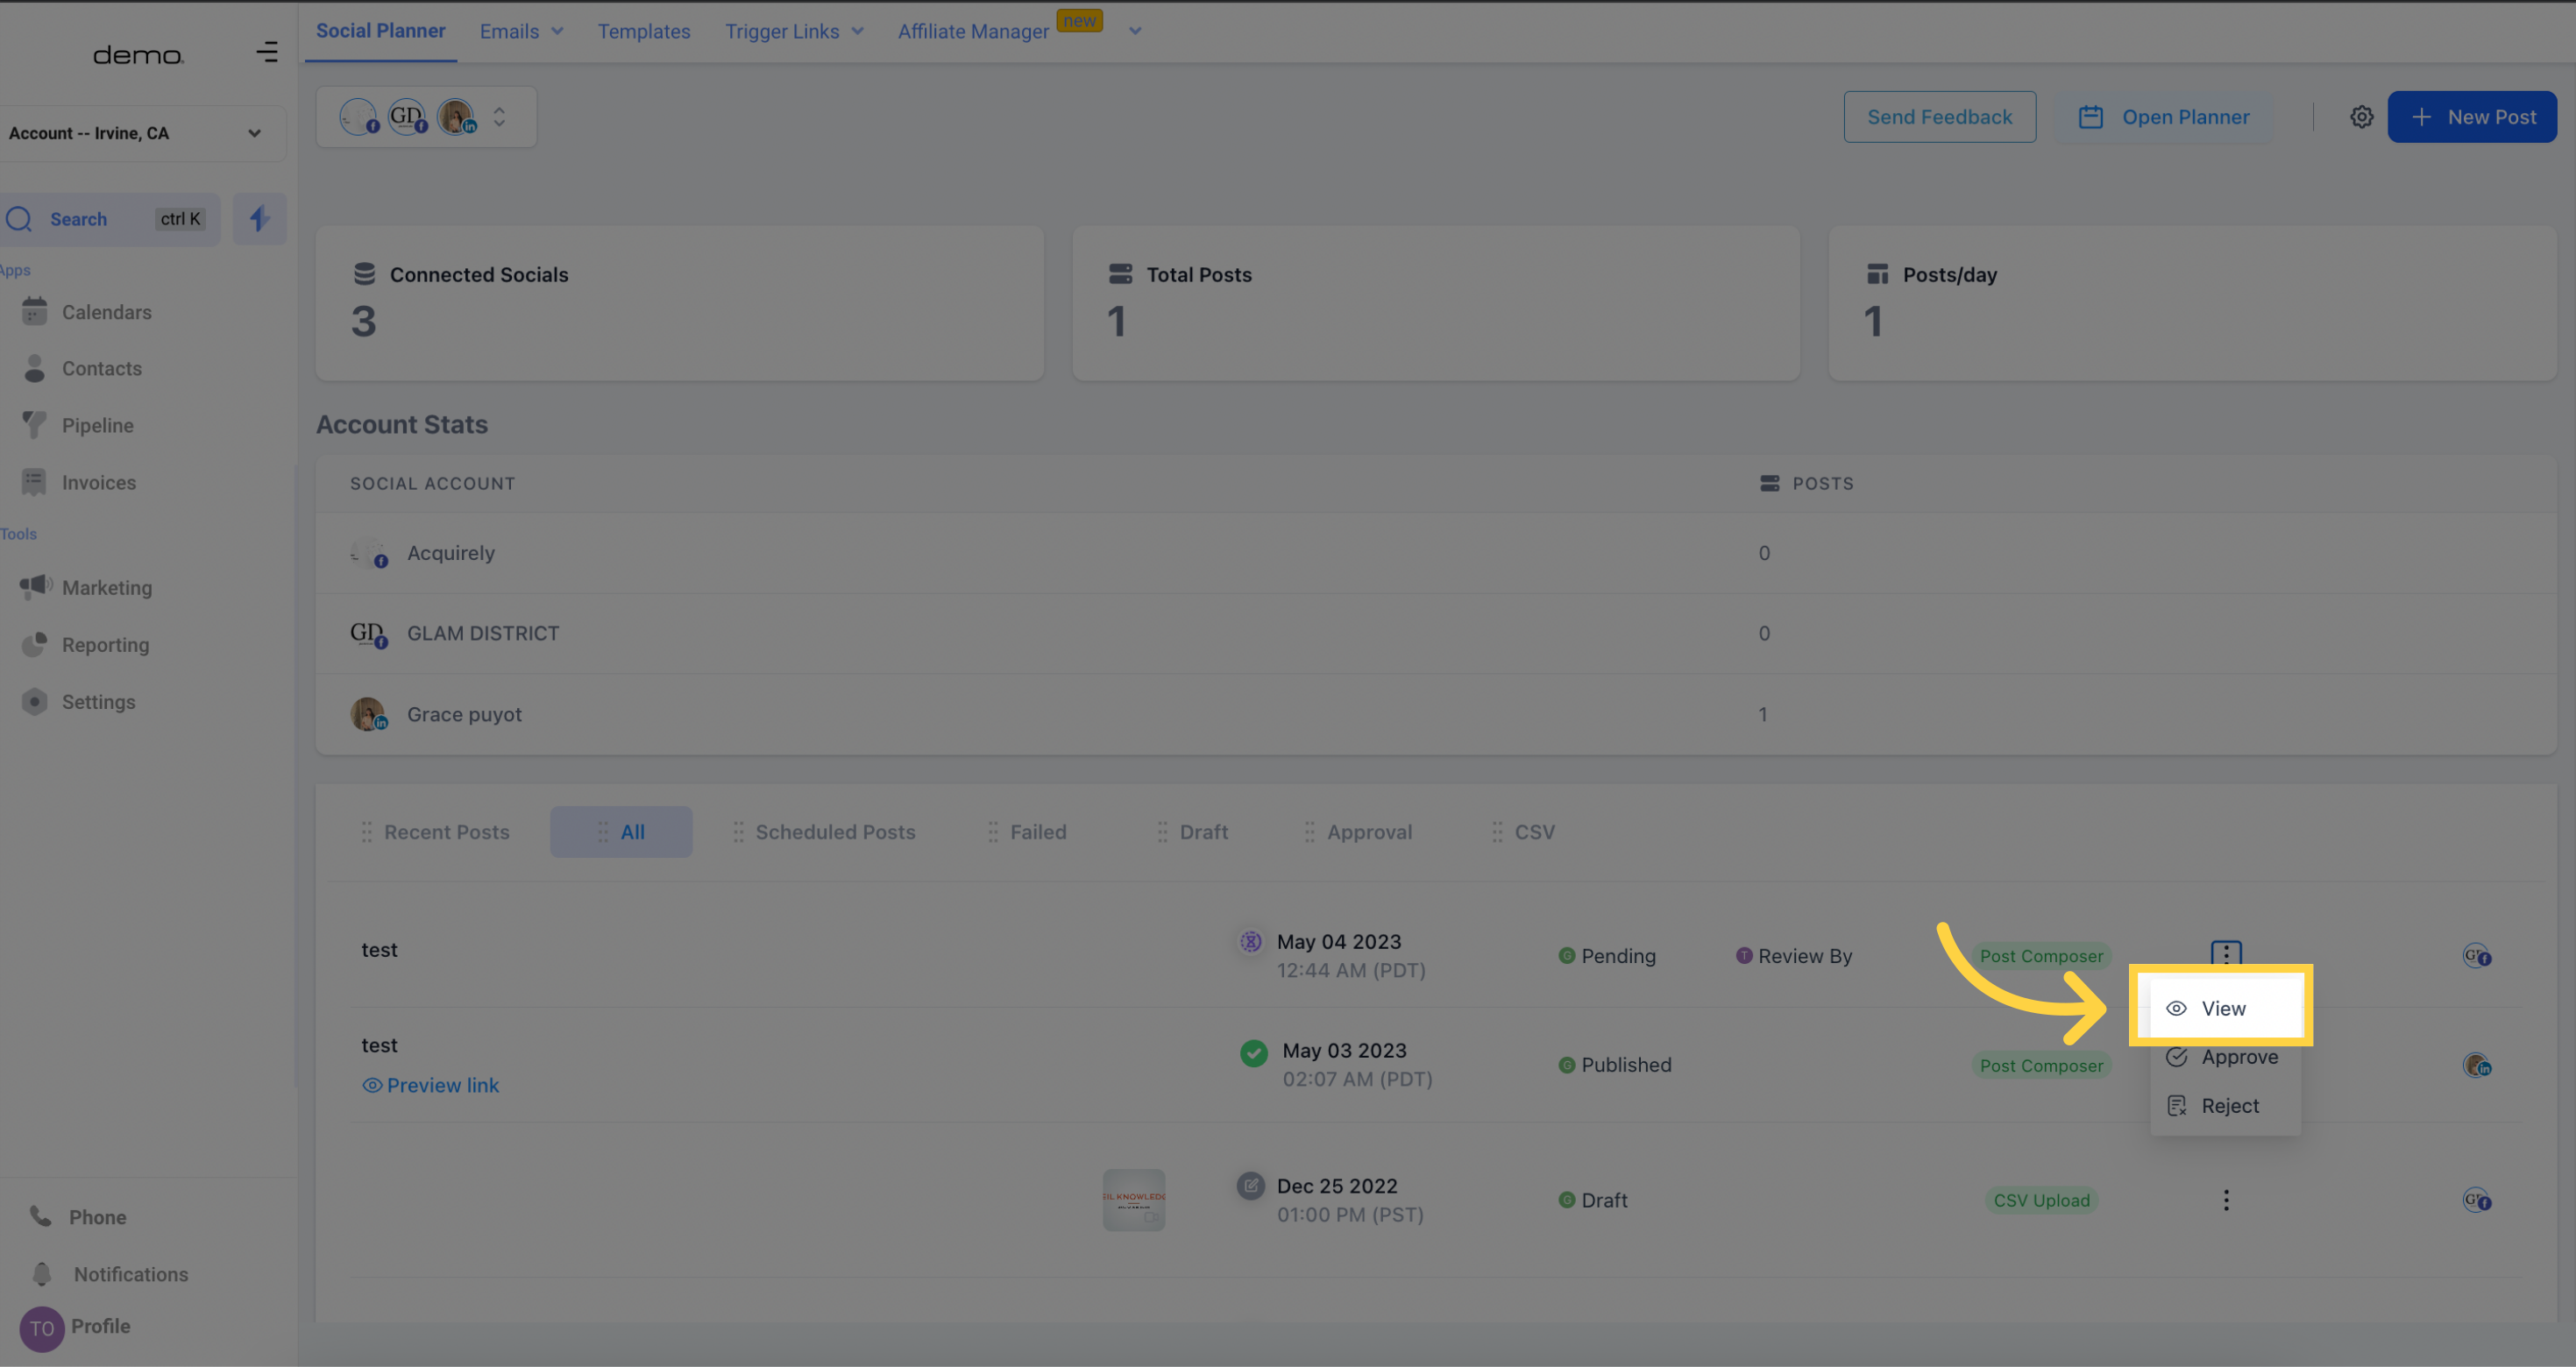
VIEW - The assigned reviewer can access the post through the "Approval" tab. This tab provides the reviewer with the options to view, approve, or reject the post. Selecting the "View" option allows the user to examine the details of the post before approving or rejecting it.
)
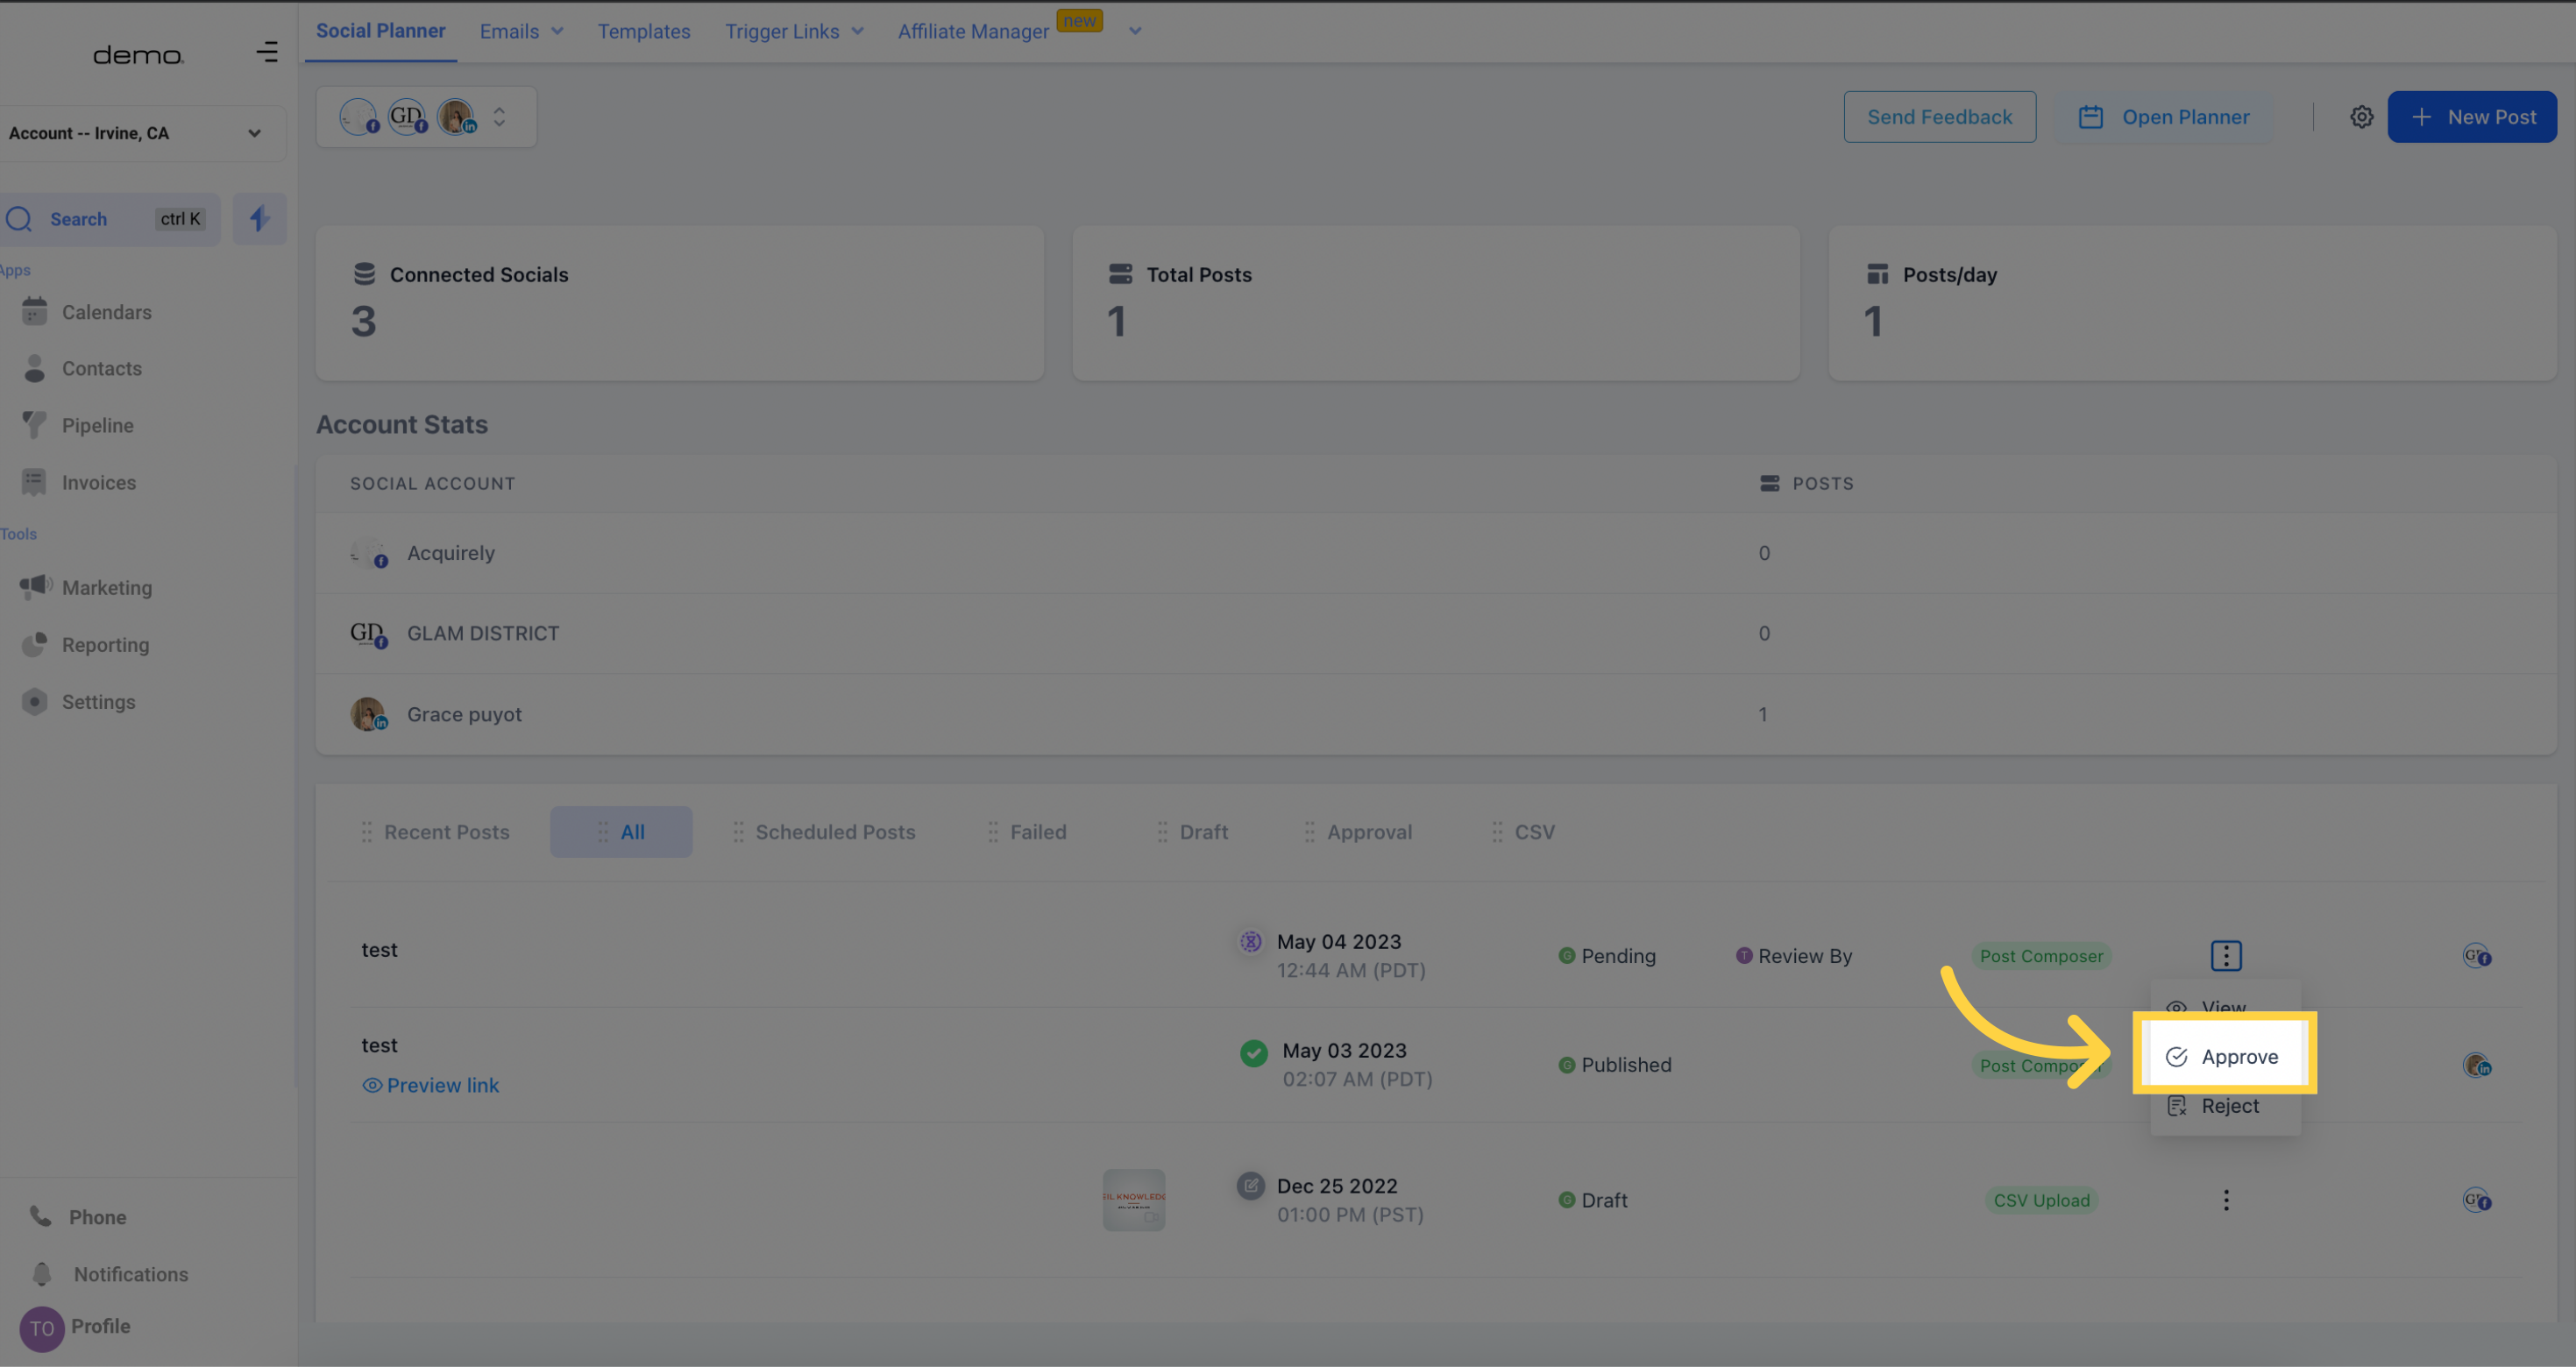
APPROVE - After the post has been approved by the reviewer, it will be scheduled in your social calendar.
)
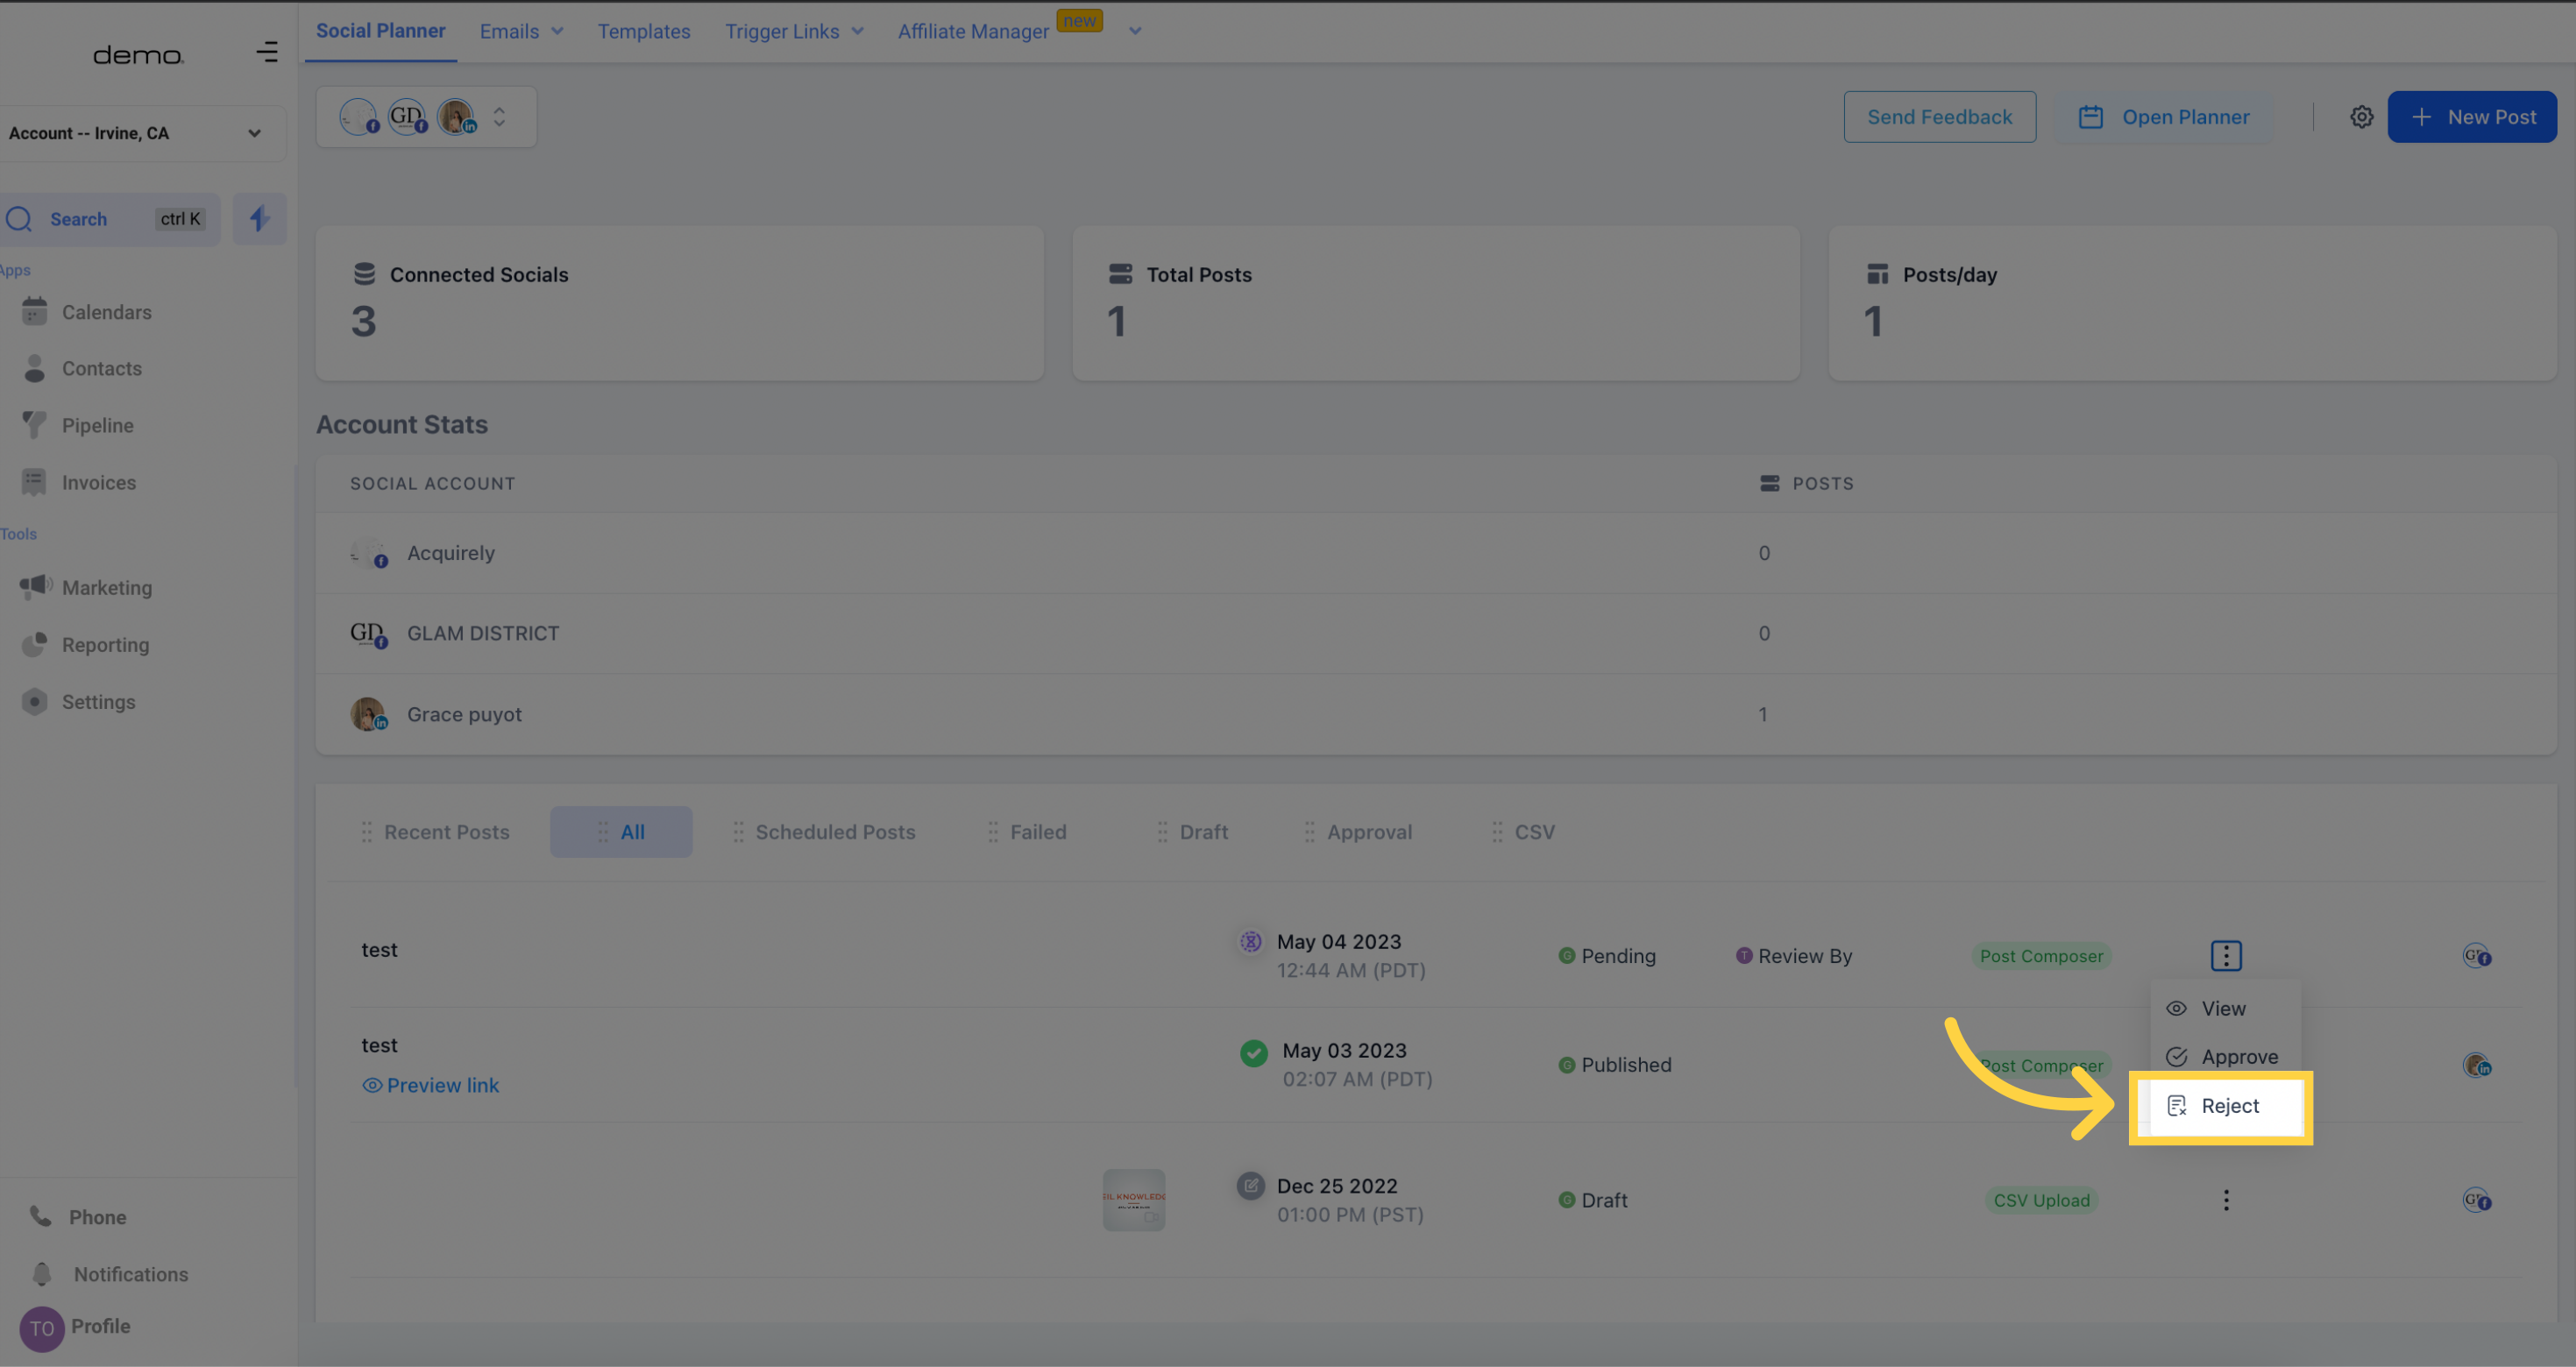
REJECT - In case the post is rejected, the user can view the comments provided by the reviewer for further feedback and improvements.
)
