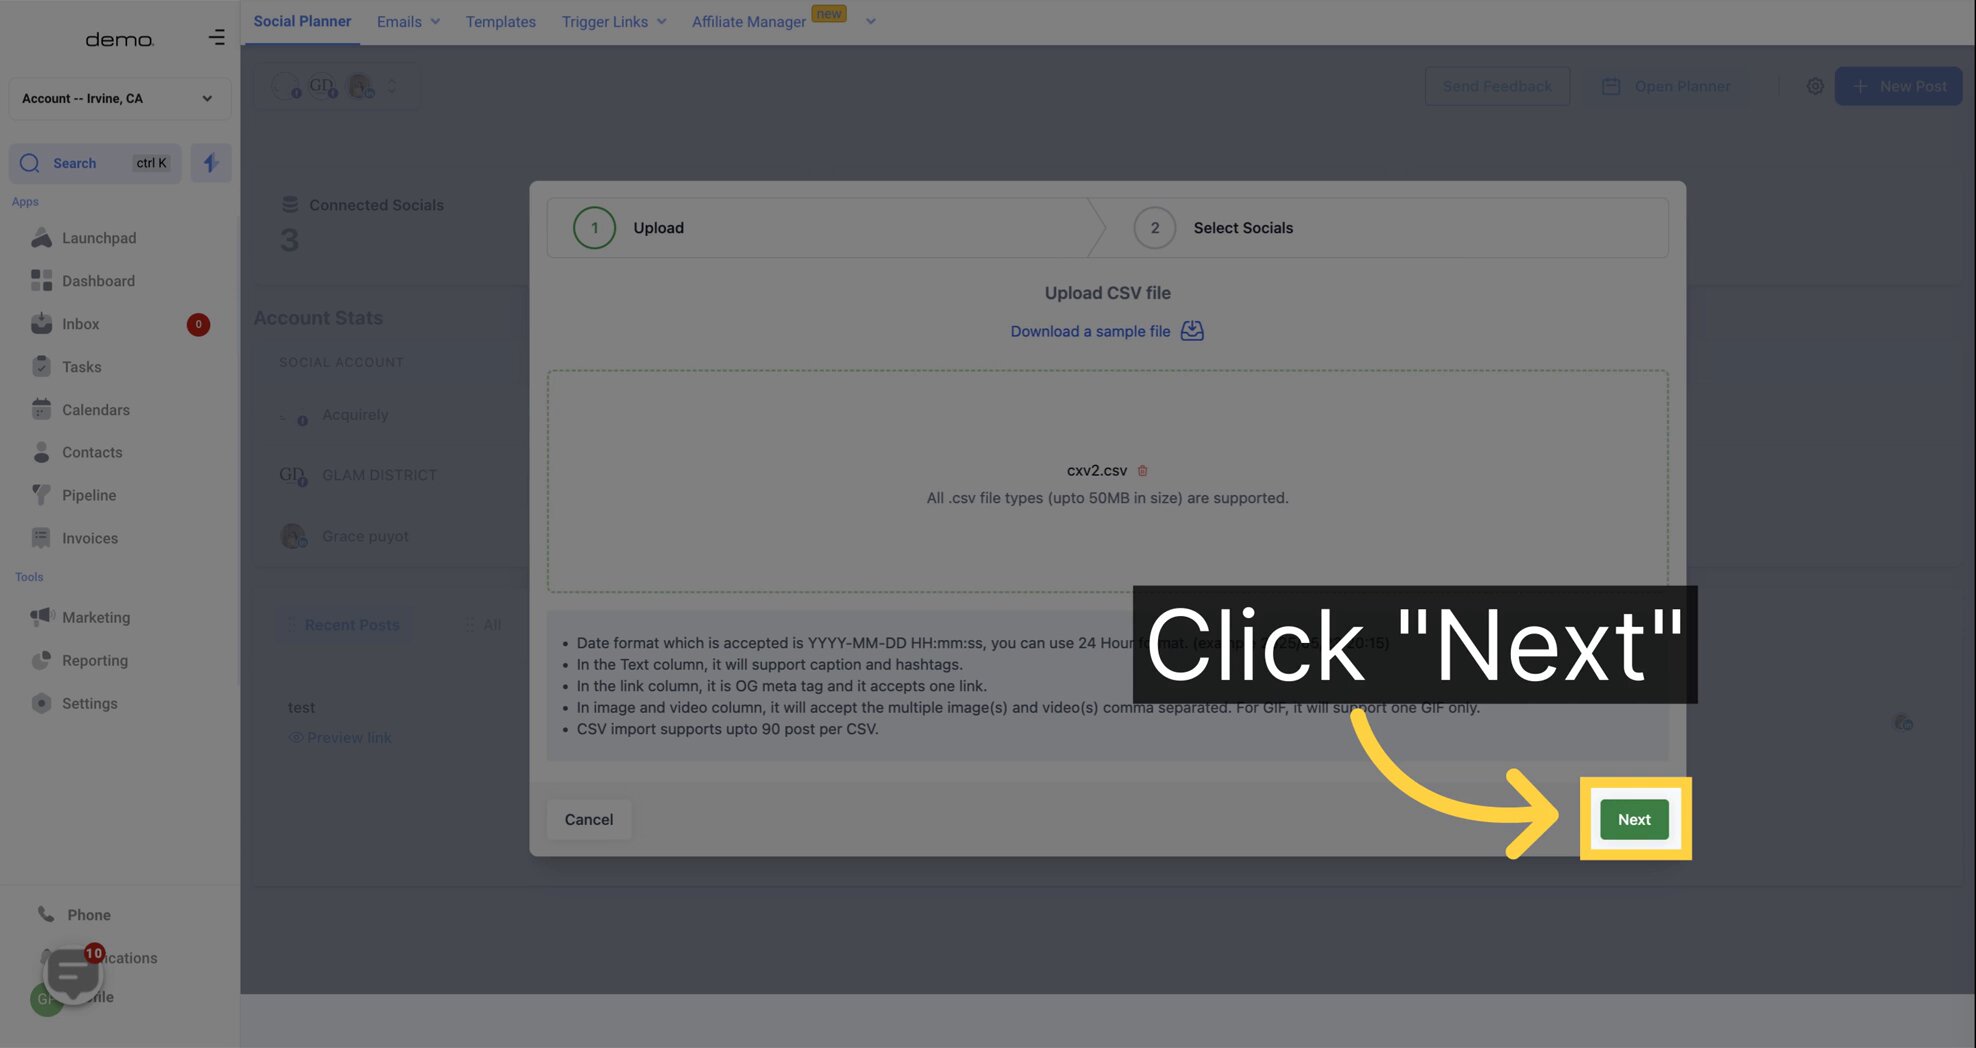
Make sure that the CSV file follows the required format and includes all the necessary details for each post.

Proceed to the next step.
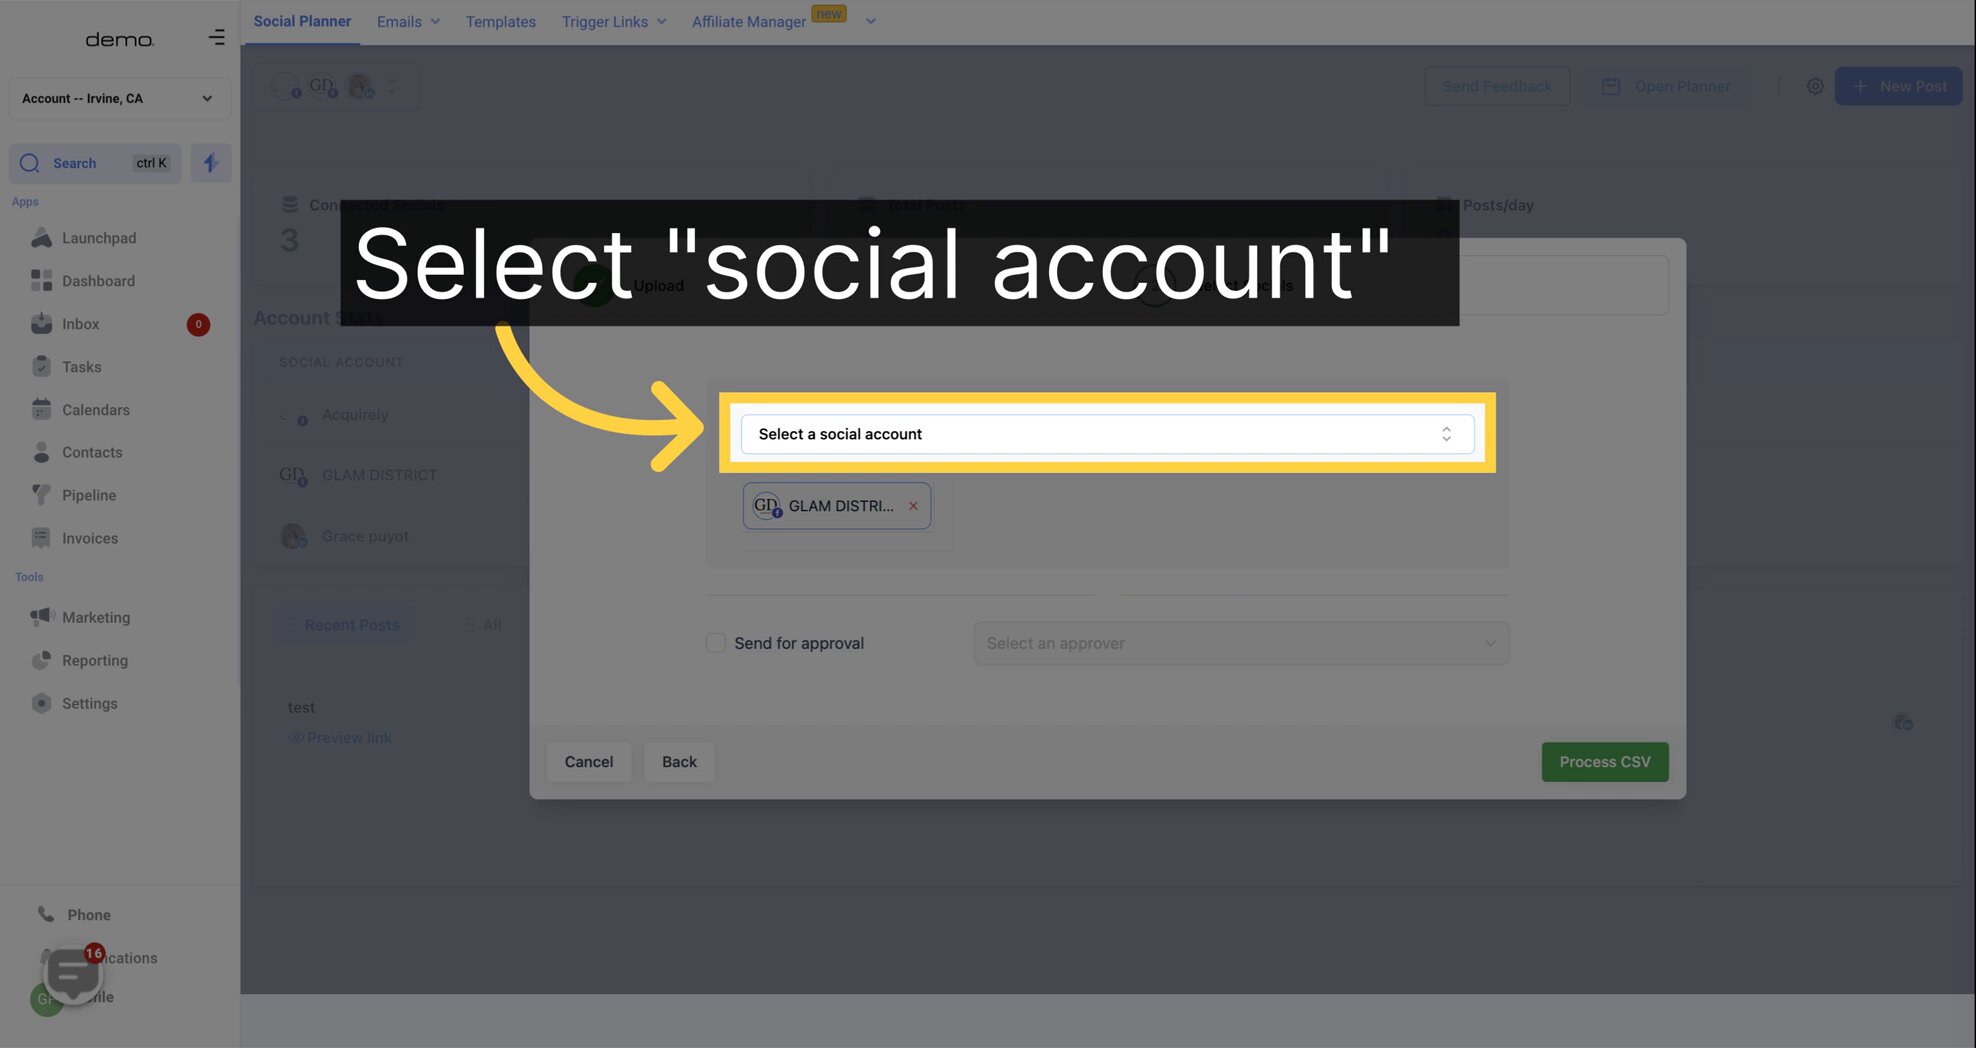
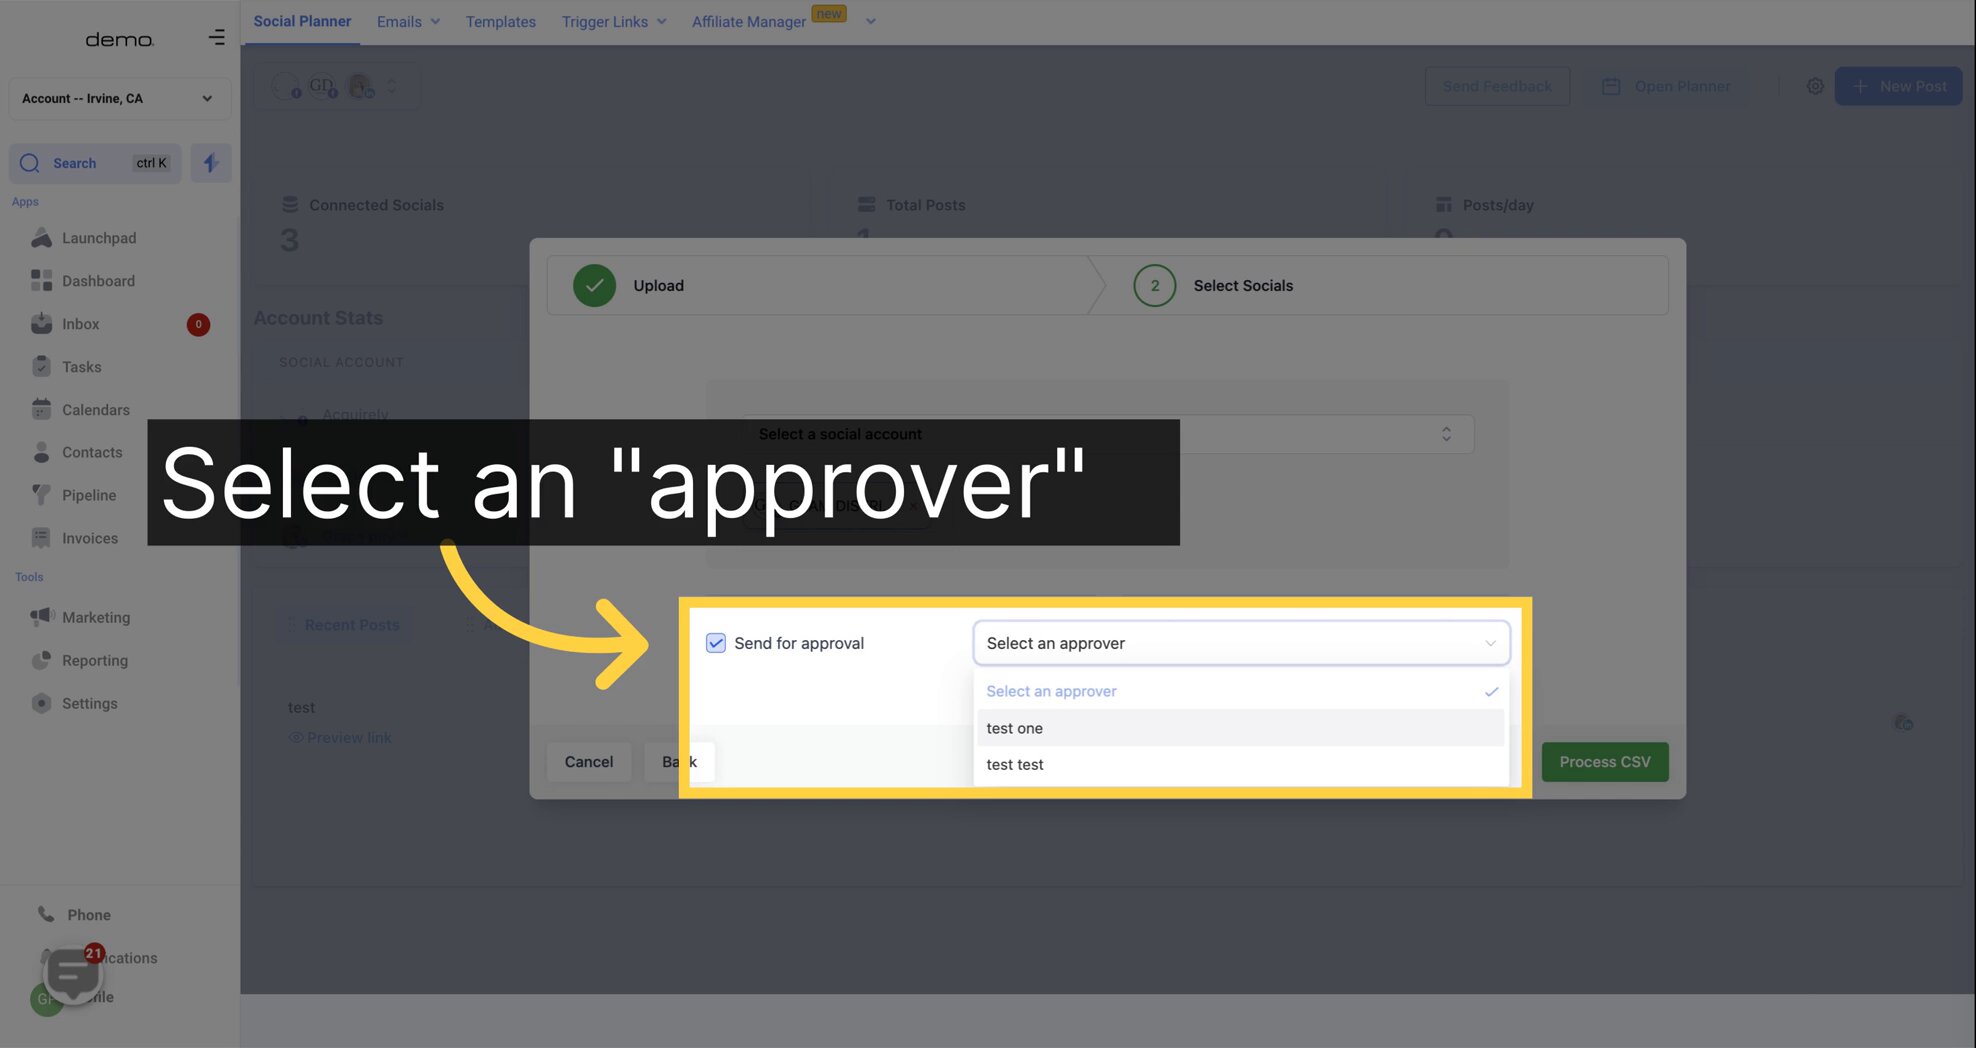
Select Social Media Platforms Available for Bulk Scheduling
CSV Status Check In Progress: The CSV file is currently being processed for its content, links, images, and videos. In Review and Schedule: Once complete, the user can review the details and make necessary changes to posts with errors or m
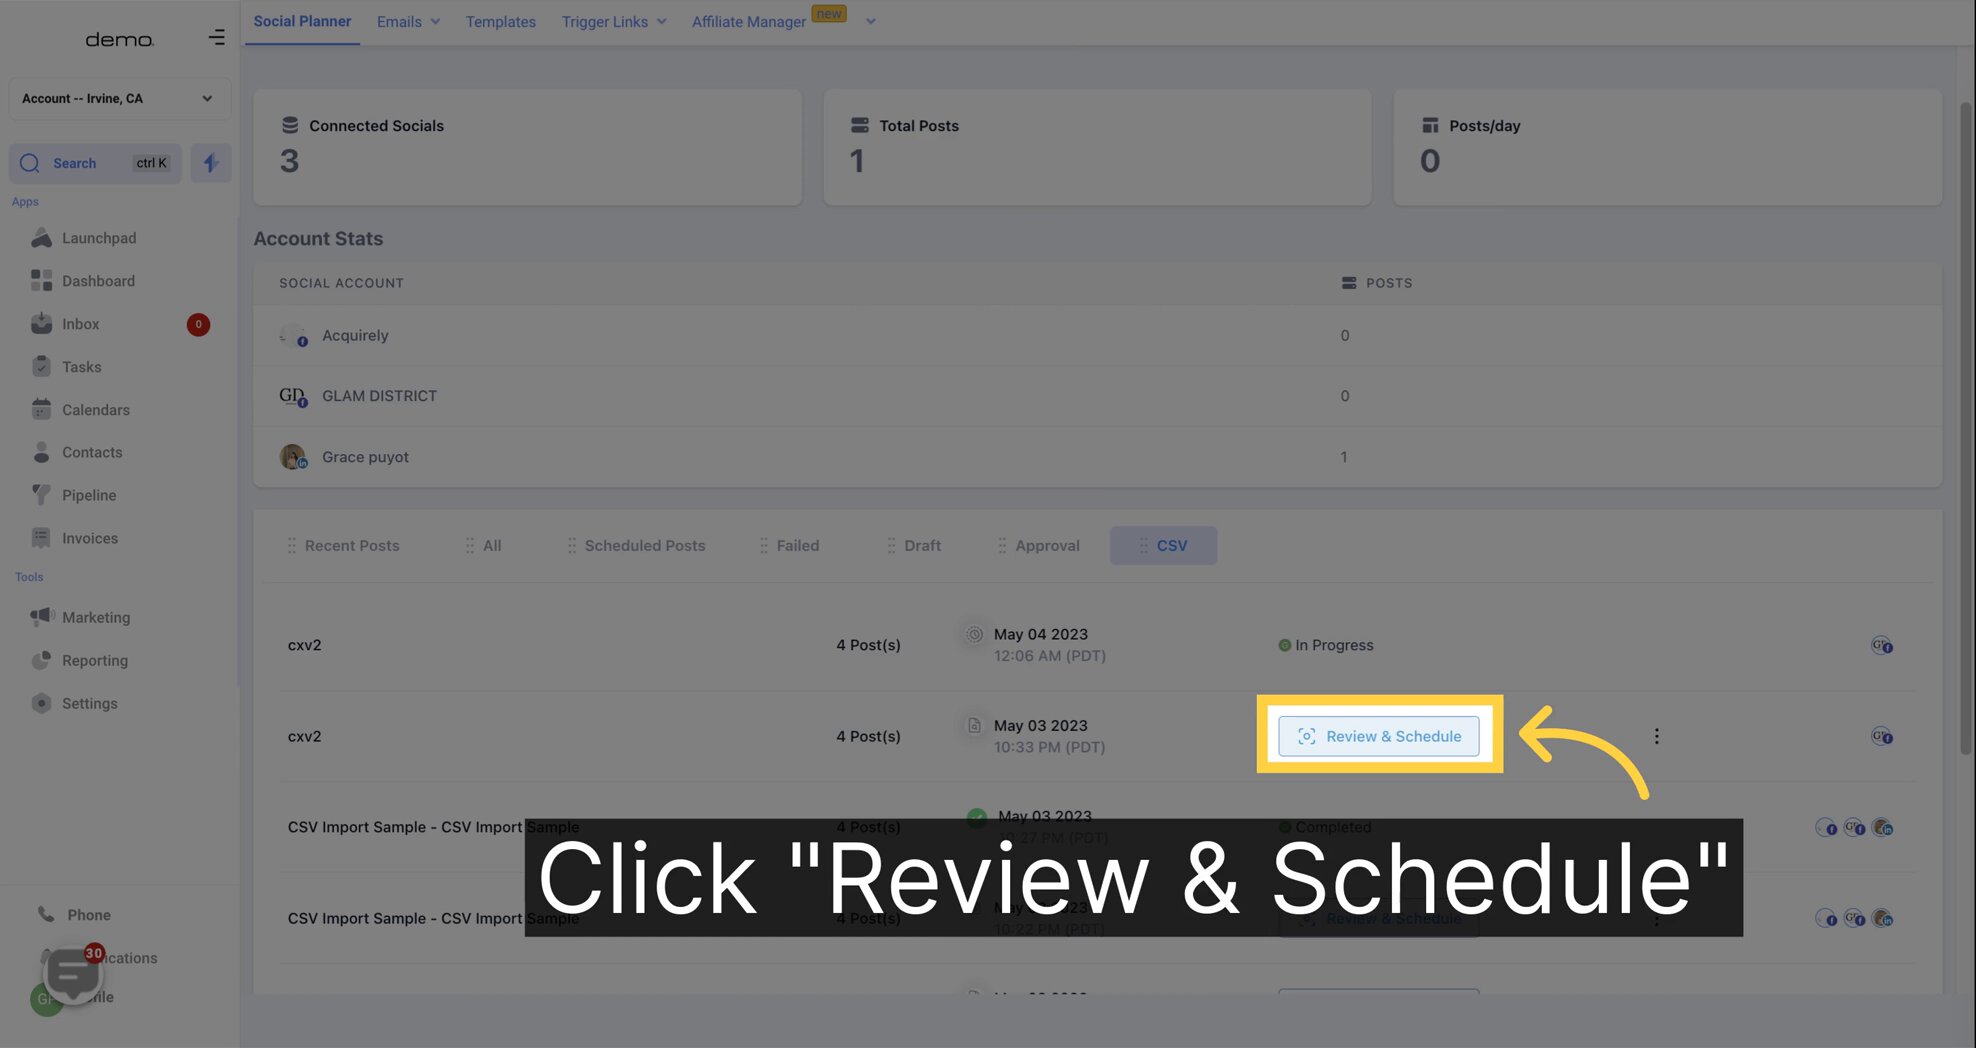
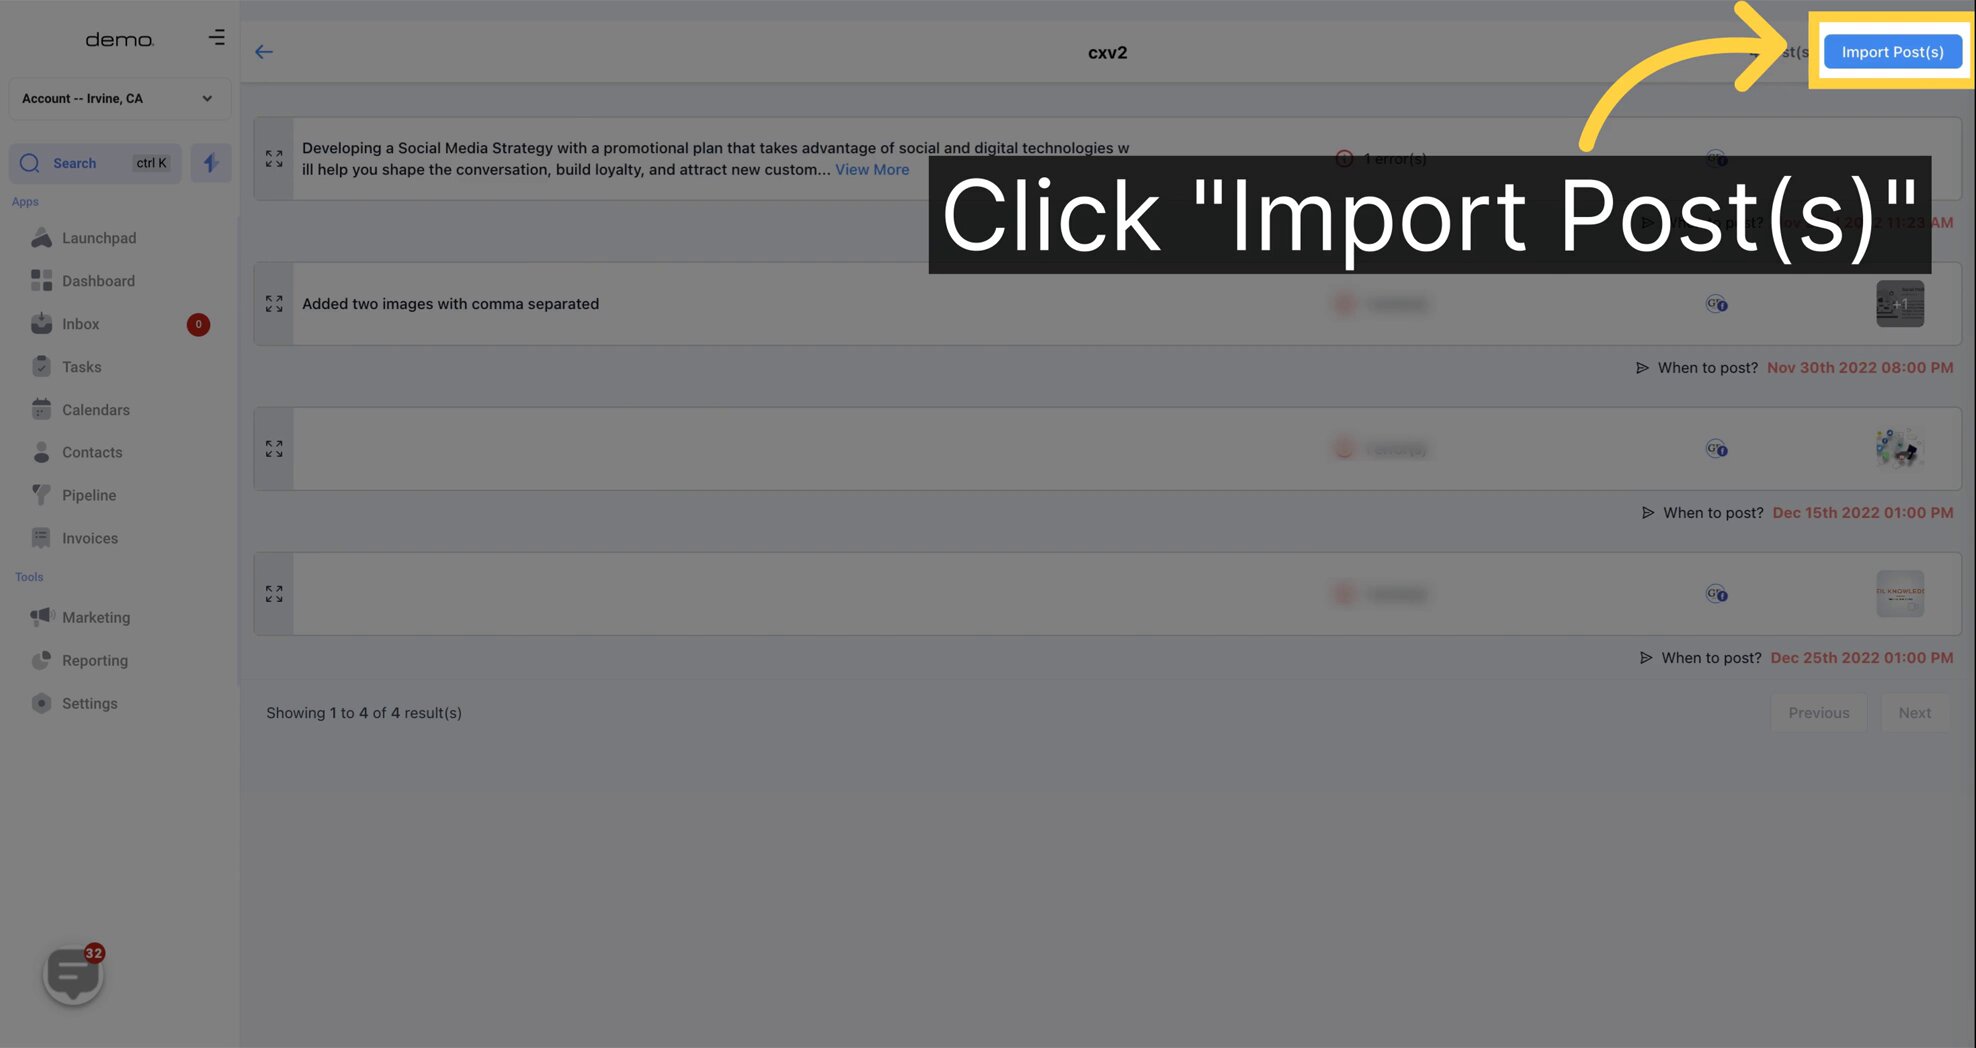
Once you have resolved the errors or removed the posts with errors in them, you can Import Posts to the Social Planner:
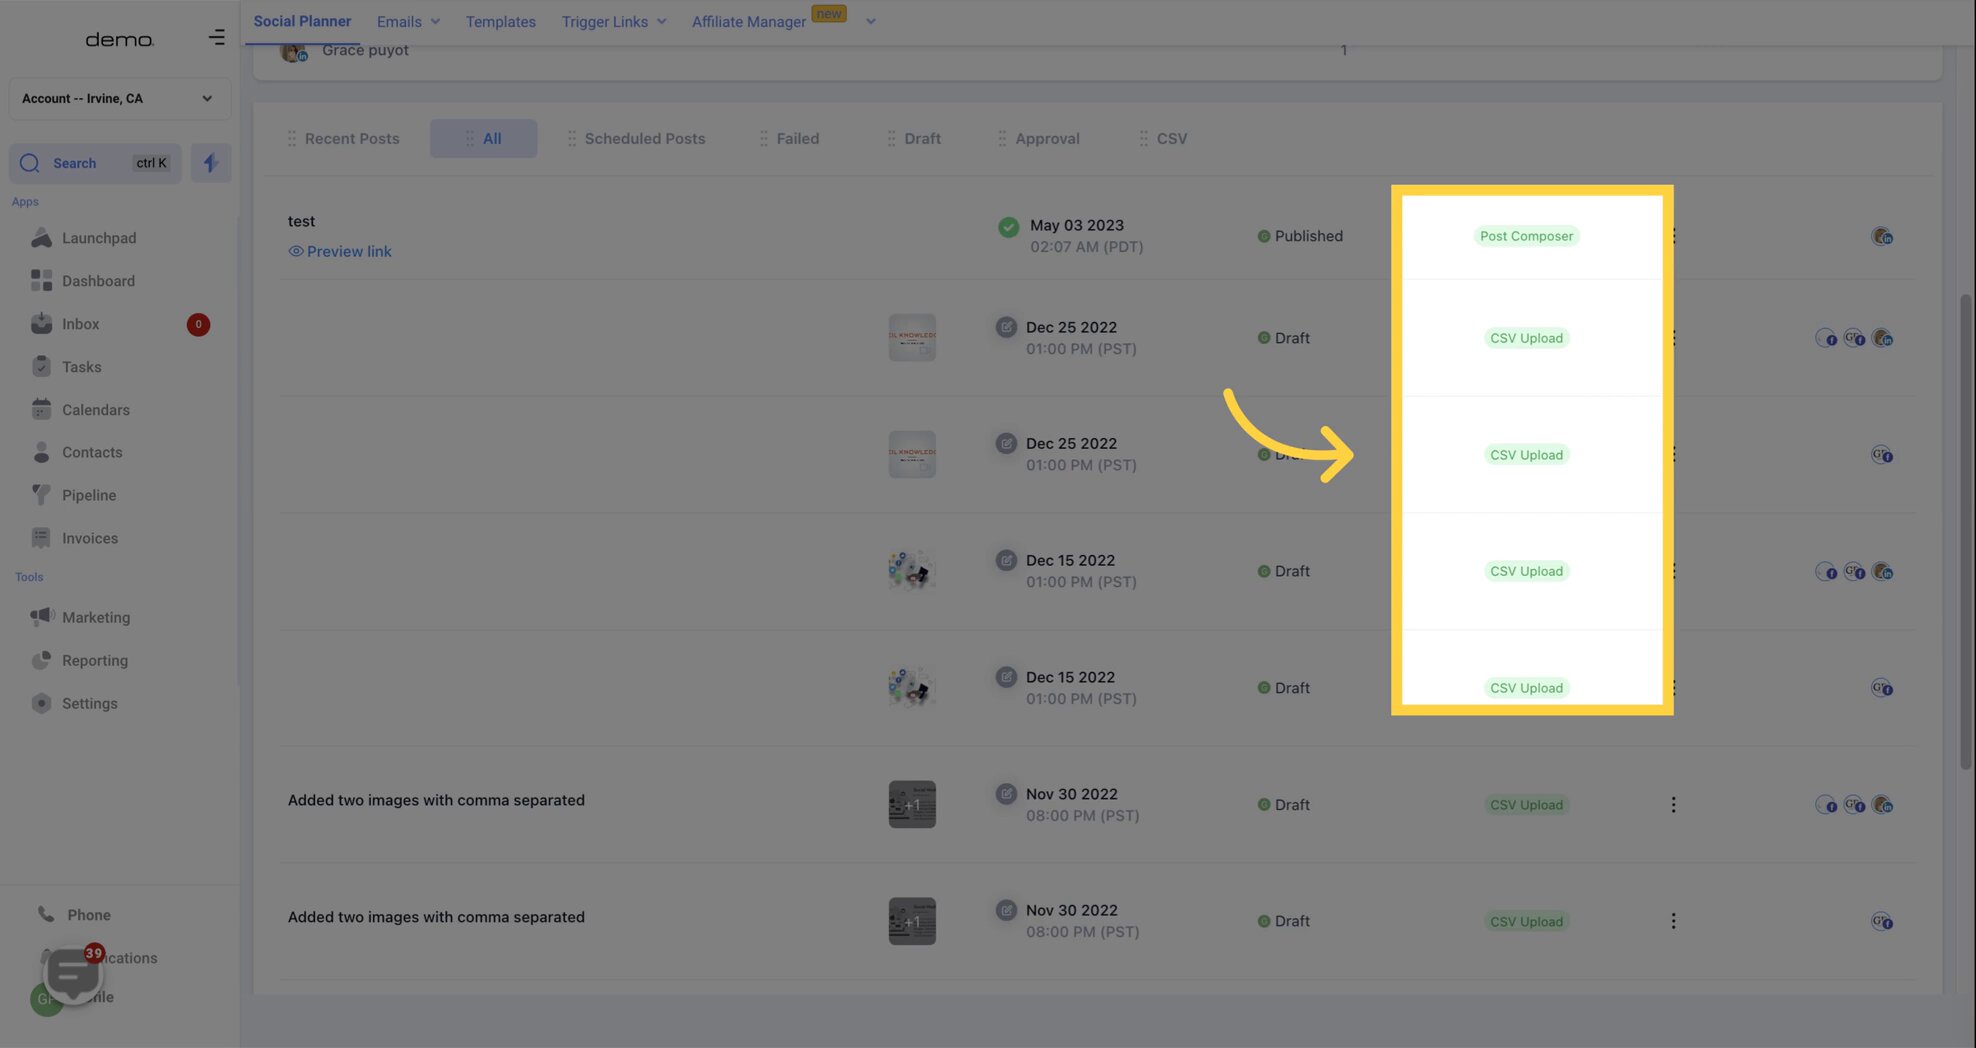
It will show you in the Social Planner dashboard which posts came in via CSV upload and which ones came in via the Post Composer